Understanding Disk Partitioning in Windows 11: A Comprehensive Guide
Related Articles: Understanding Disk Partitioning in Windows 11: A Comprehensive Guide
Introduction
In this auspicious occasion, we are delighted to delve into the intriguing topic related to Understanding Disk Partitioning in Windows 11: A Comprehensive Guide. Let’s weave interesting information and offer fresh perspectives to the readers.
Table of Content
- 1 Related Articles: Understanding Disk Partitioning in Windows 11: A Comprehensive Guide
- 2 Introduction
- 3 Understanding Disk Partitioning in Windows 11: A Comprehensive Guide
- 3.1 The Importance of Disk Partitioning
- 3.2 Understanding Partition Types
- 3.3 Methods of Disk Partitioning in Windows 11
- 3.4 Steps to Partition a Disk in Windows 11
- 3.5 Best Practices for Disk Partitioning
- 3.6 FAQs on Disk Partitioning in Windows 11
- 3.7 Tips for Disk Partitioning in Windows 11
- 3.8 Conclusion
- 4 Closure
Understanding Disk Partitioning in Windows 11: A Comprehensive Guide

Disk partitioning is a fundamental aspect of computer management, particularly in operating systems like Windows 11. It involves dividing a physical storage device, such as a hard drive or solid-state drive (SSD), into distinct sections known as partitions. Each partition functions as an independent storage unit, allowing for the organization and separation of data, operating systems, and applications.
This guide delves into the intricacies of disk partitioning in Windows 11, exploring its significance, benefits, methods, and best practices.
The Importance of Disk Partitioning
Disk partitioning offers numerous advantages, enhancing system performance, security, and manageability:
-
Organized Storage: Partitions enable the logical separation of data, preventing clutter and facilitating easier file management. Users can designate specific partitions for operating systems, applications, personal files, and system backups, maintaining a structured and organized storage environment.
-
Enhanced Security: Partitioning provides an additional layer of security by isolating sensitive data. For instance, a dedicated partition for system files can protect against accidental deletion or corruption, while another partition can house personal files, ensuring their privacy even if the operating system is compromised.
-
Improved System Performance: Partitioning allows for optimized allocation of disk space. By dedicating a specific partition to the operating system, its performance is not hindered by data stored in other partitions. This dedicated space ensures faster boot times and overall system responsiveness.
-
Simplified System Recovery: In case of system failures or data corruption, partitioning simplifies the recovery process. A separate partition for system backups allows for quick and easy restoration of the operating system and critical data, minimizing downtime and data loss.
-
Multi-Boot Environments: Partitioning facilitates the installation of multiple operating systems on a single device. Each operating system can be installed on a separate partition, allowing users to choose their preferred environment at boot time.
Understanding Partition Types
Windows 11 supports various partition types, each serving a specific purpose:
-
Primary Partition: The primary partition is the most common type, and a hard drive can have a maximum of four primary partitions. It can be designated as an active partition, which contains the boot sector and is responsible for booting the operating system.
-
Extended Partition: An extended partition serves as a container for logical partitions. It cannot be directly used to install an operating system but provides a space for creating multiple logical partitions within its boundaries.
-
Logical Partition: A logical partition is created within an extended partition and can be used for storing data, installing applications, or creating system backups.
Methods of Disk Partitioning in Windows 11
Windows 11 provides two primary methods for disk partitioning:
-
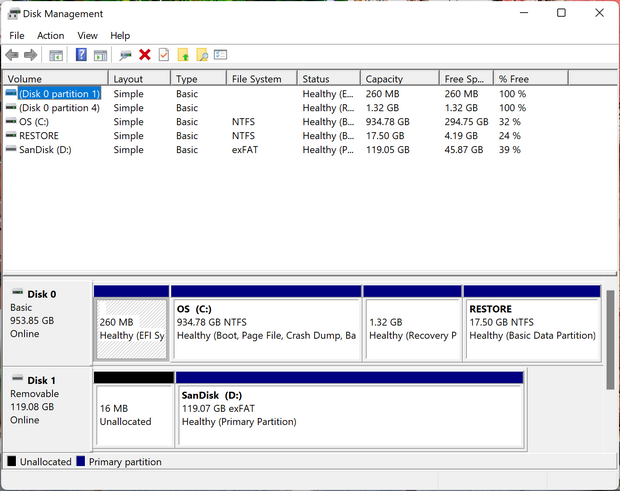
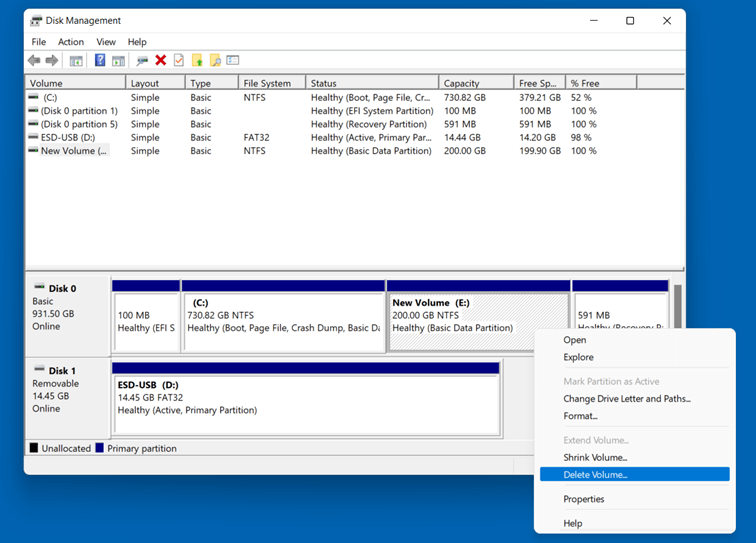
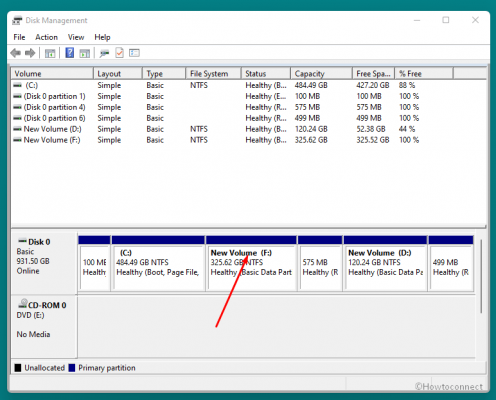
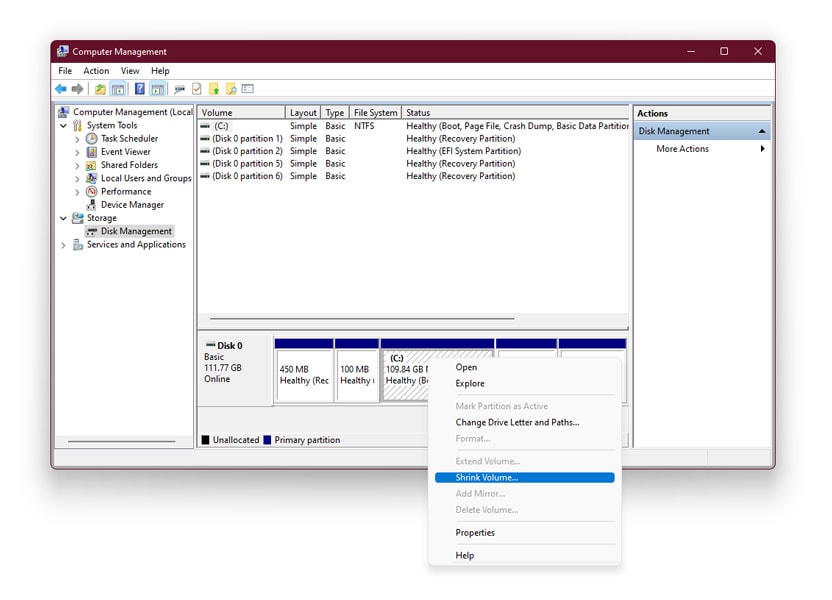
Using Disk Management: The built-in Disk Management tool in Windows 11 offers a user-friendly interface for managing partitions. It allows users to create, delete, format, and resize partitions without requiring external tools.
-
Using Third-Party Partitioning Software: Advanced partitioning software, such as EaseUS Partition Master or AOMEI Partition Assistant, provides more comprehensive features, including the ability to migrate partitions, convert disk types, and perform advanced partitioning operations.
Steps to Partition a Disk in Windows 11
Using Disk Management:
- Open Disk Management: Press Windows key + X and select Disk Management.
- Identify the Disk: Locate the disk you want to partition in the Disk Management window.
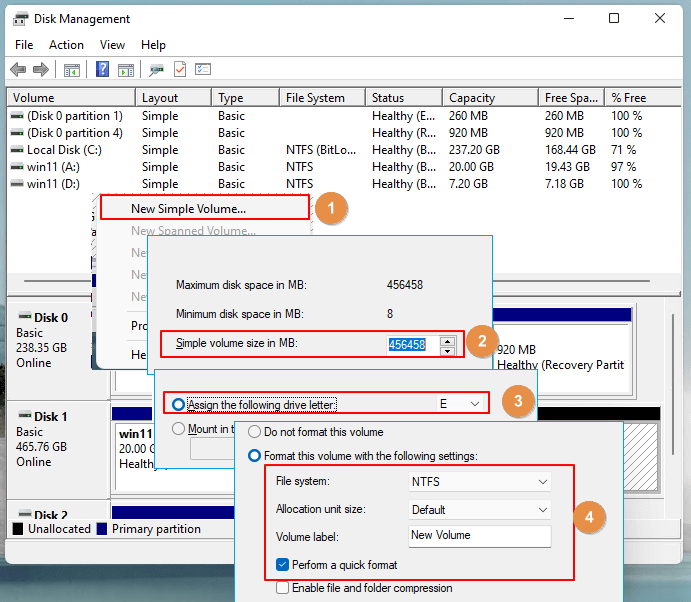
- Create a New Partition: Right-click on the unallocated space on the disk and select New Simple Volume.
- Specify Partition Size: Enter the desired size for the new partition and click Next.
- Assign a Drive Letter: Choose a drive letter for the new partition and click Next.
- Format the Partition: Select the desired file system (usually NTFS) and assign a volume label for the partition. Click Next.
- Complete the Process: Review the summary of the partition creation process and click Finish.
Using Third-Party Partitioning Software:
- Install the Software: Download and install the desired partitioning software.
- Launch the Software: Open the partitioning software and select the disk you want to partition.
- Create a New Partition: Follow the software’s instructions to create a new partition, specifying its size, file system, and other settings.
- Apply Changes: Review the changes and apply them to the disk.
Best Practices for Disk Partitioning
- Backup Data: Always back up important data before performing any partitioning operations to prevent data loss.
- Plan Partition Sizes: Carefully consider the size of each partition based on its intended use. Allocate sufficient space for the operating system, applications, and data storage.
- Leave Unallocated Space: Reserve some unallocated space on the disk for future partitioning needs or potential system expansion.
- Use NTFS File System: NTFS is the recommended file system for Windows 11, offering better performance, security, and features.
- Avoid Excessive Partitioning: While partitioning offers advantages, excessive partitioning can lead to fragmentation and slower performance. Aim for a reasonable number of partitions based on your needs.
FAQs on Disk Partitioning in Windows 11
Q: Can I partition a USB drive in Windows 11?
A: Yes, you can partition a USB drive in Windows 11 using Disk Management or third-party partitioning software.
Q: What happens if I delete a partition?
A: Deleting a partition will erase all data stored on it. Ensure you have backed up any important data before deleting a partition.
Q: Can I resize a partition in Windows 11?
A: Yes, you can resize a partition in Windows 11 using Disk Management or third-party partitioning software. However, resizing may require moving data within the partition, which can take time.
Q: Can I create a bootable partition in Windows 11?
A: Yes, you can create a bootable partition in Windows 11 using a USB drive or an external hard drive. This allows you to boot from the partition and access a recovery environment or install a new operating system.
Q: What are the risks associated with disk partitioning?
A: Disk partitioning, if not performed correctly, can lead to data loss, system instability, or boot errors. It’s crucial to follow best practices and use reliable partitioning tools.
Tips for Disk Partitioning in Windows 11
- Understand Your Needs: Before partitioning, carefully consider your storage requirements and the purpose of each partition.
- Use a Reliable Tool: Choose a reputable partitioning software and ensure it’s compatible with Windows 11.
- Back Up Data: Always back up your data before performing any partitioning operations.
- Test Before Committing: If using third-party software, use the preview feature to visualize the changes before applying them.
- Seek Professional Help: If you are unsure about partitioning your disk, consult a professional technician for assistance.
Conclusion
Disk partitioning in Windows 11 is a valuable tool for optimizing storage, enhancing security, and improving system performance. By understanding the different partition types, methods, and best practices, users can effectively manage their disk space, organize data, and ensure a smooth and efficient computing experience. Remember to always back up data before performing any partitioning operations and consult reliable resources or professionals if you are unsure about the process.

:max_bytes(150000):strip_icc()/002_how-to-partition-a-hard-drive-2626081-5c82c62d46e0fb00010f10b6.jpg)
![Windows 11 - How to Partition Hard Drives [Tutorial] - YouTube](https://i.ytimg.com/vi/C65AA9V2lpU/maxresdefault.jpg)
Closure
Thus, we hope this article has provided valuable insights into Understanding Disk Partitioning in Windows 11: A Comprehensive Guide. We hope you find this article informative and beneficial. See you in our next article!