Understanding Disk Management in Windows 11: A Comprehensive Guide to Initialization and Beyond
Related Articles: Understanding Disk Management in Windows 11: A Comprehensive Guide to Initialization and Beyond
Introduction
With great pleasure, we will explore the intriguing topic related to Understanding Disk Management in Windows 11: A Comprehensive Guide to Initialization and Beyond. Let’s weave interesting information and offer fresh perspectives to the readers.
Table of Content
Understanding Disk Management in Windows 11: A Comprehensive Guide to Initialization and Beyond
The Windows 11 operating system relies heavily on efficient disk management to function seamlessly. At the heart of this process lies the ability to "initialize" disks, a critical step that prepares them for use by the operating system. This article delves into the intricacies of disk management in Windows 11, focusing on the importance and procedure of disk initialization, while also exploring related concepts and functionalities.
The Significance of Disk Initialization
Before a disk can be used to store data in a Windows 11 environment, it must undergo a process known as initialization. This process essentially transforms a raw, unformatted disk into a recognized storage space. Initialization involves two key actions:
- Formatting: This step establishes a file system structure on the disk, allowing Windows 11 to organize and manage data efficiently. Common file systems used in Windows 11 include NTFS (New Technology File System) and exFAT (Extended File Allocation Table).
- Partitioning: The disk is divided into distinct logical sections called partitions. Each partition can be treated as a separate storage unit, enabling users to allocate specific areas for different purposes, such as operating system installation, data storage, or backup files.
The Importance of Disk Initialization
Disk initialization plays a crucial role in the smooth operation of Windows 11. Here’s why:
- Data Storage: Initialization provides a framework for storing data on the disk, ensuring that files can be saved, retrieved, and managed effectively.
- Operating System Installation: A properly initialized disk is essential for installing the Windows 11 operating system. The installer requires a formatted and partitioned disk to write the operating system files.
- Disk Management: Initialization allows Windows 11 to recognize and manage the disk, enabling users to create, delete, and format partitions as needed.
- Performance Optimization: By formatting the disk with an appropriate file system, users can optimize data access and improve overall system performance.
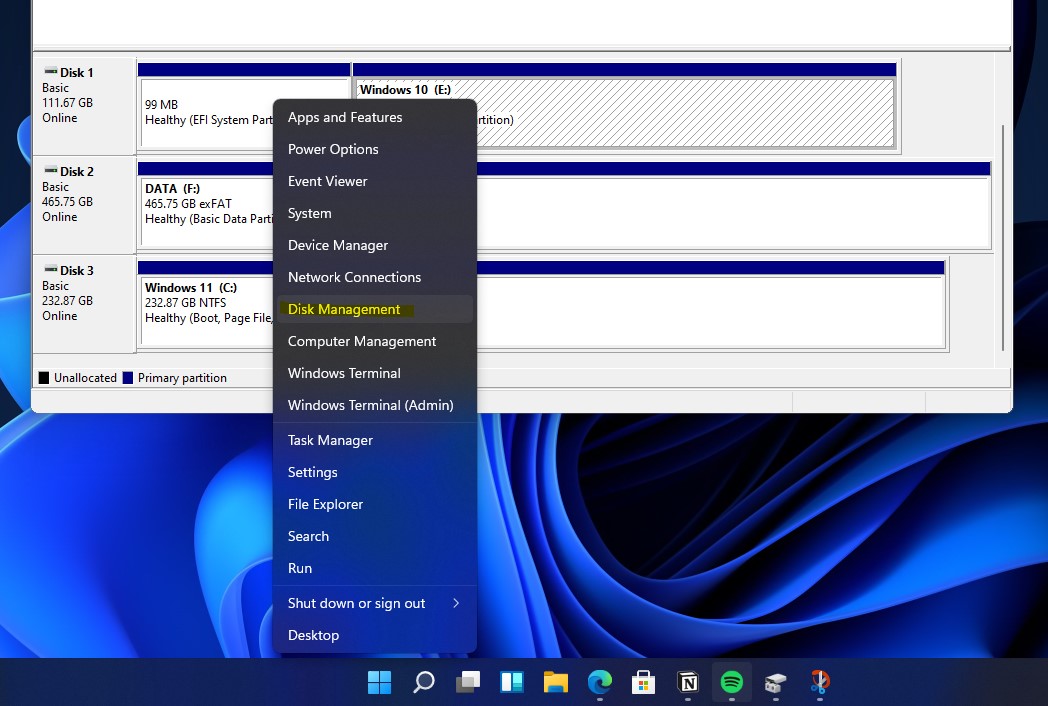
Navigating Disk Management in Windows 11
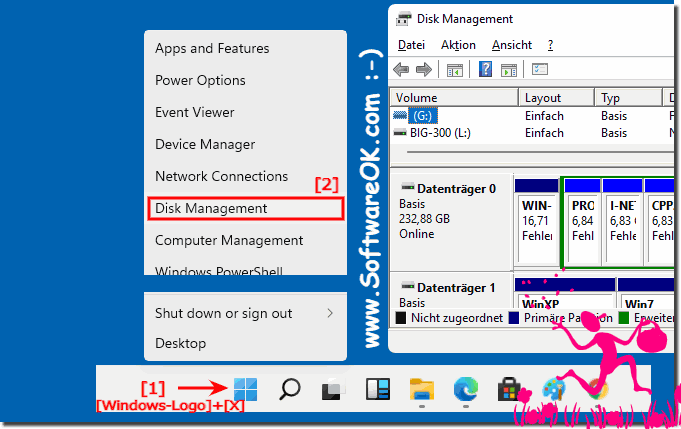
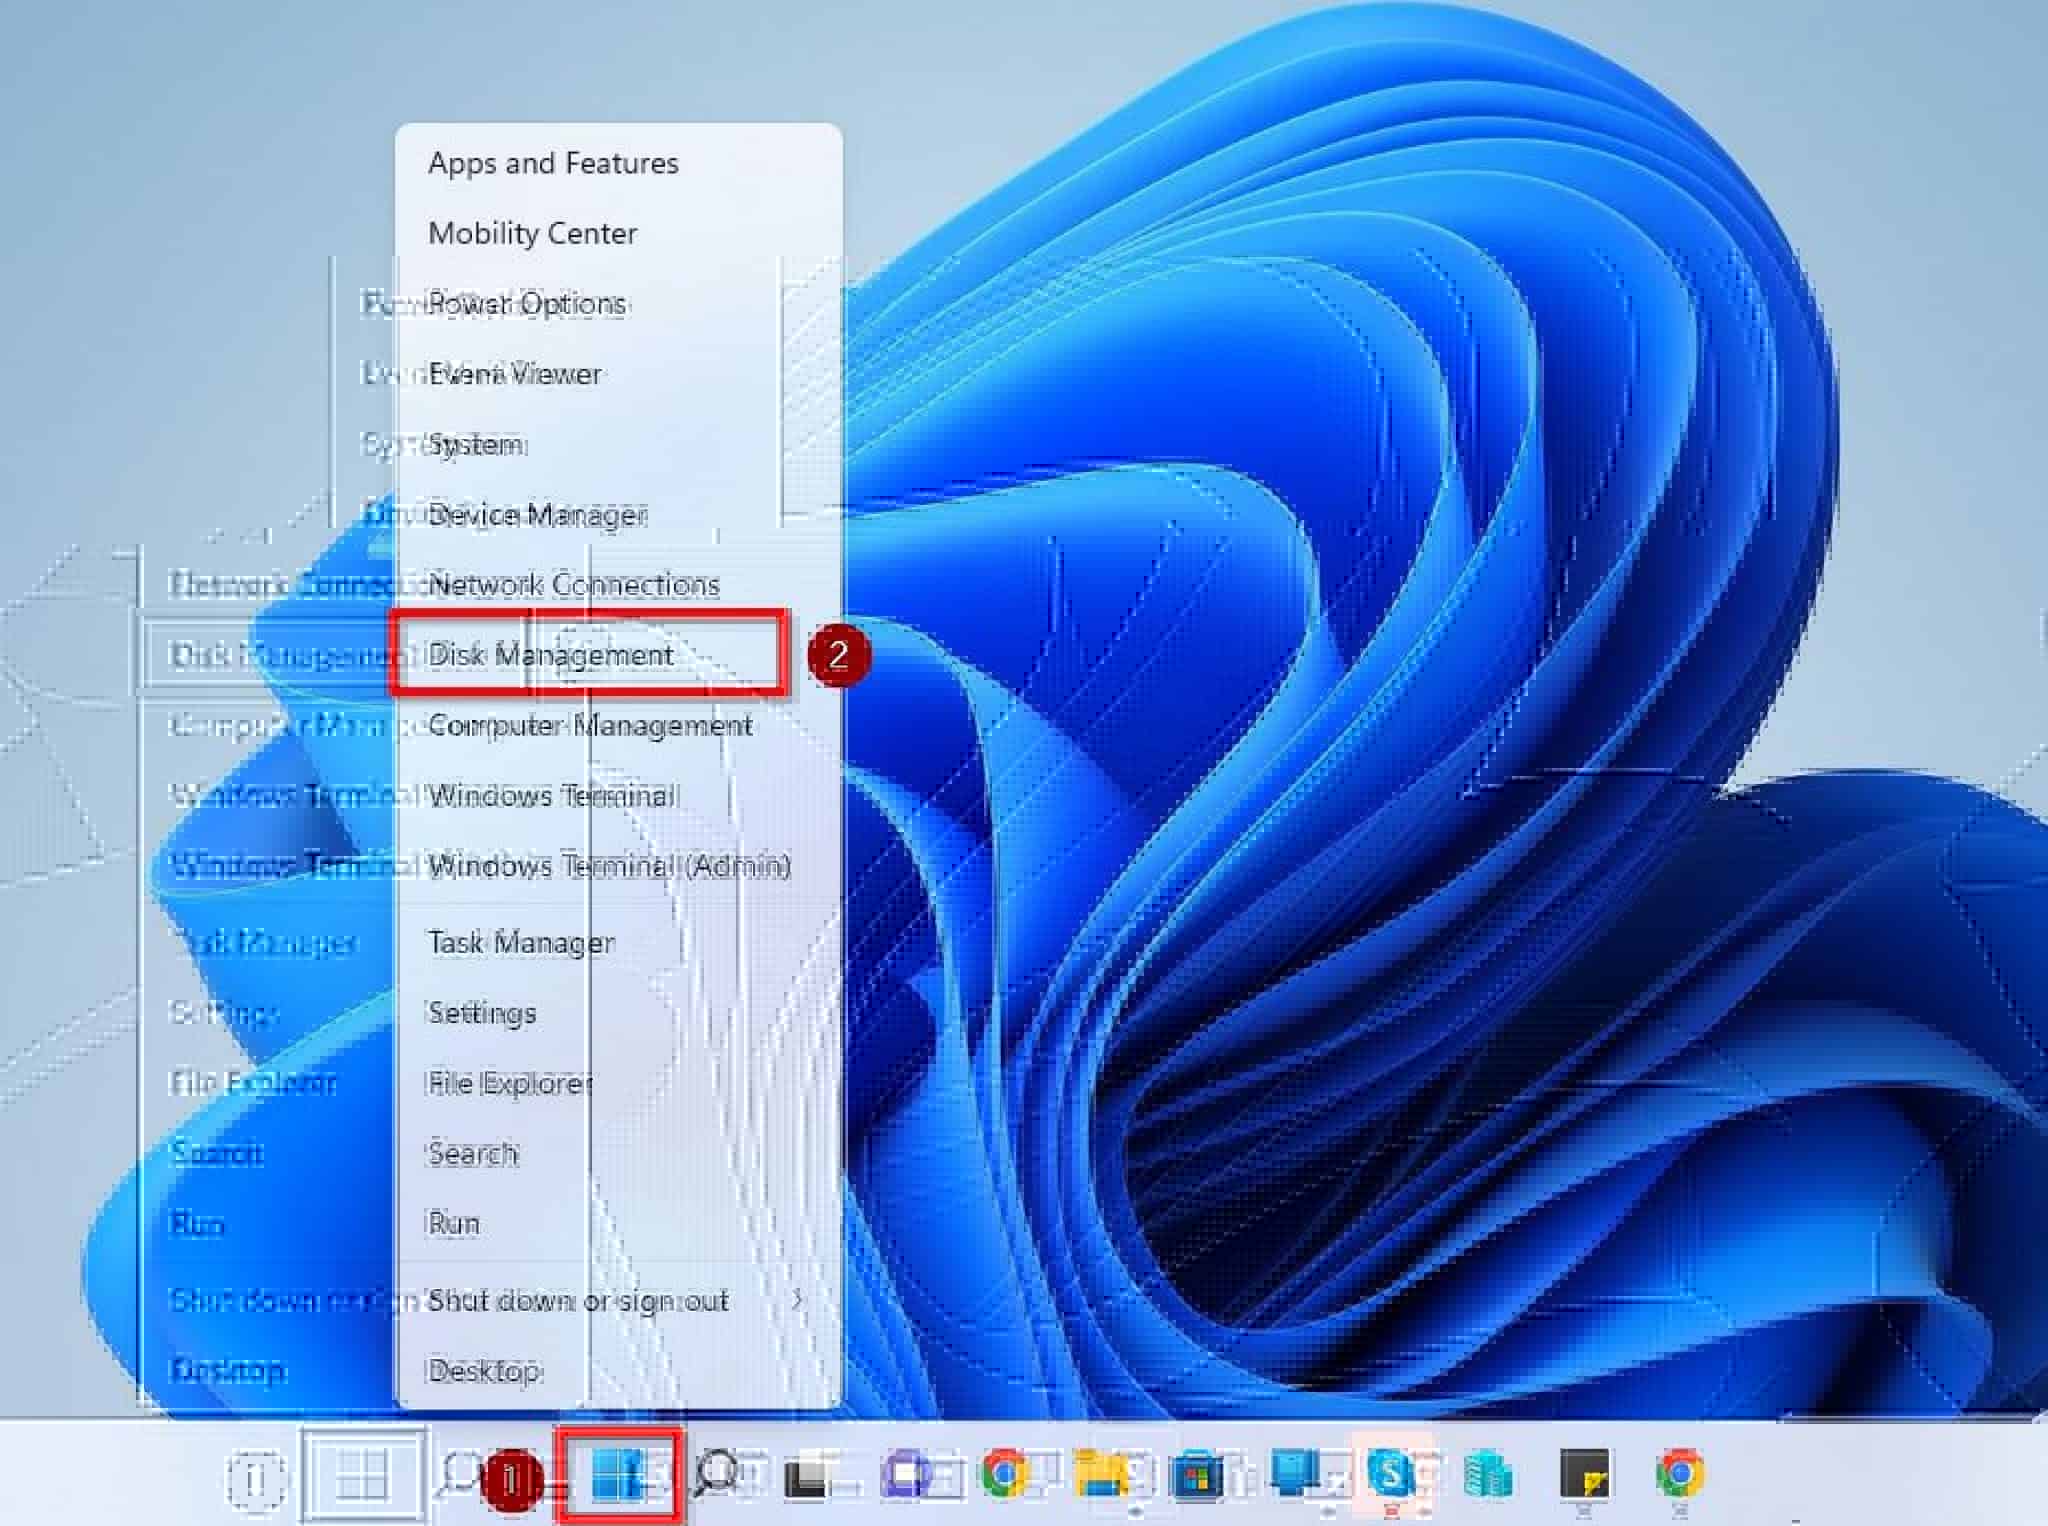
Windows 11 offers a user-friendly interface for managing disks through the "Disk Management" tool. To access this tool, follow these steps:
- Open File Explorer: Click the File Explorer icon on the taskbar or press the Windows key + E.
- Navigate to "This PC": In the left pane, click "This PC."
- Right-click "This PC": Right-click the "This PC" icon.
- Select "Manage": Choose the "Manage" option from the context menu.
- Open "Disk Management": In the "Computer Management" window, navigate to "Storage" and click "Disk Management."
Initiating Disk Initialization in Windows 11
Once the Disk Management tool is open, the process of initializing a disk is straightforward:
- Identify the Disk: Locate the disk you want to initialize. Uninitialized disks are usually represented as "Disk 1," "Disk 2," etc., and appear as "Unknown" in the "Disk Management" window.
- Right-click the Disk: Right-click the disk you wish to initialize.
- Select "Initialize Disk": Choose the "Initialize Disk" option from the context menu.
- Choose a Disk Style: Select the disk style (MBR or GPT) based on your needs. MBR (Master Boot Record) is generally suitable for older systems and smaller disks, while GPT (GUID Partition Table) is recommended for modern systems and larger disks, offering enhanced features and support for larger disk sizes.
- Click "OK": Confirm the initialization process by clicking the "OK" button.
Post-Initialization Steps: Formatting and Partitioning
After initialization, the disk is ready for formatting and partitioning. These steps are crucial for defining the structure and functionality of the disk:
Formatting:
- Right-click the Disk: Right-click the initialized disk in "Disk Management."
- Select "New Simple Volume": Choose the "New Simple Volume" option from the context menu.
- Follow the Wizard: A wizard will guide you through the formatting process. Select the desired file system (NTFS or exFAT) and assign a volume label (a name for the partition).
- Complete the Formatting: Click "Next" to complete the formatting process.
Partitioning:
- Right-click the Disk: Right-click the initialized disk in "Disk Management."
- Select "New Simple Volume": Choose the "New Simple Volume" option from the context menu.
- Define Partition Size: Specify the size of the new partition, ensuring it fits within the available disk space.
- Assign Drive Letter: Select a drive letter for the new partition.
- Format the Partition: Choose the file system (NTFS or exFAT) and assign a volume label for the partition.
- Complete Partitioning: Click "Next" to complete the partitioning process.
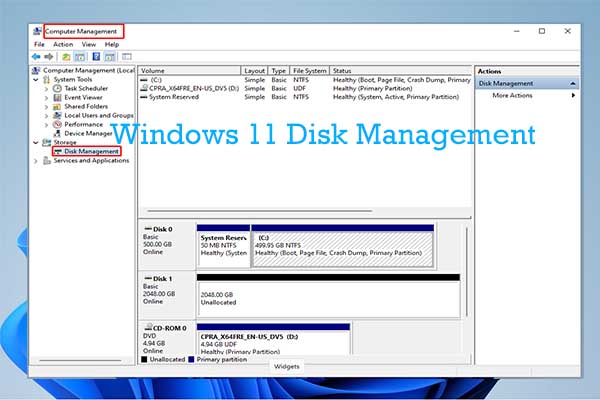
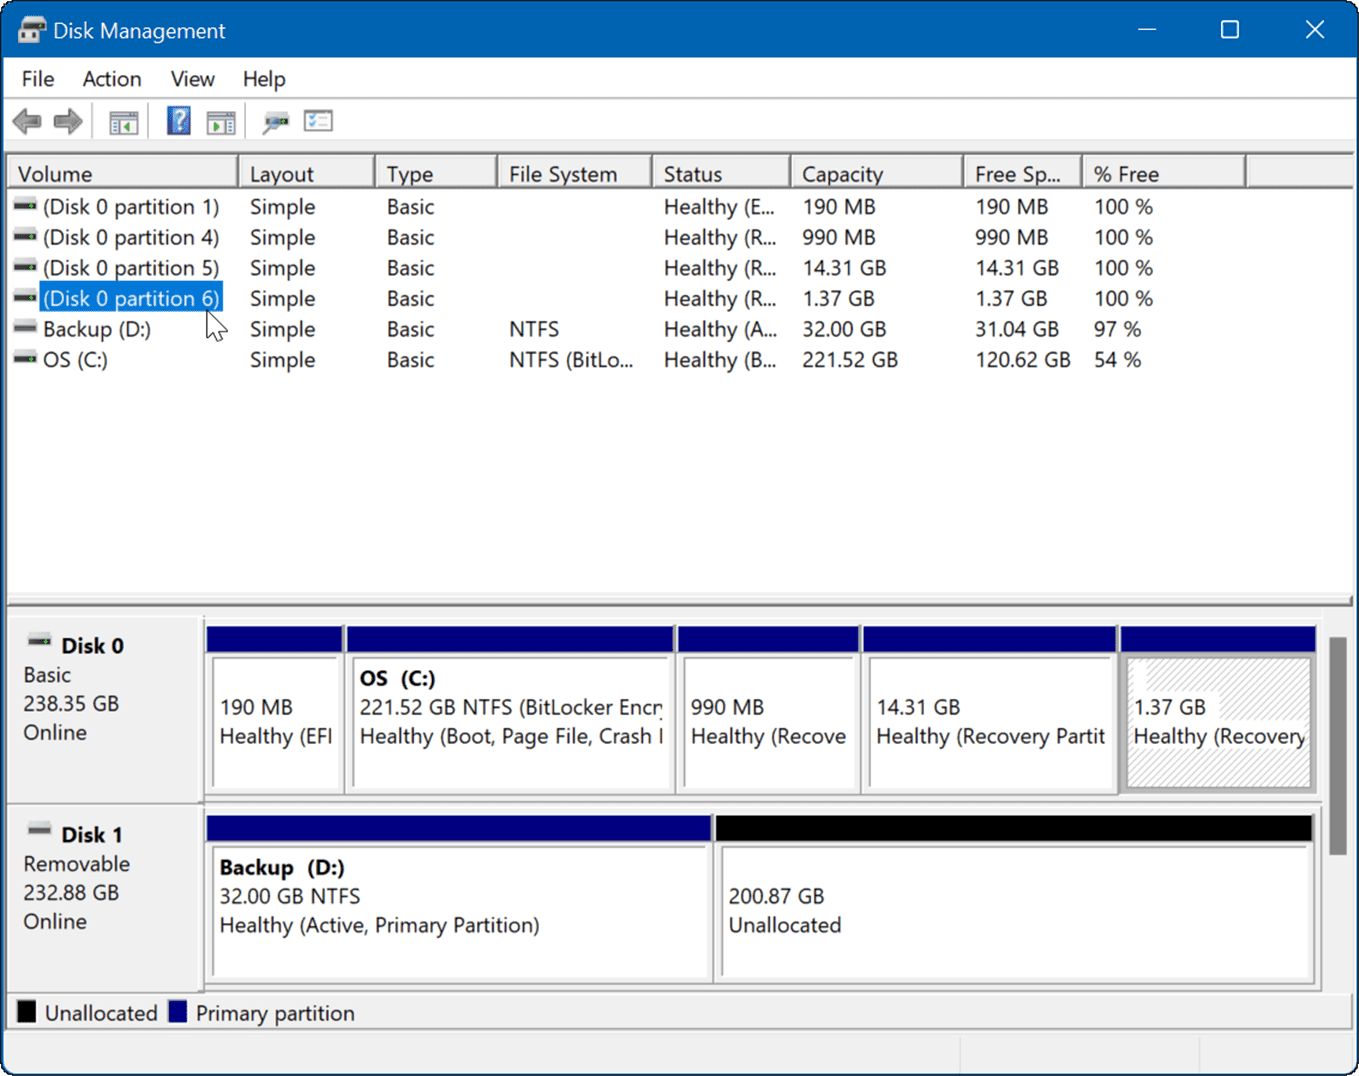
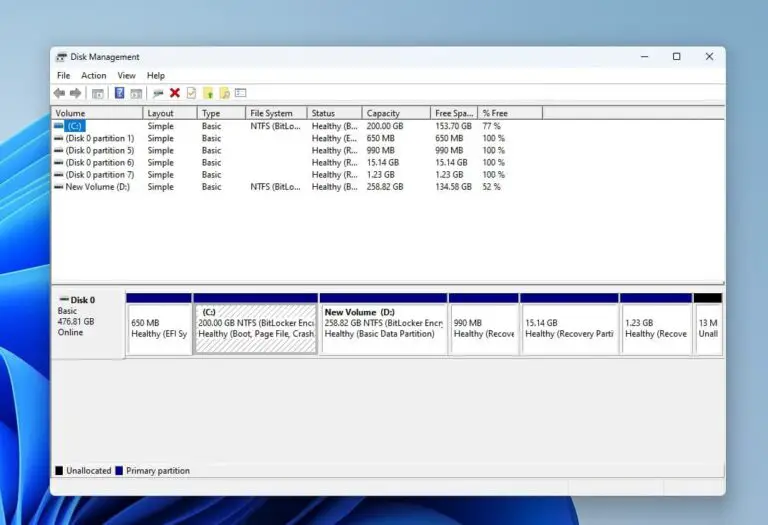
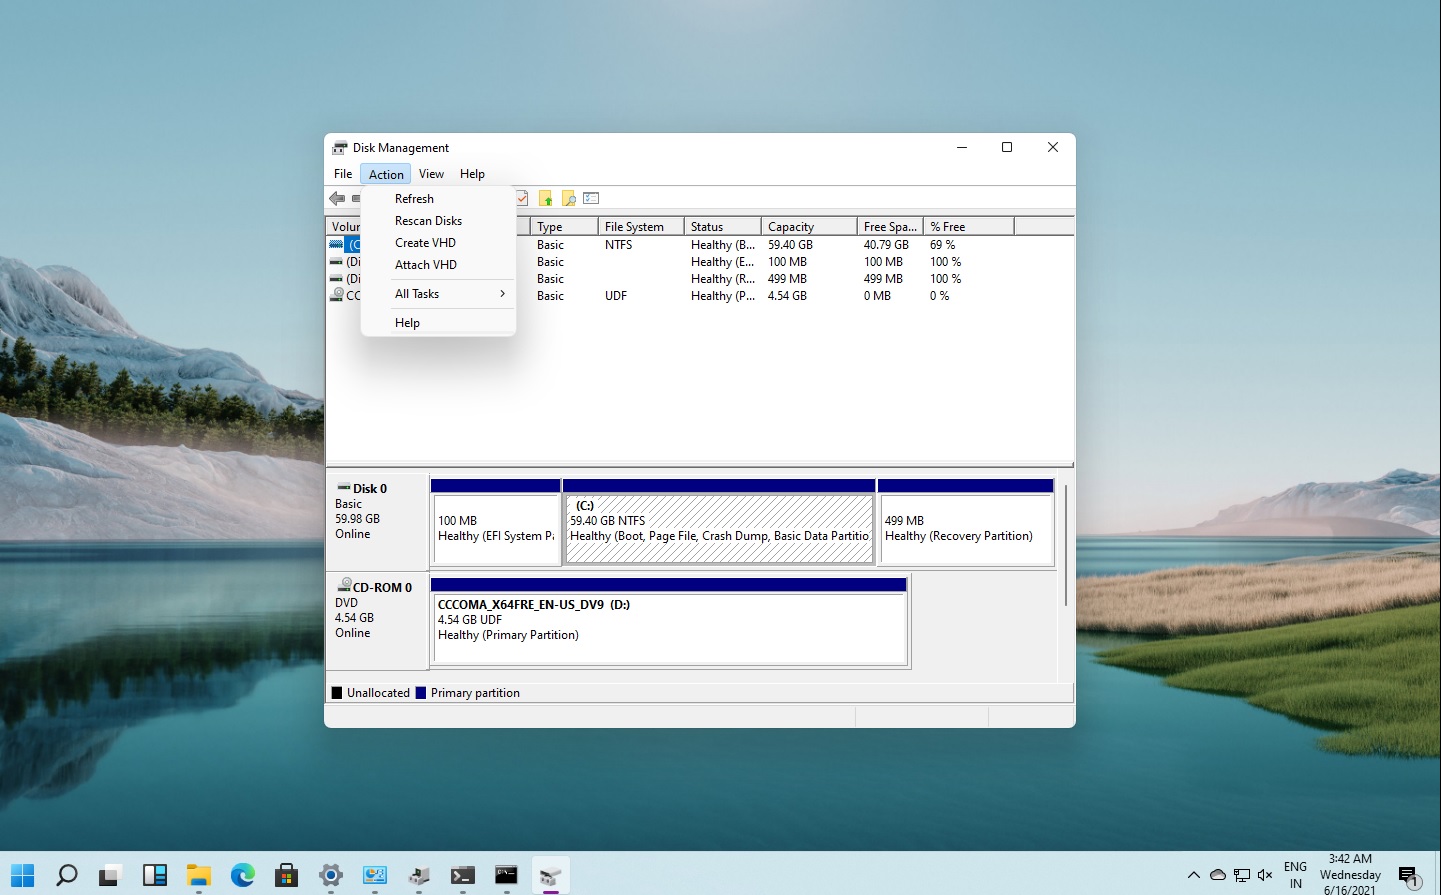
Understanding the Disk Management Interface
The "Disk Management" tool offers a visual representation of the disks connected to your computer. Here’s a breakdown of the key components:
- Disk List: Displays the disks connected to your system, including their size, model, and status.
- Partition List: Shows the partitions on each disk, their file system, volume label, and status.
- Disk Space Visualization: Provides a graphical representation of the used and available space on each disk and partition.
- Context Menu: Right-clicking on a disk or partition reveals a menu with options for formatting, partitioning, deleting, and managing the selected element.
Addressing Common Disk Management Challenges
While disk management in Windows 11 is generally straightforward, users may encounter certain challenges:
- Disk Not Recognized: If a disk is not recognized by Windows 11, ensure that it is properly connected and powered. Check the device manager for any error messages related to the disk.
- Disk Initialization Errors: If initialization fails, check the disk for physical damage or errors. Try using a different USB port or connecting the disk to a different computer.
- Partitioning Errors: If you encounter errors during partitioning, ensure that you have sufficient disk space for the desired partition size. If necessary, resize or delete existing partitions to make space.
- File System Conversion: To convert a disk from one file system to another (e.g., from FAT32 to NTFS), you can use the "Convert Disk" option in "Disk Management." However, this process may require data backup and format the disk.
FAQs on Disk Management in Windows 11
Q: What is the difference between MBR and GPT disk styles?
A: MBR (Master Boot Record) is an older disk style that supports up to 2.2 TB of disk space and is limited to four primary partitions. GPT (GUID Partition Table) is a newer disk style that supports up to 9.4 ZB of disk space and allows for unlimited partitions. GPT is generally recommended for modern systems and larger disks.
Q: Can I initialize a disk without formatting it?
A: No, initialization inherently involves formatting the disk to establish a file system structure. However, you can choose the desired file system during the formatting process.
Q: What happens if I delete a partition?
A: Deleting a partition will erase all data stored on that partition. Before deleting a partition, ensure that you have backed up any essential data.
Q: Can I shrink or resize a partition?
A: Yes, Windows 11 allows you to shrink or resize partitions using the "Disk Management" tool. However, shrinking a partition may require moving data to other partitions or allocating unallocated space.
Q: How do I recover data from a formatted disk?
A: Data recovery from a formatted disk is possible, but it requires specialized data recovery software. Contact a professional data recovery service if you need to recover data from a formatted disk.
Tips for Efficient Disk Management in Windows 11
- Regularly Backup Data: Create regular backups of important data to protect against data loss due to disk failure or accidental deletion.
- Monitor Disk Space: Keep track of available disk space and delete unnecessary files to prevent disk space exhaustion.
- Defragment Regularly: Defragmenting the hard drive can improve performance by organizing fragmented files.
- Use Disk Cleanup: The "Disk Cleanup" utility can help free up disk space by removing temporary files, system files, and other unnecessary data.
- Consider Disk Optimization Tools: Third-party disk optimization tools can provide additional features and functionality for managing and optimizing disks.
Conclusion
Disk management is an essential aspect of maintaining a functional and efficient Windows 11 system. Understanding the importance of disk initialization, formatting, and partitioning, and utilizing the "Disk Management" tool effectively are key to maximizing disk performance and ensuring data security. By following the guidelines and tips outlined in this article, users can confidently manage their disks and optimize their Windows 11 experience.


Closure
Thus, we hope this article has provided valuable insights into Understanding Disk Management in Windows 11: A Comprehensive Guide to Initialization and Beyond. We thank you for taking the time to read this article. See you in our next article!