Understanding and Resolving Disk Utilization Issues in Windows 10
Related Articles: Understanding and Resolving Disk Utilization Issues in Windows 10
Introduction
In this auspicious occasion, we are delighted to delve into the intriguing topic related to Understanding and Resolving Disk Utilization Issues in Windows 10. Let’s weave interesting information and offer fresh perspectives to the readers.
Table of Content
Understanding and Resolving Disk Utilization Issues in Windows 10

High disk utilization, often manifested as a disk running at or near 100% capacity, is a common problem encountered by Windows 10 users. This persistent issue can significantly impact system performance, leading to sluggish responsiveness, application freezes, and overall frustration. Understanding the root causes and implementing effective solutions is crucial for restoring optimal system functionality.
Delving into the Causes of High Disk Utilization
High disk utilization can stem from various factors, each requiring a specific approach for resolution. These include:
1. Disk Fragmentation: Over time, files on a hard disk drive (HDD) become fragmented, meaning they are scattered across different sectors of the drive. This fragmented state forces the disk to work harder to access the scattered pieces, leading to increased disk activity and slower performance.
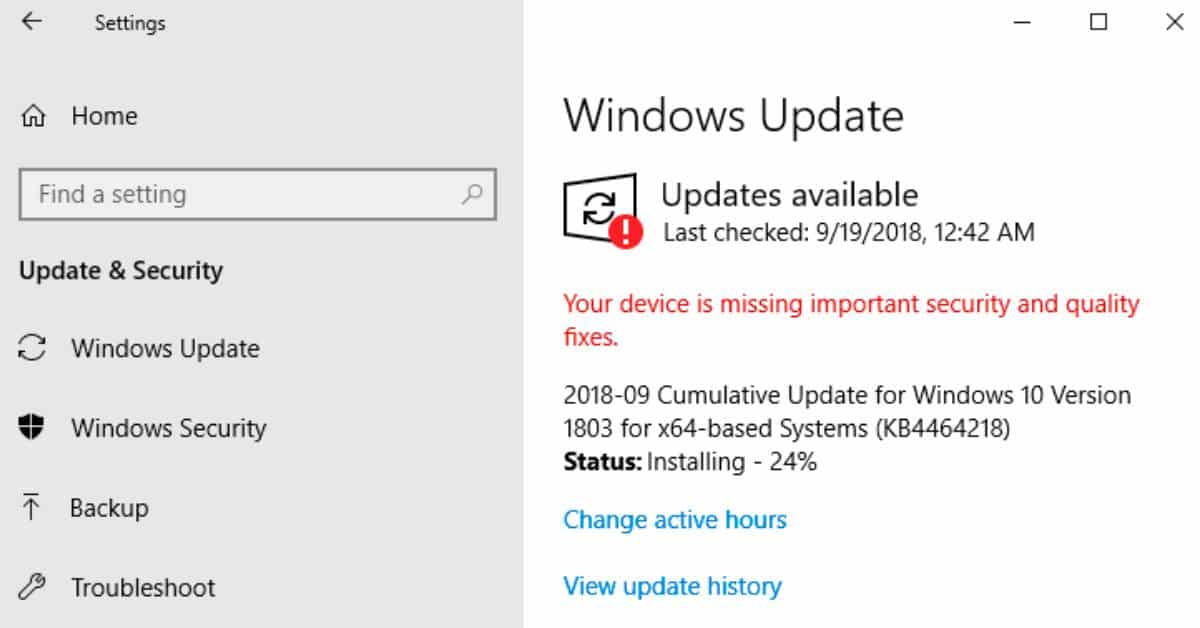
2. Background Processes: Windows 10 utilizes numerous background processes, such as system updates, antivirus scans, and indexing services, which can consume significant disk resources. These processes are essential for maintaining system security and functionality, but their intensity can contribute to high disk utilization.
3. Insufficient Disk Space: A lack of available disk space can also lead to high disk utilization. When the system runs low on free space, it struggles to write new data and may resort to using temporary files on the disk, further increasing activity.
4. Hardware Issues: Defective or aging hard drives can exhibit slow performance, leading to high disk utilization. Issues with the drive’s controller, read/write heads, or other internal components can hinder data access and increase disk activity.
5. Malware and Viruses: Malicious software can consume system resources, including disk space, leading to high disk utilization. Viruses and other malware can operate in the background, constantly accessing and manipulating files, impacting system performance.
6. Defective Drivers: Outdated or incompatible device drivers can cause conflicts and errors, leading to increased disk activity. These errors can force the system to constantly access the disk to resolve issues, resulting in high utilization.
7. Startup Applications: Applications that launch automatically at startup can consume system resources, including disk space, leading to high disk utilization. These applications may perform background tasks or initiate processes that require disk access, impacting overall system performance.
8. Resource-Intensive Applications: Running resource-intensive applications, such as video editing software, gaming platforms, or data analysis programs, can place a heavy load on the system’s resources, including the disk. These applications require significant disk access for data processing and storage, contributing to high utilization.
9. Overloaded System: A system with excessive applications running simultaneously can lead to high disk utilization. Multiple applications vying for disk access can create a bottleneck, resulting in slower performance and increased disk activity.
10. System Configuration Issues: Incorrect system configurations, such as a poorly optimized virtual memory setting, can lead to excessive disk usage. The system may rely heavily on the disk for temporary data storage, increasing disk activity.
Addressing High Disk Utilization: A Step-by-Step Approach
Resolving high disk utilization requires a systematic approach. The following steps provide a comprehensive guide to identifying and addressing the underlying causes:
Step 1: Identify the Culprit – Analyzing Disk Activity:
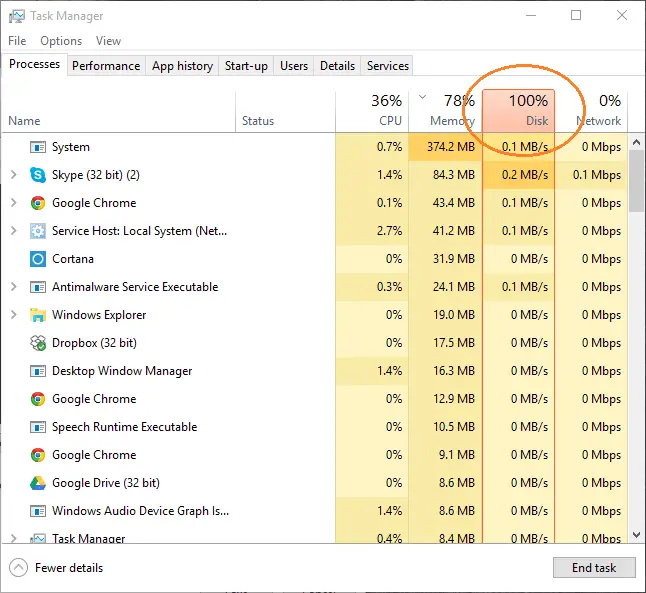
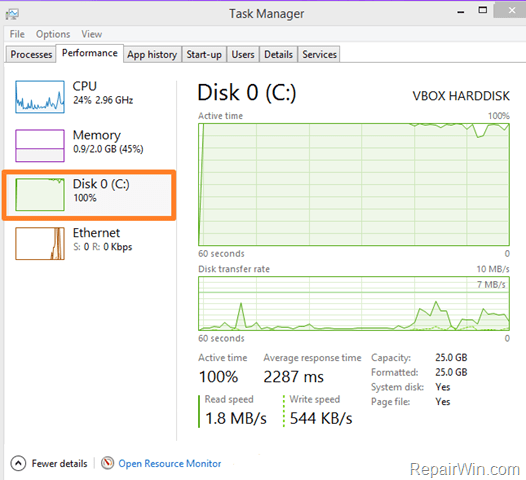
- Task Manager: The Task Manager provides valuable insights into disk activity. Open the Task Manager (Ctrl + Shift + Esc) and navigate to the "Performance" tab. Observe the "Disk" section, which displays the percentage of disk utilization over time.
- Resource Monitor: For a more detailed analysis, utilize the Resource Monitor. Access it by searching for "Resource Monitor" in the Start menu. The "Disk Activity" tab provides a breakdown of disk activity, showing processes and files accessing the disk.
- Process Explorer: For advanced troubleshooting, consider using Process Explorer, a free tool available from Microsoft. It offers a more detailed view of processes and their disk usage, aiding in identifying specific culprits.
Step 2: Optimize Disk Performance:
- Defragmentation: For HDDs, defragmentation can improve performance by reorganizing fragmented files and reducing disk access time. Run Disk Defragmenter (accessible through the Control Panel) to optimize disk performance. Note that SSDs do not require defragmentation as they use a different data storage mechanism.
- Disk Cleanup: Remove unnecessary files and folders to free up disk space. Access Disk Cleanup through the Control Panel or by right-clicking the system drive and selecting "Properties."
- Storage Sense: Windows 10 includes Storage Sense, a feature that automatically cleans up temporary files, downloads, and other unnecessary data to free up disk space. Configure Storage Sense through Settings > System > Storage.
Step 3: Manage Background Processes:
- Task Scheduler: Review and disable unnecessary scheduled tasks. Access Task Scheduler by searching for it in the Start menu.
- Startup Applications: Disable unnecessary startup applications to reduce the initial load on the system. Access Startup applications through Task Manager (Startup tab) or Settings > Apps > Startup.
- System Services: Carefully review system services and disable those that are not essential for system functionality. Access System Services through the Services app (search for "Services" in the Start menu). Be cautious when disabling services, as some may be crucial for system stability.
Step 4: Check for Malware and Viruses:
- Antivirus Scan: Run a full system scan using your antivirus software to detect and remove any malware or viruses that may be consuming system resources.
- Anti-Malware Software: Consider using dedicated anti-malware software to supplement your antivirus protection. These tools can detect and remove more advanced threats that may evade traditional antivirus software.
Step 5: Update and Troubleshoot Drivers:
- Device Manager: Check for outdated or incompatible device drivers. Access Device Manager by searching for it in the Start menu. Update drivers through the Device Manager or by visiting the manufacturer’s website.
- Driver Troubleshooter: Windows 10 includes a driver troubleshooter that can automatically identify and resolve driver issues. Access the troubleshooter through Settings > Update & Security > Troubleshoot.
Step 6: Optimize System Configuration:
- Virtual Memory: Adjust virtual memory settings to ensure sufficient space for temporary data storage. Access virtual memory settings through System Properties (accessible through the Control Panel) > Advanced System Settings > Performance > Advanced > Change.
- Power Plan: Ensure the system is using a balanced or high-performance power plan. Access power plan settings through Control Panel > Hardware and Sound > Power Options.
Step 7: Consider Hardware Upgrades:
- Hard Drive Replacement: If high disk utilization is persistent and other solutions have failed, consider replacing the hard drive with a newer, faster model, such as an SSD. SSDs offer significantly faster data access speeds, reducing disk activity and improving overall system performance.
- RAM Upgrade: Increasing system RAM can alleviate high disk utilization by providing more memory for applications, reducing the need to access the disk for temporary data storage.
FAQs Regarding High Disk Utilization in Windows 10
1. Why is my disk usage so high even after defragmenting my HDD?
Defragmentation is primarily effective for HDDs. If your system uses an SSD, defragmentation is not necessary and may even be detrimental. SSDs use a different storage mechanism and do not benefit from defragmentation.
2. How do I identify which process is causing the high disk usage?
Utilize the Task Manager’s Performance tab or the Resource Monitor’s Disk Activity tab to observe disk activity and identify processes consuming significant disk resources. Process Explorer can provide even more detailed insights.
3. What is the optimal virtual memory setting for my system?
The optimal virtual memory setting depends on your system’s RAM and usage patterns. A good starting point is to set the initial size to 1.5 times the amount of RAM and the maximum size to 3 times the amount of RAM. Monitor system performance and adjust the settings if necessary.
4. Is high disk utilization always a problem?
While high disk utilization often indicates a performance issue, there are scenarios where it may be expected. For example, during system updates, antivirus scans, or when running resource-intensive applications, high disk usage is normal.
5. Should I disable all startup applications?
Disabling all startup applications can reduce the initial load on the system but may also impact the functionality of certain applications. Carefully review startup applications and disable only those that are unnecessary or have a significant impact on performance.
Tips for Preventing High Disk Utilization in Windows 10
- Regular Disk Cleanup: Schedule regular disk cleanups to remove temporary files and other unnecessary data.
- Monitor Background Processes: Regularly review and disable unnecessary background processes to minimize their impact on disk activity.
- Limit Startup Applications: Keep the number of startup applications to a minimum to reduce the initial load on the system.
- Use Resource-Efficient Applications: Choose applications that are known for their efficiency and minimize resource consumption.
- Optimize System Settings: Ensure that system settings, such as virtual memory and power plan, are optimized for performance.
- Maintain Regular Maintenance: Perform regular system maintenance tasks, such as defragmentation (for HDDs) and virus scans, to prevent performance issues.
- Consider SSD Upgrade: If your system uses an HDD, consider upgrading to an SSD for significantly faster data access and reduced disk activity.
Conclusion
High disk utilization in Windows 10 can significantly hinder system performance. Understanding the underlying causes and implementing effective solutions is crucial for restoring optimal system functionality. By systematically analyzing disk activity, managing background processes, optimizing system settings, and considering hardware upgrades, users can effectively address high disk utilization and restore smooth system operation. Remember, a proactive approach to system maintenance and optimization is essential for preventing future performance issues.
![[FIX] Windows 10 100 Percent Disk Usage Problem](https://htse.kapilarya.com/FIX-Windows-10-100-Percent-Disk-Usage-Problem.PNG)
![[SOLVED] Windows 10 100% disk usage in Task Manager - Driver Easy](https://images.drivereasy.com/wp-content/uploads/2019/12/100disk1.jpg)


Closure
Thus, we hope this article has provided valuable insights into Understanding and Resolving Disk Utilization Issues in Windows 10. We hope you find this article informative and beneficial. See you in our next article!