The Power of Disk Manipulation: Exploring the Utility of dd for Windows 11
Related Articles: The Power of Disk Manipulation: Exploring the Utility of dd for Windows 11
Introduction
With great pleasure, we will explore the intriguing topic related to The Power of Disk Manipulation: Exploring the Utility of dd for Windows 11. Let’s weave interesting information and offer fresh perspectives to the readers.
Table of Content
The Power of Disk Manipulation: Exploring the Utility of dd for Windows 11
The realm of operating systems is built upon the foundation of data storage and manipulation. While Windows 11 offers a user-friendly interface for managing files, there exist powerful tools that grant users a more granular level of control over their system’s data. Among these tools, a command-line utility known as "dd" stands out for its ability to directly interact with disk drives, enabling a range of operations from creating disk images to cloning entire drives.
Understanding dd’s Core Functionality
The "dd" command, originally rooted in Unix systems, is a versatile tool that facilitates the copying and manipulation of data at a low level. It operates by reading data from a source, processing it as needed, and writing it to a destination. This process allows for precise control over data transfer, making it ideal for tasks that require meticulous handling of disk contents.
Key Applications of dd in Windows 11
While "dd" is not natively integrated into Windows 11, its functionality can be accessed through various methods, including using a Unix-like environment like Cygwin or Windows Subsystem for Linux (WSL). Here are some key applications of "dd" in a Windows 11 environment:
-
Creating Disk Images: "dd" excels at creating exact replicas of entire hard drives or partitions. This process, known as disk imaging, is crucial for backups, system restoration, and troubleshooting. By creating an image, users can capture the complete state of a drive, including its file system, data, and boot sector.
-
Cloning Drives: "dd" enables users to clone one drive to another, replicating its content entirely. This is useful for migrating data from an old drive to a new one, upgrading storage capacity, or creating identical system copies for redundancy.
-
Data Recovery: "dd" can be used to extract data from damaged or inaccessible drives. By carefully reading sectors from the affected drive, users can attempt to recover lost files or system components.
-
Partition Management: "dd" allows for precise manipulation of partitions on a disk. This includes creating, resizing, and deleting partitions, providing a more granular level of control compared to the built-in disk management tools in Windows 11.
-
Low-Level Data Manipulation: "dd" can be used to write specific data patterns to a drive, useful for testing drive functionality, formatting drives, or creating specialized boot sectors.
Beyond the Basics: Exploring dd’s Capabilities
While the core functionality of "dd" revolves around data transfer, its versatility extends beyond simple copying. By leveraging its various options and parameters, users can achieve complex data manipulation tasks. Some key aspects to consider:
-
Data Conversion: "dd" can convert data between different formats, such as converting a raw disk image to a standard file format or vice versa. This is achieved by specifying appropriate input and output formats using specific options.
-
Data Filtering: "dd" allows for filtering data during the transfer process. This can involve skipping specific blocks, converting data encoding, or applying checksums to ensure data integrity.
-
Error Handling: "dd" provides options for error handling, allowing users to specify how to handle potential errors during data transfer. This ensures that the process is robust and can recover from unexpected issues.
Navigating the dd Command: A Practical Guide
The syntax of "dd" commands can seem daunting at first, but with a basic understanding of its structure, users can easily execute various operations. A typical "dd" command follows this structure:
dd if=source_file of=destination_file bs=block_size count=number_of_blocks conv=conversion_optionsLet’s break down each component:
- if=source_file: Specifies the source file or device from which data will be read. This could be a file path, a device identifier (e.g., /dev/sda), or a network stream.
- of=destination_file: Specifies the destination file or device where data will be written. Similar to the source, it can be a file path, a device identifier, or a network stream.
- bs=block_size: Defines the size of each data block that will be transferred. This can influence performance and efficiency.
- count=number_of_blocks: Specifies the number of data blocks to be transferred. This allows for limiting the data transfer to a specific amount.
- conv=conversion_options: Provides a list of conversion options to be applied to the data during transfer. These options can include data encoding conversion, checksum verification, and error handling.
Illustrative Examples of dd Usage
To solidify the understanding of "dd" commands, let’s examine some practical examples:
- Creating a Disk Image:
dd if=/dev/sda of=disk_image.img bs=4MThis command creates a disk image named "disk_image.img" of the entire first hard drive (/dev/sda) with a block size of 4 MB.
- Cloning a Drive:
dd if=/dev/sdb of=/dev/sdc bs=4MThis command clones the data from the second hard drive (/dev/sdb) to the third hard drive (/dev/sdc) with a block size of 4 MB.
- Extracting Data from a Damaged Drive:
dd if=/dev/sdg of=recovered_data.img bs=512 skip=1000 count=5000This command extracts 5000 blocks (assuming a block size of 512 bytes) from the fifth hard drive (/dev/sdg), starting from the 1000th block, and saves them to the file "recovered_data.img".
dd for Windows 11: Addressing the Challenges
While "dd" offers immense power and flexibility, its usage in Windows 11 presents certain challenges:
-
Absence of Native Support: Windows 11 does not include "dd" as a built-in command-line utility. Users need to rely on third-party solutions like Cygwin or WSL to access its functionality.
-
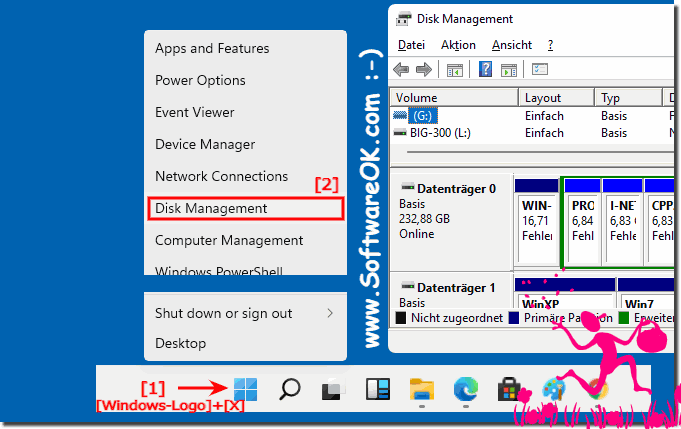
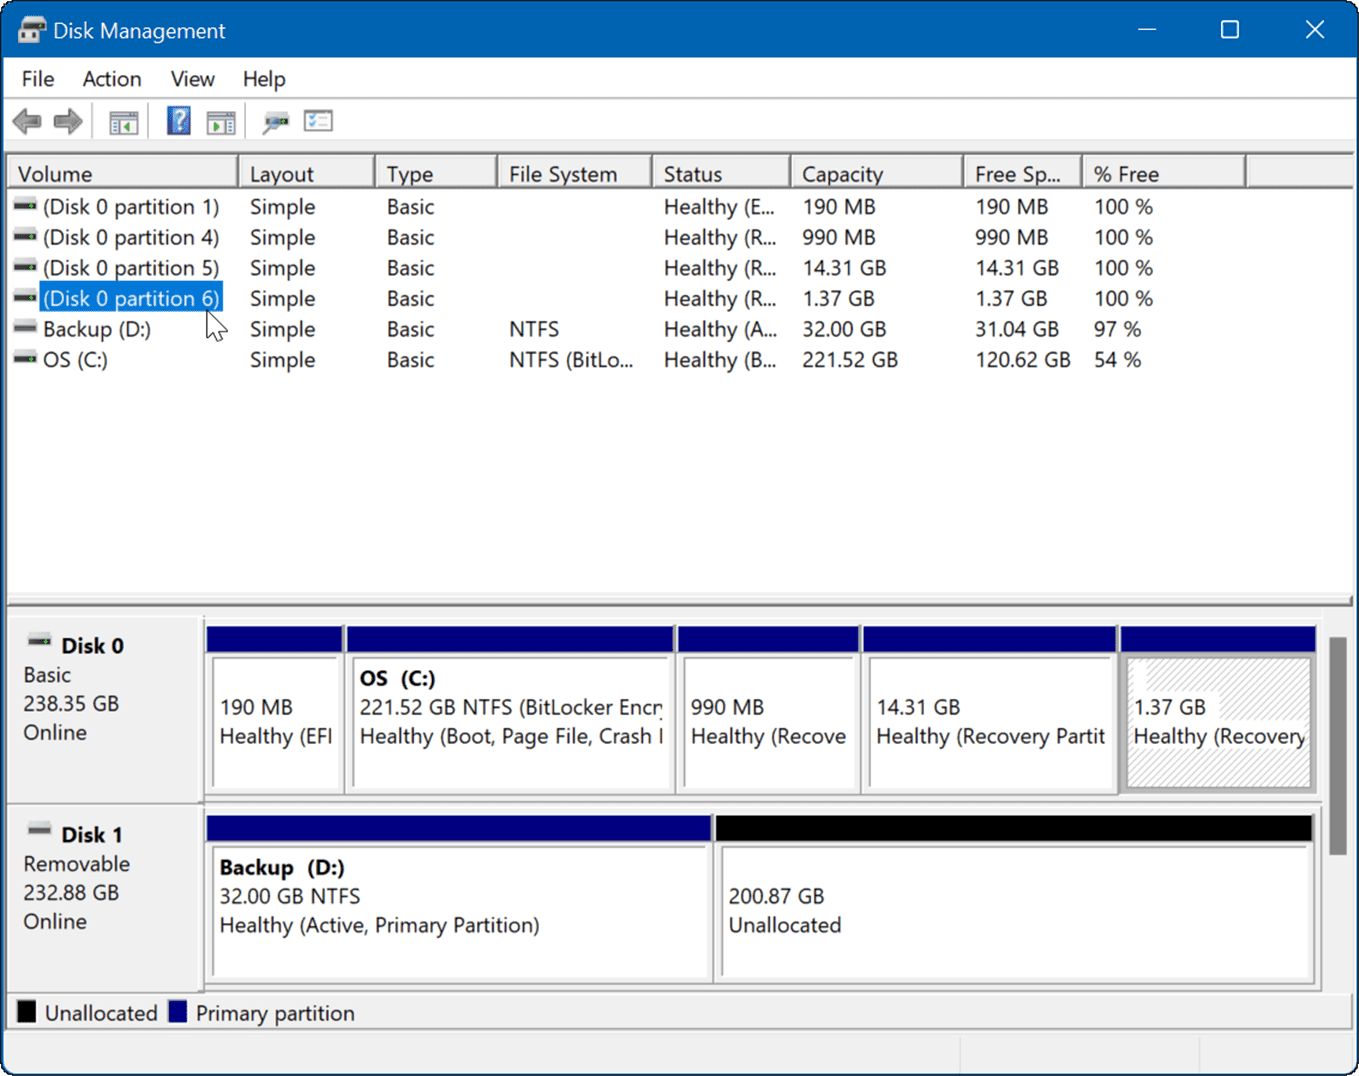
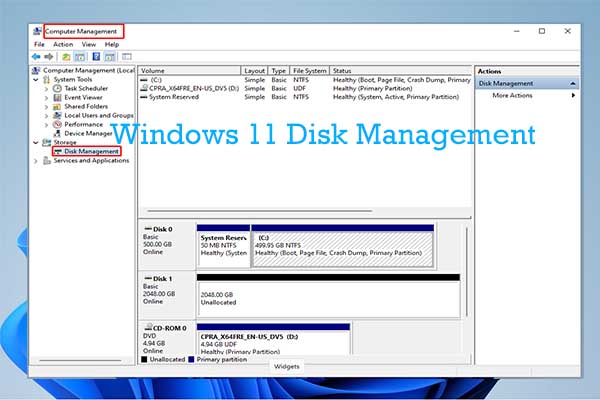
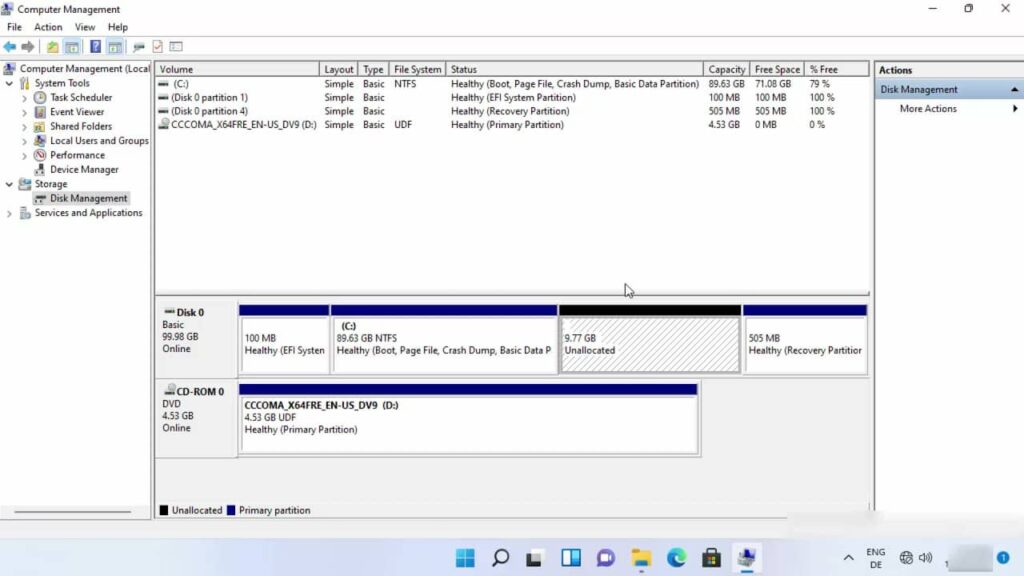
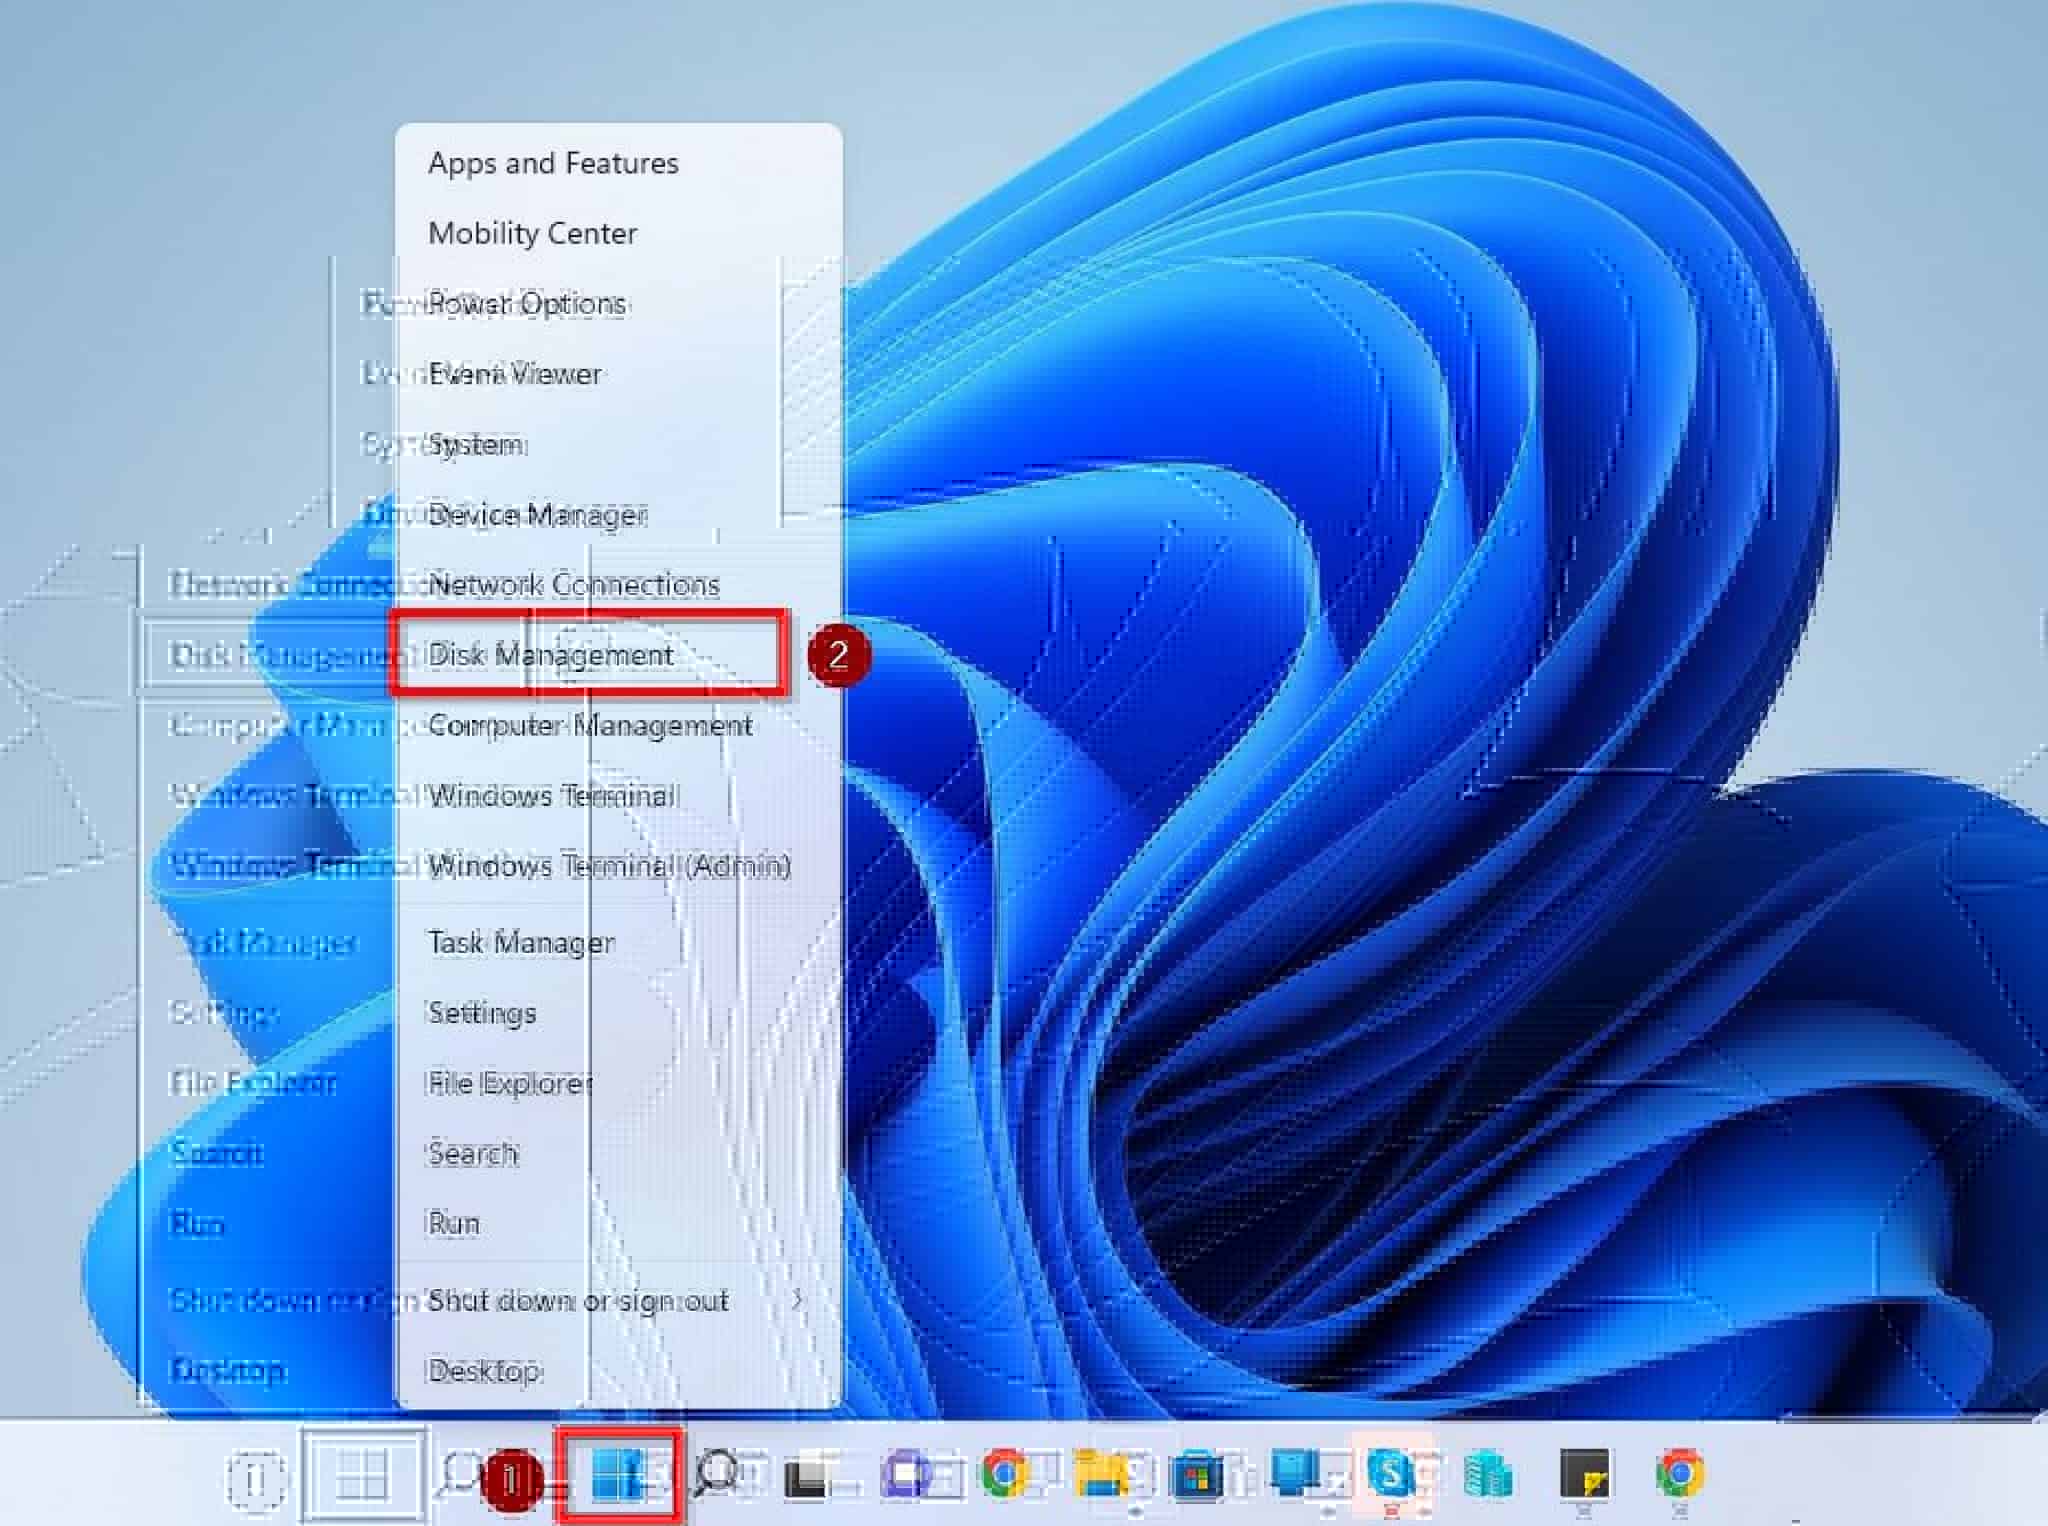
Understanding Device Identifiers: Identifying the correct device identifiers for hard drives and partitions can be confusing for beginners. Windows 11’s disk management tools can be used to determine these identifiers.
-
Risk of Data Loss: Improper use of "dd" can lead to data loss. It is crucial to double-check commands and ensure accurate source and destination specifications before execution.
Frequently Asked Questions (FAQs)
Q1: What are the prerequisites for using dd in Windows 11?
A1: To utilize "dd" in Windows 11, you need to install a Unix-like environment like Cygwin or WSL. These environments provide access to the necessary command-line tools, including "dd".
Q2: How do I determine the correct device identifiers for my hard drives and partitions?
A2: Use the Disk Management tool in Windows 11 to identify the device identifiers. This tool displays a list of connected drives and partitions with their respective identifiers.
Q3: What precautions should I take when using dd to avoid data loss?
A3: Always verify the source and destination specifications before executing any "dd" command. Ensure that you are not overwriting critical data or accidentally deleting partitions. It is also advisable to create backups of important data before performing any major disk operations.
Q4: Can I use dd to recover data from a formatted drive?
A4: While "dd" can read data from formatted drives, it may not be able to recover deleted files. Data recovery software specifically designed for this purpose might be more effective.
Q5: Is dd suitable for beginners?
A5: "dd" is a powerful tool but requires a good understanding of its syntax and potential risks. Beginners should exercise caution and consult reliable resources before attempting complex operations.
Tips for Effective dd Usage in Windows 11
- Start with Simple Commands: Begin with basic commands to familiarize yourself with "dd" syntax and behavior.
- Test Commands on Non-Critical Data: Before applying "dd" to critical drives, test commands on non-essential data to ensure accuracy and prevent accidental data loss.
- Use Small Block Sizes: Smaller block sizes can improve data transfer accuracy, especially when dealing with damaged drives or complex operations.
- Verify Data Integrity: After transferring data, verify its integrity using checksum tools or file comparison utilities to ensure data accuracy.
- Consult Documentation: Refer to the documentation of your chosen Unix-like environment (Cygwin or WSL) for detailed information on "dd" options and usage.
Conclusion
"dd" is a powerful tool that grants users a high level of control over their disk drives. By leveraging its capabilities, users can perform various tasks, including creating disk images, cloning drives, managing partitions, and recovering data. While its use requires careful planning and execution, "dd" remains an invaluable tool for those seeking advanced disk manipulation capabilities within a Windows 11 environment.


Closure
Thus, we hope this article has provided valuable insights into The Power of Disk Manipulation: Exploring the Utility of dd for Windows 11. We hope you find this article informative and beneficial. See you in our next article!