The Art of Time Travel: Understanding System Restore Points in Windows 10
Related Articles: The Art of Time Travel: Understanding System Restore Points in Windows 10
Introduction
With great pleasure, we will explore the intriguing topic related to The Art of Time Travel: Understanding System Restore Points in Windows 10. Let’s weave interesting information and offer fresh perspectives to the readers.
Table of Content
The Art of Time Travel: Understanding System Restore Points in Windows 10
The digital landscape is a constantly evolving terrain. Software updates, driver installations, and even everyday user actions can inadvertently introduce changes that disrupt the smooth functioning of a Windows 10 system. Fortunately, Microsoft provides a powerful tool to navigate these digital pitfalls: System Restore Points.
System Restore Points are snapshots of your computer’s configuration at a specific moment in time. They capture the state of your system files, registry settings, and installed applications, effectively creating a digital time capsule. Should your system encounter issues, you can revert to a previously created restore point, essentially rolling back the clock to a stable configuration.
Understanding the Importance of System Restore Points:
System Restore Points are invaluable for several reasons:
- Reversing Unwanted Changes: If a software update, driver installation, or even a simple user action causes instability or malfunctions, restoring to a previous restore point can swiftly resolve the issue without resorting to a complete system reinstall.
- Recovering from Malware Infections: Malware can wreak havoc on a system, corrupting files and altering settings. A restore point can effectively undo the damage, restoring the system to a clean state before the infection took hold.
- Testing Software or Hardware Changes: Before committing to significant changes like installing new software or upgrading hardware, creating a restore point provides a safety net. If the changes prove incompatible or cause problems, you can easily revert to the previous configuration.
- Preserving System Integrity: System Restore Points act as a safeguard against accidental data loss or system corruption. They provide a reliable way to recover from unexpected events, minimizing downtime and data loss.
Creating System Restore Points: A Step-by-Step Guide:
- Open System Properties: Navigate to the "Start" menu, type "System Properties," and press "Enter."
- Access System Protection: In the "System Properties" window, select the "System Protection" tab.
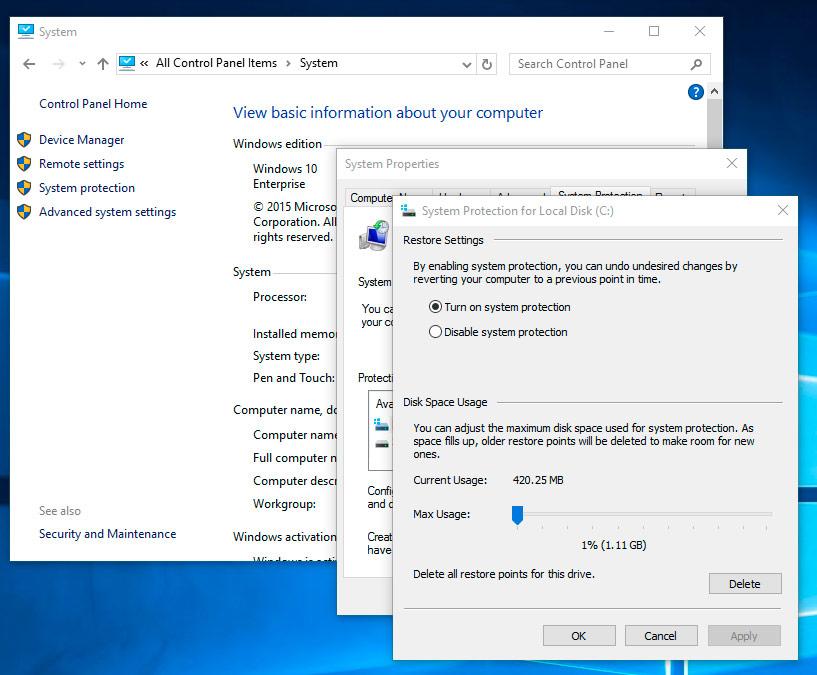
- Configure System Restore: Click on the "Configure" button.
- Enable System Protection: Ensure that the "Turn on system protection" option is selected.
- Adjust Disk Space: Set the maximum disk space you are willing to dedicate to storing restore points.
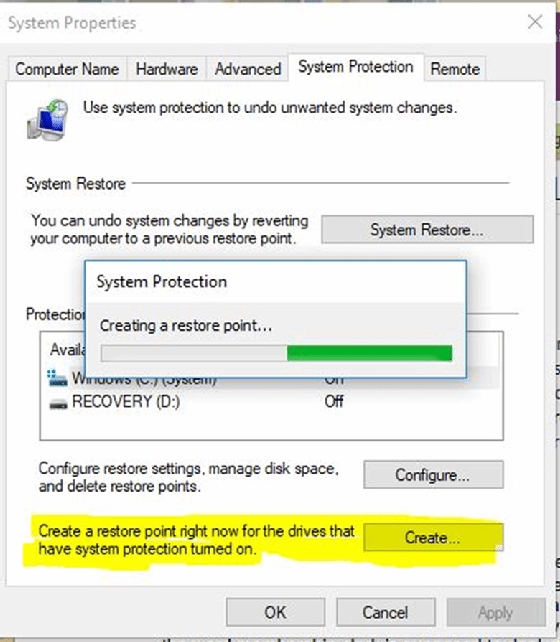
- Create a Restore Point: Click on the "Create" button to manually initiate the creation of a restore point. Assign a descriptive name to easily identify the restore point later.
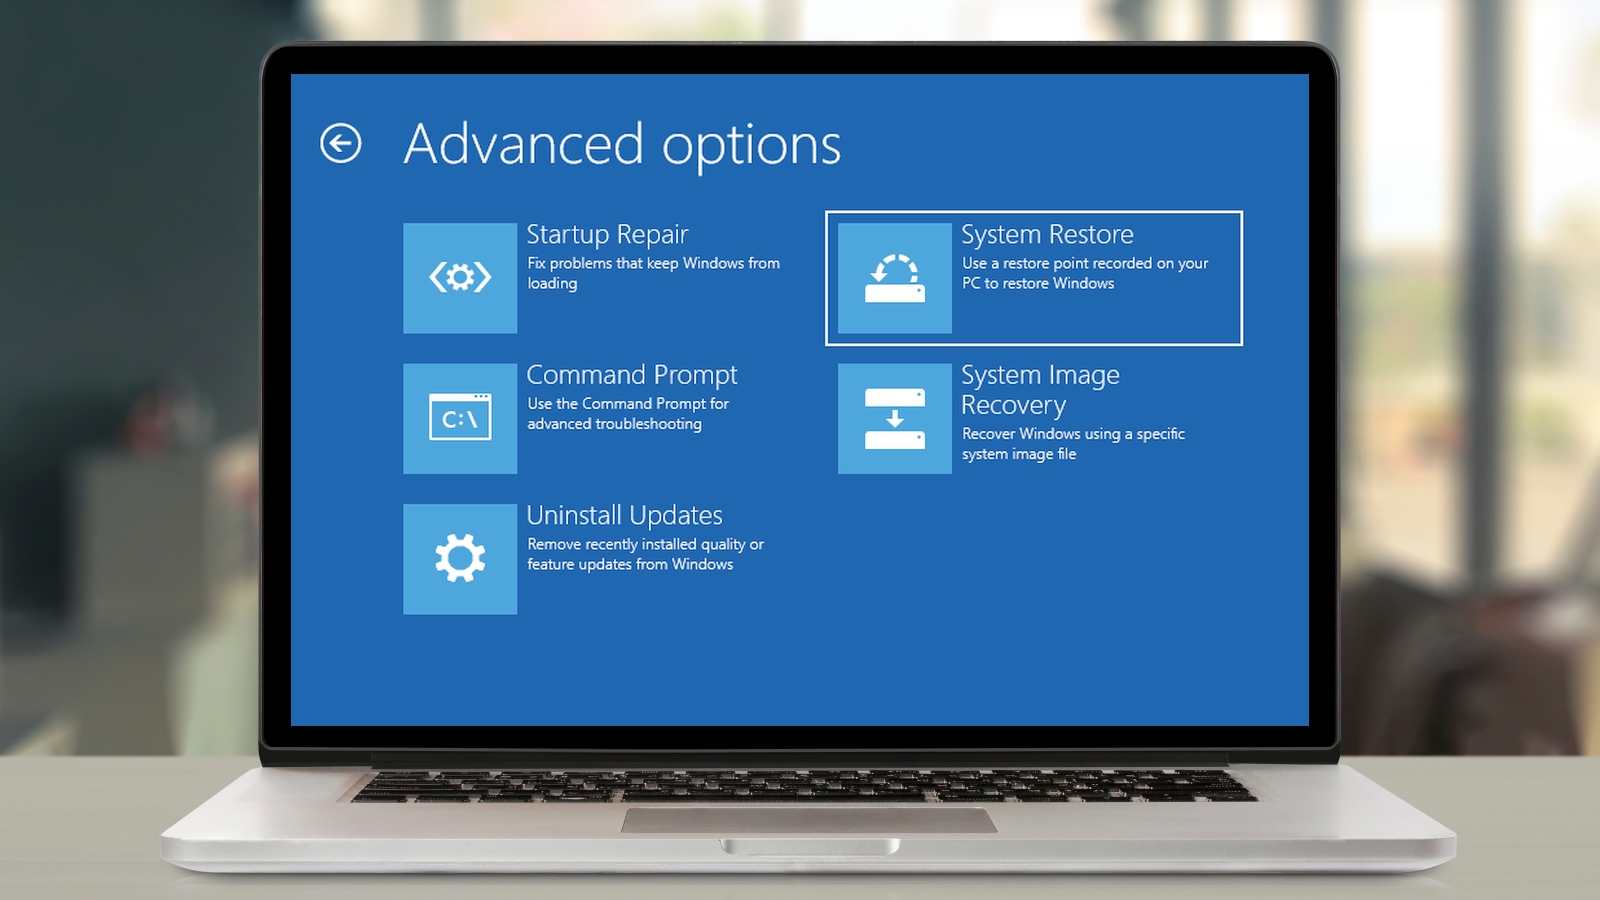
Creating Back-Dated System Restore Points: A Deeper Dive
While the standard method allows you to create restore points at any given moment, there are situations where you might want to create a restore point that appears to be dated in the past. While this might seem impossible, there are some techniques that can be employed, though they require advanced knowledge and potentially involve modifying system files.
Important Disclaimer: Modifying system files or using techniques that alter the date and time of system events can be risky. Proceed with caution and only if you are confident in your technical abilities.
Potential Techniques:
- Time Machine Software: Some third-party software claims to manipulate system time and create back-dated restore points. However, their effectiveness and reliability vary, and using them may come with risks.
- Manual Registry Modification: Advanced users can manually modify registry keys related to system time and restore points. However, this method is complex and requires a deep understanding of the registry structure. Any incorrect modification can lead to system instability or data loss.
FAQs Regarding System Restore Points
Q: How often should I create system restore points?
A: The frequency of creating restore points depends on your usage patterns. It is recommended to create them before major system changes, such as installing new software, updating drivers, or performing significant hardware upgrades. You can also schedule automatic creation of restore points at regular intervals.
Q: How much disk space do restore points consume?
A: The amount of disk space used by restore points depends on the size of your system files and the number of restore points created. You can adjust the maximum disk space allocated to restore points in the System Protection settings.
Q: Can I delete restore points?
A: Yes, you can delete restore points to free up disk space. However, it is advisable to keep at least one recent restore point in case of unexpected issues.
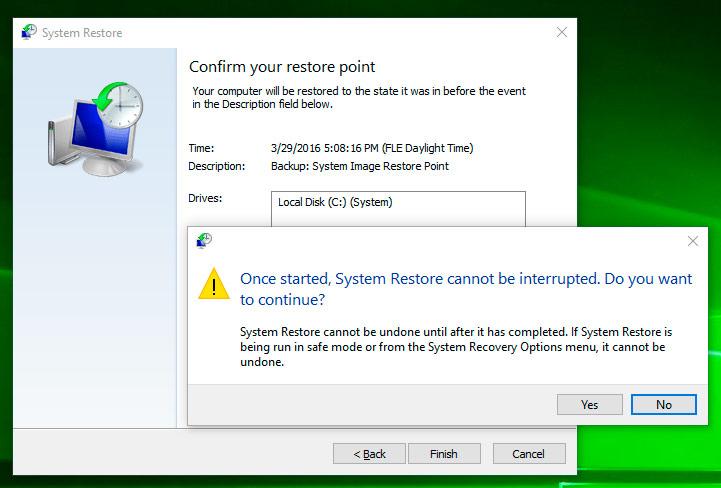
Q: What happens when I restore my system to a previous restore point?
A: Restoring to a previous restore point reverts your system files, registry settings, and installed applications to the state they were in at the time the restore point was created. Any changes made after the restore point creation will be lost.
Tips for Effective System Restore Point Management
- Regularly Create Restore Points: Make it a habit to create restore points before significant system changes, such as installing new software, updating drivers, or making hardware modifications.
- Assign Descriptive Names: When creating a restore point, give it a descriptive name that clearly indicates the purpose or the event that triggered its creation. This will help you easily identify the relevant restore point later.
- Monitor Disk Space: Keep an eye on the amount of disk space consumed by restore points. You can delete older restore points to free up space if necessary.
- Test Restore Points: Occasionally, test a restore point to ensure it works correctly. This will give you confidence that you can successfully recover from system issues.
- Keep a Backup: While system restore points provide a safety net, it is crucial to have a comprehensive backup of your important data, such as documents, photos, and videos. This backup should be stored on a separate device, such as an external hard drive or cloud storage service.
Conclusion:
System Restore Points are a powerful tool that empowers Windows 10 users to navigate the complexities of digital life with confidence. They provide a safety net against unexpected system issues, enabling quick recovery and minimizing downtime. By understanding the importance of system restore points, creating them regularly, and managing them effectively, you can ensure the stability and resilience of your Windows 10 system, safeguarding your data and maintaining a smooth digital experience.
:format(webp)/cdn.vox-cdn.com/uploads/chorus_asset/file/19993846/restore_point_5__1_.png)


Closure
Thus, we hope this article has provided valuable insights into The Art of Time Travel: Understanding System Restore Points in Windows 10. We appreciate your attention to our article. See you in our next article!