Securing Windows 10: Understanding and Enabling LSA Protection
Related Articles: Securing Windows 10: Understanding and Enabling LSA Protection
Introduction
With enthusiasm, let’s navigate through the intriguing topic related to Securing Windows 10: Understanding and Enabling LSA Protection. Let’s weave interesting information and offer fresh perspectives to the readers.
Table of Content
Securing Windows 10: Understanding and Enabling LSA Protection

In the digital landscape, where threats are constantly evolving, ensuring the security of your Windows 10 operating system is paramount. One crucial aspect of this security is the Local Security Authority (LSA), a core component responsible for managing user authentication, access control, and security policies. This article delves into the significance of LSA protection, exploring its functionality, benefits, and how to effectively enable it on your Windows 10 machine.
What is LSA Protection?
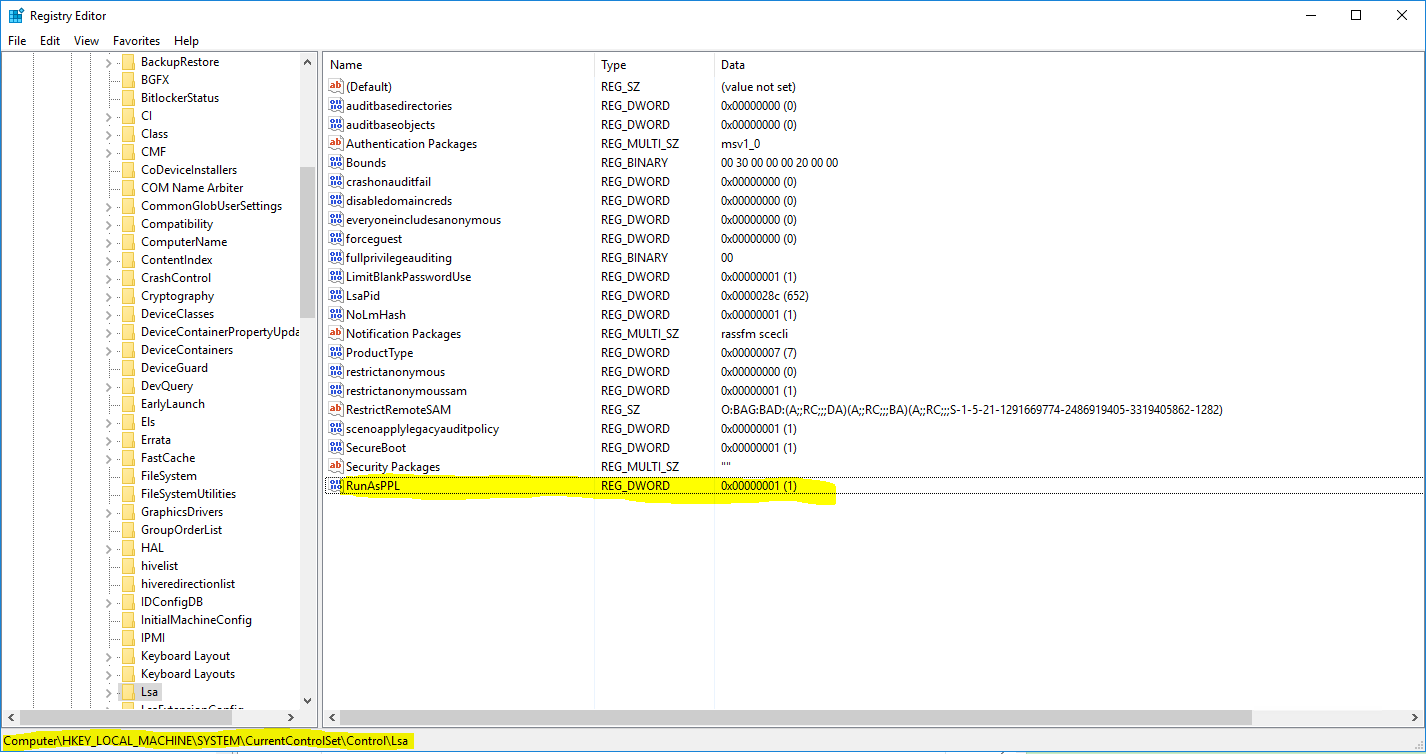
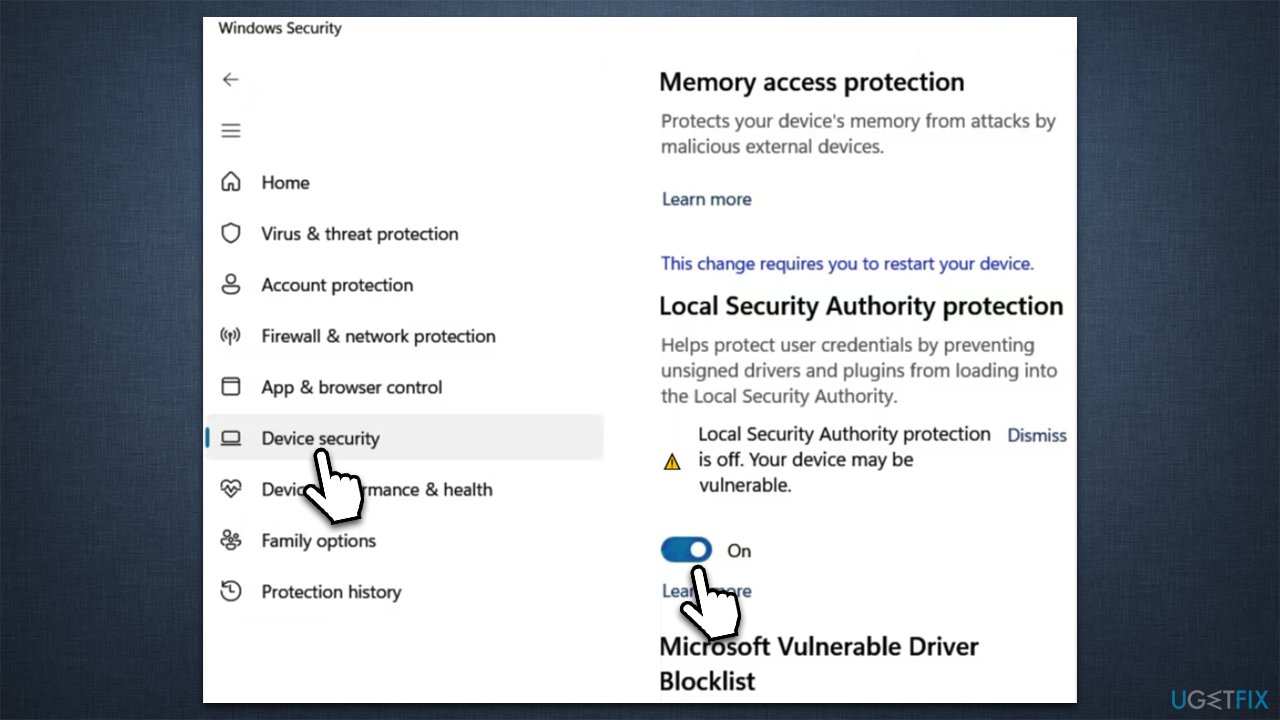
The LSA is a vital part of Windows 10, acting as the central authority for security-related decisions. LSA Protection, also known as "Local Security Authority Protection," is a security feature designed to safeguard the LSA from unauthorized access and manipulation. It achieves this by running the LSA process in a more secure environment, isolated from other processes and users.
Why is LSA Protection Important?
LSA Protection plays a critical role in enhancing Windows 10 security by:
- Preventing unauthorized access: By isolating the LSA process, it becomes significantly harder for malicious actors to gain access to sensitive data and manipulate security settings. This is particularly important as the LSA controls access to critical resources, including user accounts, passwords, and system files.
- Minimizing attack surface: LSA Protection reduces the potential attack surface by limiting the ways in which attackers can exploit vulnerabilities. By running the LSA in a protected environment, it becomes less susceptible to attacks that target the process directly.
- Strengthening overall security posture: Enabling LSA Protection acts as a strong security measure, significantly bolstering the overall security posture of your Windows 10 system. It helps to prevent unauthorized access, maintain data integrity, and protect against potential breaches.
Understanding the Mechanisms of LSA Protection
LSA Protection leverages two primary mechanisms to achieve its security goals:
- Protected Process Light (PPL): PPL is a technology that allows critical system processes, such as the LSA, to run in a more secure environment. It effectively isolates the process from other users and processes, making it less vulnerable to attacks.
- Least Privilege Principle: The principle of least privilege dictates that processes should only have the minimum permissions necessary to perform their tasks. LSA Protection adheres to this principle by restricting the permissions of the LSA process, minimizing the potential impact of a successful attack.
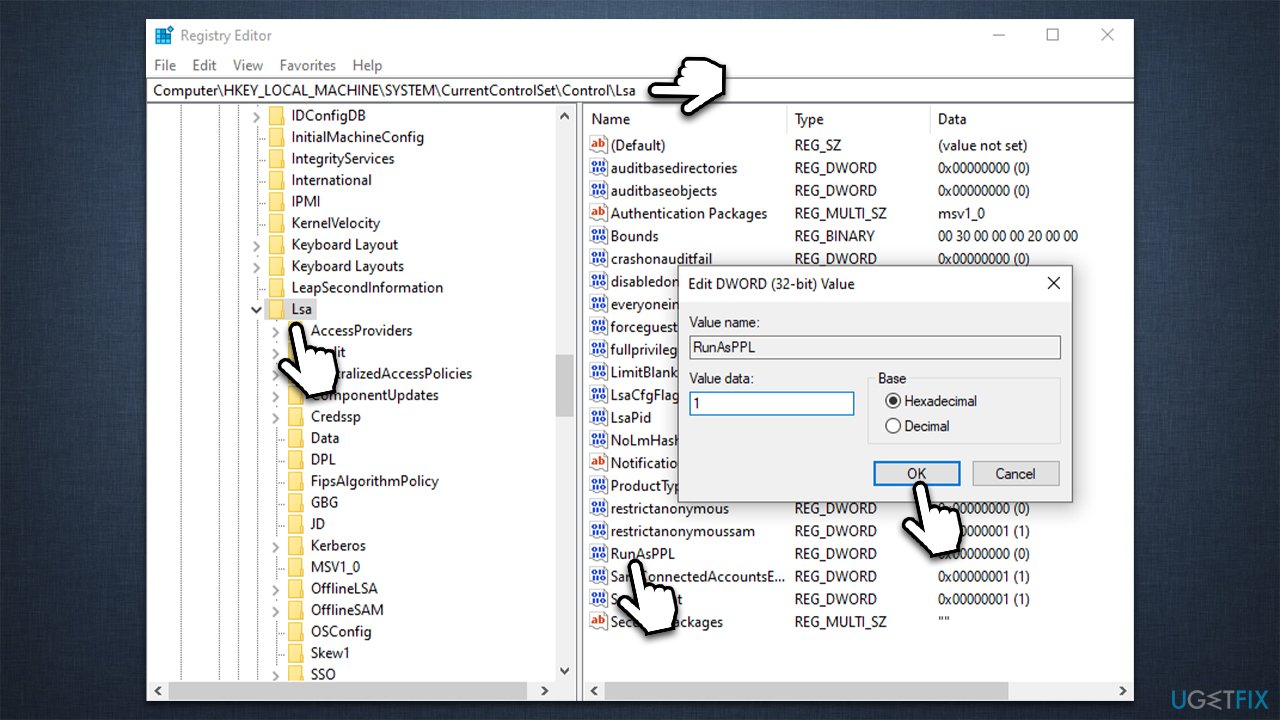
Enabling LSA Protection in Windows 10
Enabling LSA Protection in Windows 10 is a straightforward process:
- Open Local Group Policy Editor: Press the Windows key + R to open the Run dialog box, type "gpedit.msc" and press Enter.
- Navigate to the relevant policy: In the Local Group Policy Editor, navigate to Computer Configuration > Windows Settings > Security Settings > Local Policies > Security Options.
- Locate the LSA Protection policy: Look for the policy named "Network security: Restrict NTLM: Server use of NTLMv2 session security".
- Enable the policy: Double-click the policy and select "Enabled".
- Apply and exit: Click "Apply" and "OK" to save the changes.
Troubleshooting and Considerations
While enabling LSA Protection is generally recommended, there are a few things to consider:
- Compatibility: Ensure that the applications and services you rely on are compatible with LSA Protection. Some older applications might not function correctly with this feature enabled.
- Impact on performance: While the performance impact of LSA Protection is minimal, it might slightly affect the overall system performance.
- Rebooting: After enabling LSA Protection, it’s recommended to restart your computer for the changes to take effect.
Frequently Asked Questions
Q: What are the risks of not enabling LSA Protection?
A: Not enabling LSA Protection exposes your Windows 10 system to increased security risks. It makes the LSA process vulnerable to attacks, potentially allowing attackers to gain unauthorized access to sensitive data, manipulate security settings, and compromise the entire system.
Q: Does enabling LSA Protection require any special hardware or software?
A: No, enabling LSA Protection does not require any special hardware or software. It is a built-in feature of Windows 10.
Q: Will enabling LSA Protection impact the performance of my applications?
A: The performance impact of enabling LSA Protection is typically minimal. However, some applications, especially older ones, might experience slight performance degradation.
Q: Can I disable LSA Protection if I need to?
A: Yes, you can disable LSA Protection if you encounter compatibility issues or performance problems. However, it is strongly recommended to keep it enabled for optimal security.
Tips for Enhancing Security
- Keep your operating system up to date: Regularly update your Windows 10 system with the latest security patches and updates to address known vulnerabilities.
- Use strong passwords: Choose strong and unique passwords for your user accounts and avoid reusing passwords across different services.
- Enable multi-factor authentication: Implement multi-factor authentication wherever possible to add an extra layer of security to your accounts.
- Be cautious of suspicious emails and links: Avoid clicking on suspicious links or opening attachments from unknown senders.
- Install reputable antivirus software: Install and regularly update a reputable antivirus software to protect your system from malware.
Conclusion
Enabling LSA Protection is a critical step in securing your Windows 10 system. By isolating the LSA process and reducing its attack surface, it significantly strengthens the overall security posture of your machine. While it is generally recommended, it’s important to consider potential compatibility issues and performance impacts. By taking proactive steps to enhance security, including enabling LSA Protection and following best practices, you can significantly reduce the risk of cyberattacks and protect your sensitive data.


Closure
Thus, we hope this article has provided valuable insights into Securing Windows 10: Understanding and Enabling LSA Protection. We thank you for taking the time to read this article. See you in our next article!