Safeguarding Your Windows 10: A Comprehensive Guide to System Restore Points
Related Articles: Safeguarding Your Windows 10: A Comprehensive Guide to System Restore Points
Introduction
With enthusiasm, let’s navigate through the intriguing topic related to Safeguarding Your Windows 10: A Comprehensive Guide to System Restore Points. Let’s weave interesting information and offer fresh perspectives to the readers.
Table of Content
- 1 Related Articles: Safeguarding Your Windows 10: A Comprehensive Guide to System Restore Points
- 2 Introduction
- 3 Safeguarding Your Windows 10: A Comprehensive Guide to System Restore Points
- 3.1 Understanding System Restore Points
- 3.2 The Importance of System Restore Points
- 3.3 Creating a System Restore Point Manually
- 3.4 Navigating System Restore Points: Finding the Right One
- 3.5 System Restore: A Step-by-Step Guide
- 3.6 FAQs: Addressing Common Concerns
- 3.7 Tips for Effective System Restore Usage
- 3.8 Conclusion: Empowering Your System’s Resilience
- 4 Closure
Safeguarding Your Windows 10: A Comprehensive Guide to System Restore Points
In the dynamic world of computing, unforeseen circumstances can disrupt the smooth functioning of your Windows 10 system. A faulty driver installation, a malicious software attack, or even a simple configuration error can lead to performance issues, data loss, or even system instability. Fortunately, Windows 10 offers a built-in safety net: System Restore Points. These snapshots of your system’s configuration allow you to revert to a previous state, effectively undoing the changes that caused the problem.
Understanding System Restore Points
A System Restore Point is a snapshot of your computer’s critical system files, registry settings, and program installations. It captures the state of your system at a particular moment in time, allowing you to roll back to that configuration if needed. These restore points are created automatically by Windows 10 at certain intervals, such as before major system updates or after driver installations.
The Importance of System Restore Points
System Restore Points serve as a crucial safety net for your Windows 10 system, providing several significant benefits:
- Reversing Unwanted Changes: If a software update or driver installation causes problems, restoring to a previous state can quickly resolve the issue without reinstalling the entire operating system.
- Recovering from Malware Attacks: Malicious software can wreak havoc on your computer, corrupting files, altering settings, and even disabling security measures. System Restore can help reverse these changes and restore your system to a clean state.
- Troubleshooting System Errors: When encountering unexplained system errors or crashes, restoring to a previous restore point can help isolate the cause of the problem, facilitating troubleshooting.
- Protecting Critical Data: System Restore can help prevent data loss in situations where system files become corrupted or inaccessible.
Creating a System Restore Point Manually
While Windows 10 automatically creates System Restore Points, it is highly recommended to manually create them before significant changes to your system, ensuring a safety net for your efforts. Here’s how to create a System Restore Point manually:
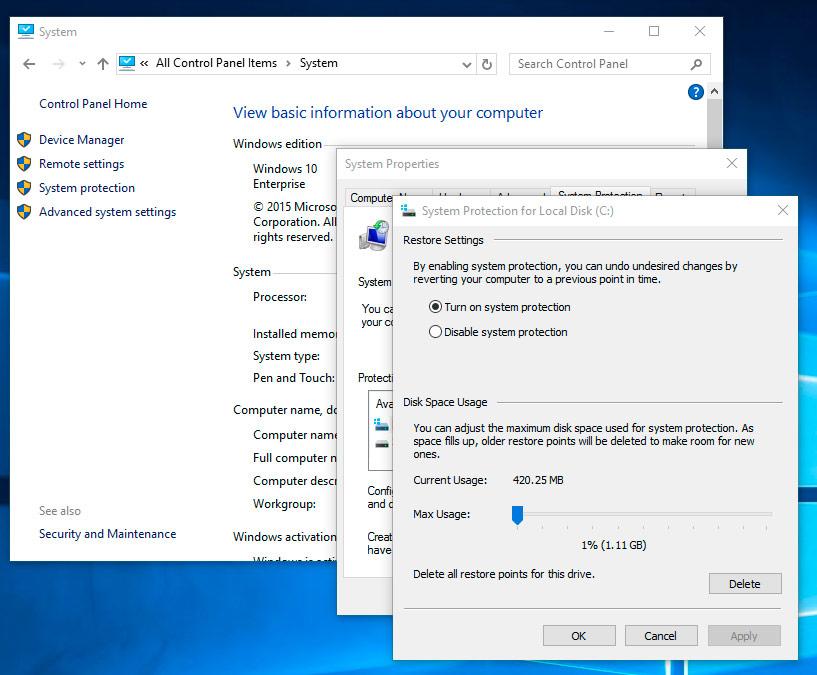
- Open the Control Panel: Click the Windows Start button, type "Control Panel," and select it from the results.
- Navigate to System and Security: Within the Control Panel, click on "System and Security."
- Select System: Click on "System" to access the system settings.
- Choose System Protection: In the System window, click on "System Protection" in the left-hand menu.
- Create a Restore Point: Click the "Create" button in the System Protection window. Provide a descriptive name for the restore point and click "Create."
Navigating System Restore Points: Finding the Right One
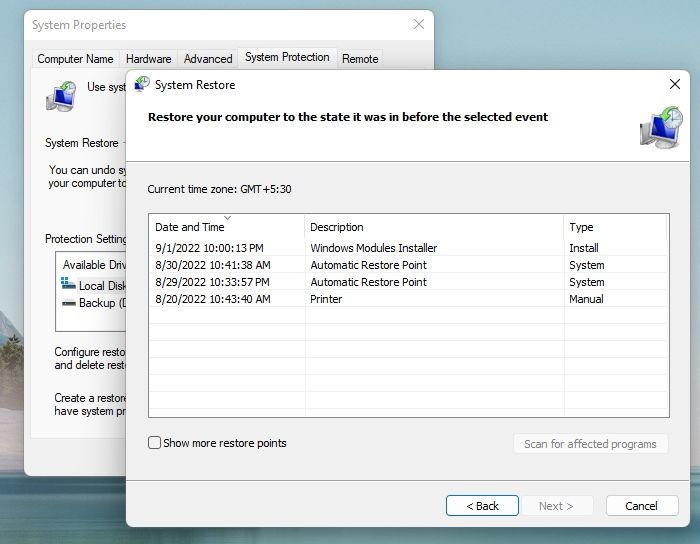
Windows 10 stores multiple System Restore Points, each representing a different state of your system. To effectively use System Restore, you need to be able to identify the relevant restore point for your situation.
- Review the Restore Point List: When you initiate System Restore, Windows 10 presents a list of available restore points. This list displays the date and time of each restore point, along with a brief description.
- Identify the Appropriate Restore Point: Carefully review the list and select the restore point that corresponds to the time period before the issue arose.
- Consider the Impact of Restoration: Restoring to a specific point will revert your system to that exact configuration, potentially removing changes made since that point. It’s crucial to choose the restore point that aligns with your recovery needs.
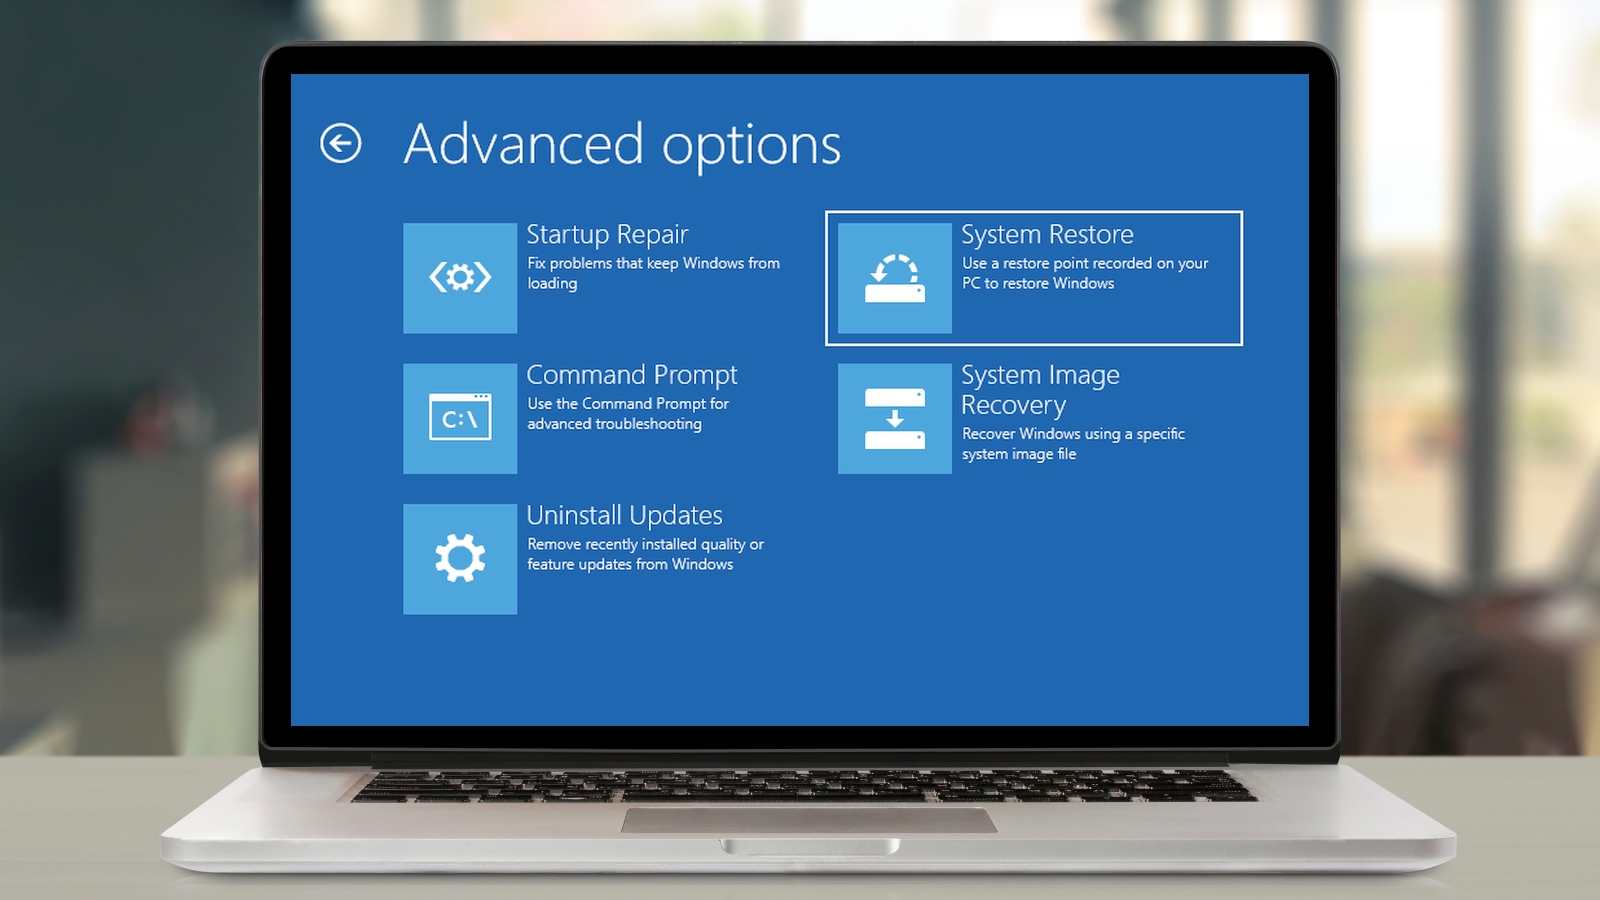
System Restore: A Step-by-Step Guide
Once you’ve identified the appropriate restore point, you can initiate the system restore process. This involves the following steps:
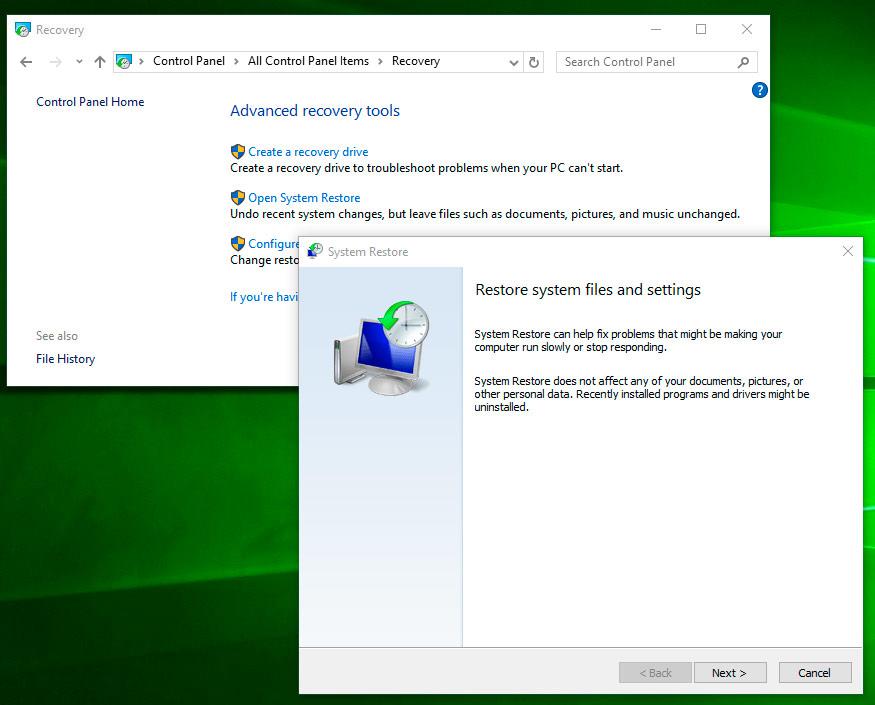
- Access System Restore: Open the Control Panel and navigate to "System and Security." Click on "System" and then "System Protection."
- Initiate System Restore: Click the "System Restore" button in the System Protection window.
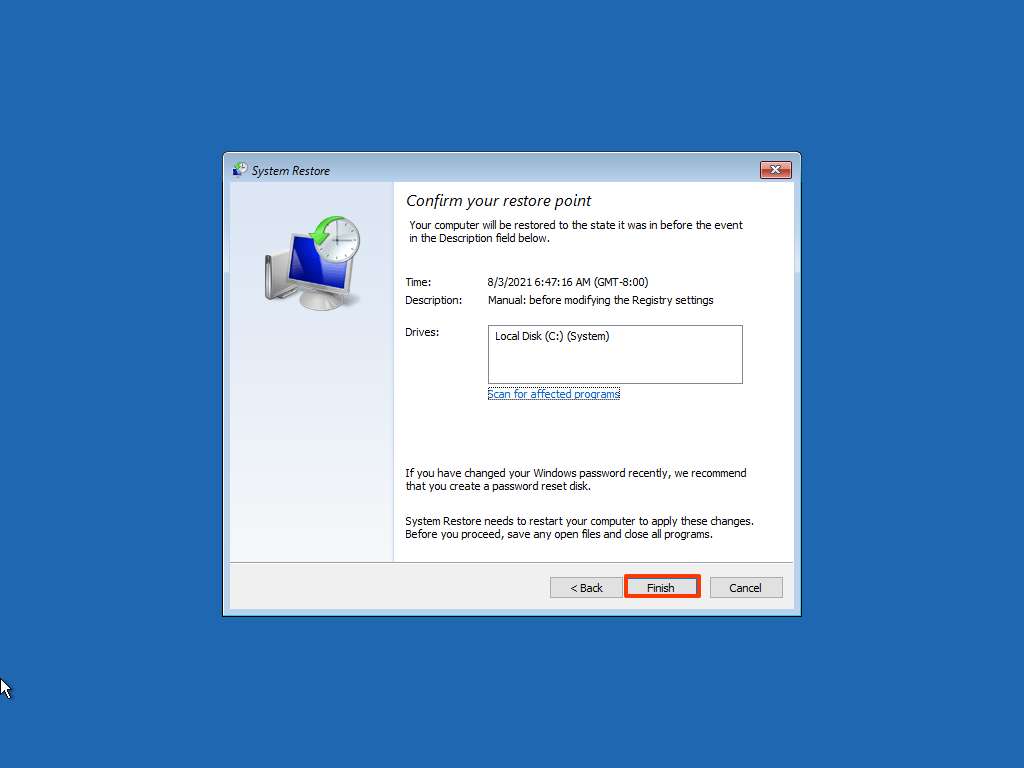
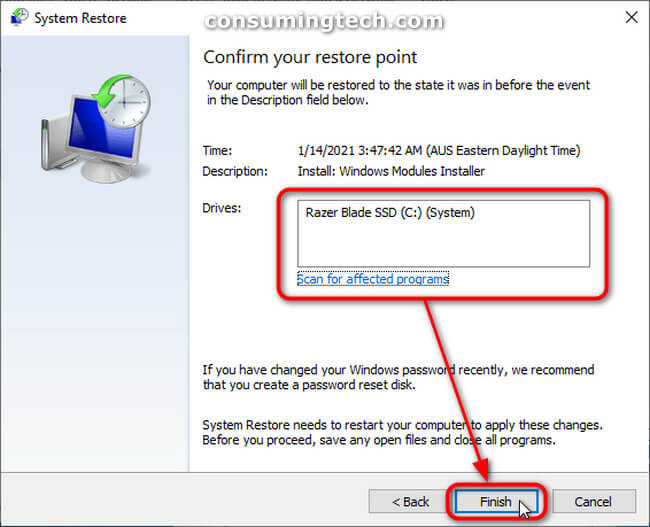
- Choose a Restore Point: Select the desired restore point from the list and click "Next."
- Confirm and Initiate Restoration: Review the selected restore point and click "Finish" to initiate the restoration process.
- Restart Your Computer: After the restoration process completes, your computer will restart.
FAQs: Addressing Common Concerns
Q: Will System Restore Delete My Personal Files?
A: System Restore primarily focuses on system files and settings. It does not affect personal files, such as documents, photos, and music. However, it’s always recommended to back up your important data regularly as a precautionary measure.
Q: Can I Undo a System Restore?
A: While System Restore is designed to reverse changes, it does not create a backup of the current state. Therefore, undoing a System Restore is not directly possible. However, you can create a new restore point after the restoration process to preserve the current state.
Q: How Many Restore Points Should I Keep?
A: Windows 10 automatically manages the number of restore points, ensuring sufficient disk space is available. However, you can manually delete older restore points if needed to free up disk space.
Q: What if System Restore Doesn’t Work?
A: If System Restore fails to resolve the issue, you may need to consider other troubleshooting options, such as a clean installation of Windows 10.
Tips for Effective System Restore Usage
- Regularly Create Restore Points: Before making significant changes to your system, such as installing new software or updating drivers, create a restore point to ensure a safe fallback option.
- Keep Track of Restore Point Dates: Make note of the dates and times of your restore points, particularly after major system changes or installations.
- Back Up Your Data: System Restore focuses on system files and settings, not personal data. Regularly back up your important files to an external drive or cloud storage service.
- Test Your Restore Points: Periodically test your restore points by initiating a restore process to a previous point. This ensures your restore points are functioning correctly.
Conclusion: Empowering Your System’s Resilience
System Restore Points are a vital tool for protecting your Windows 10 system from unforeseen issues. By creating and utilizing restore points effectively, you can safeguard your system’s stability and prevent data loss. Remember to create restore points regularly, especially before significant system changes, and always maintain backups of your important data. This proactive approach empowers you to navigate the complexities of computing with confidence, knowing that you have a reliable safety net in place.


:format(webp)/cdn.vox-cdn.com/uploads/chorus_asset/file/19993846/restore_point_5__1_.png)
Closure
Thus, we hope this article has provided valuable insights into Safeguarding Your Windows 10: A Comprehensive Guide to System Restore Points. We appreciate your attention to our article. See you in our next article!