Safeguarding Your Laptop: A Guide to System Restore Points in Windows 10
Related Articles: Safeguarding Your Laptop: A Guide to System Restore Points in Windows 10
Introduction
With great pleasure, we will explore the intriguing topic related to Safeguarding Your Laptop: A Guide to System Restore Points in Windows 10. Let’s weave interesting information and offer fresh perspectives to the readers.
Table of Content
- 1 Related Articles: Safeguarding Your Laptop: A Guide to System Restore Points in Windows 10
- 2 Introduction
- 3 Safeguarding Your Laptop: A Guide to System Restore Points in Windows 10
- 3.1 Understanding System Restore Points
- 3.2 The Importance of System Restore Points
- 3.3 Creating a System Restore Point in Windows 10
- 3.4 Tips for Effective System Restore Point Management
- 3.5 FAQs about System Restore Points
- 3.6 Conclusion
- 4 Closure
Safeguarding Your Laptop: A Guide to System Restore Points in Windows 10
In the digital age, laptops have become indispensable tools for work, communication, and entertainment. However, they are also susceptible to various issues, from software glitches to accidental file deletions. To mitigate these potential problems, Windows 10 offers a powerful tool: system restore points. These snapshots of your system’s configuration act as a safety net, allowing you to revert to a previous state if necessary.
Understanding System Restore Points
A system restore point is essentially a snapshot of your laptop’s configuration at a specific moment. It captures the state of your system files, registry settings, and installed programs. This snapshot is stored on your hard drive and can be used to restore your laptop to that specific state.
The Importance of System Restore Points
System restore points are crucial for several reasons:
- Recovering from Software Issues: If a software update or installation causes problems, you can use a restore point to revert to a working state before the issue arose.
- Undoing Accidental Changes: If you accidentally delete important files, change system settings, or install unwanted software, a restore point allows you to undo these changes.
- Protecting Against Malware: Malicious software can often corrupt system files or install unwanted programs. A restore point can help you clean up your system and remove malware.
- Preparing for Hardware Changes: Before making significant hardware changes, such as installing a new hard drive, it’s advisable to create a restore point. This allows you to revert to your previous configuration if the changes are unsuccessful.
Creating a System Restore Point in Windows 10
Creating a system restore point in Windows 10 is a straightforward process:
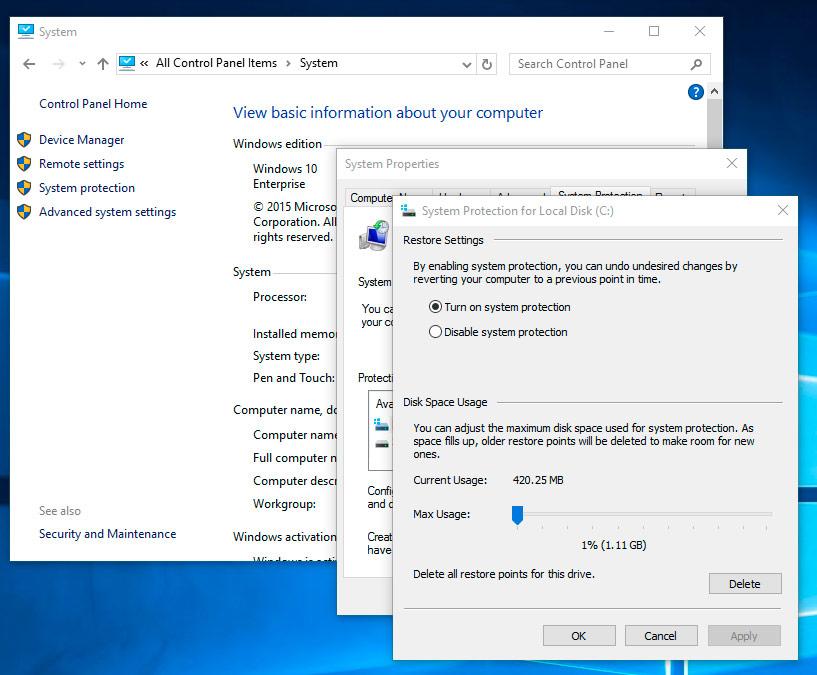
- Open the Control Panel: Click the Windows Start button, type "Control Panel," and select the "Control Panel" app.
- Navigate to System and Security: In the Control Panel, click on "System and Security."
- Select System: Under "System and Security," click on "System."
- Access System Protection: In the System window, click on "System protection" in the left pane.
- Create a Restore Point: In the System Protection window, click on the "Create" button.
- Name the Restore Point: Provide a descriptive name for the restore point, indicating the reason for its creation. This will help you identify it later.
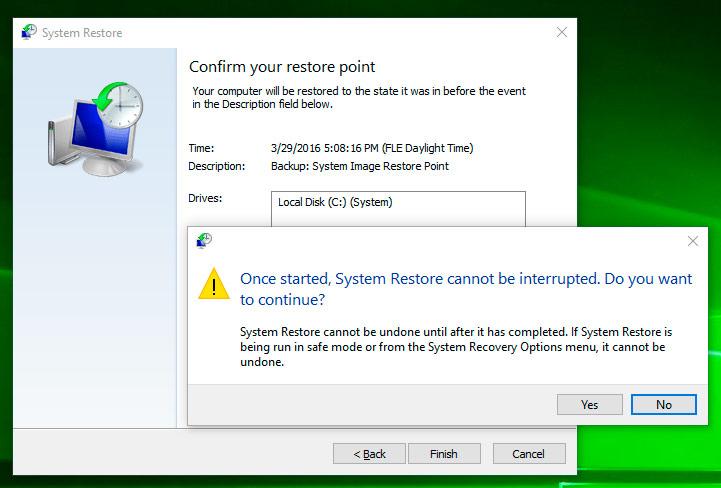
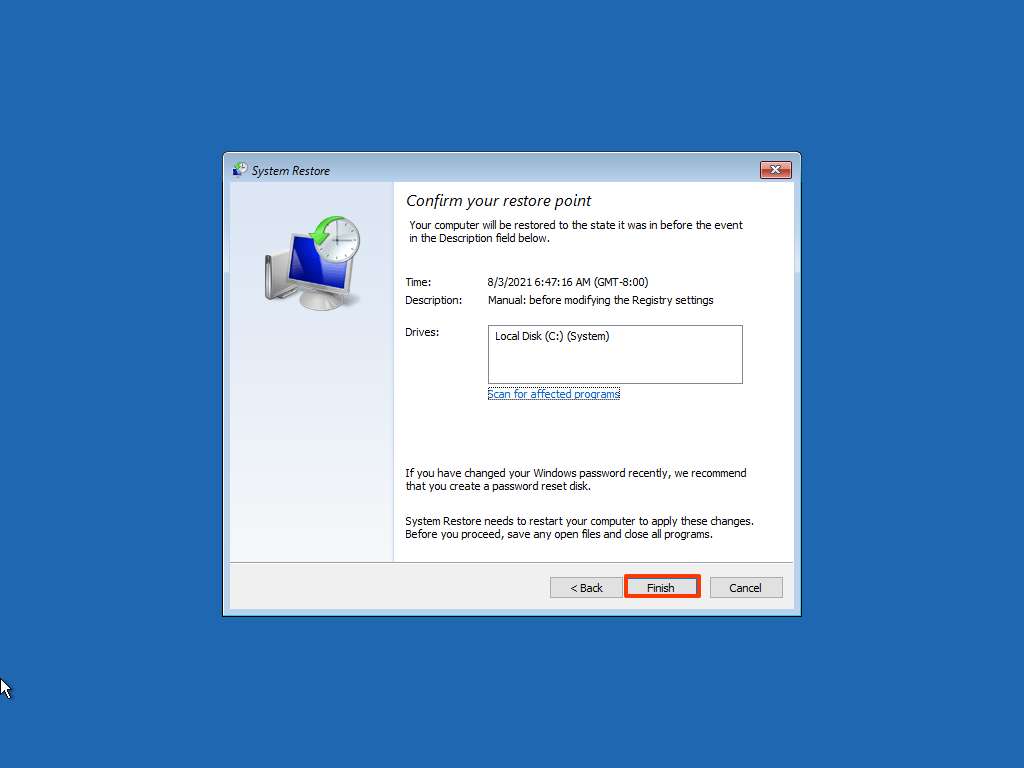
- Confirm Creation: Click on the "Create" button to confirm the creation of the restore point.
Windows will then create the restore point, which will be saved on your hard drive.
Tips for Effective System Restore Point Management
- Regular Creation: It is recommended to create restore points regularly, especially before installing new software, making significant system changes, or performing hardware upgrades.
- Descriptive Naming: Use descriptive names for your restore points, such as "Before New Software Installation" or "After Hardware Upgrade." This will help you easily identify the relevant restore point when needed.
- Storage Space Considerations: System restore points can take up significant disk space. Regularly review and delete older restore points to manage storage space.
- Understanding Limitations: System restore points do not back up your personal files. It’s important to have a separate backup solution for your important data.
FAQs about System Restore Points
Q: What happens to my files when I restore my system?
A: System restore points do not back up your personal files. Restoring your system to a previous state will not affect your personal files.
Q: Can I restore my system to a point created on a different computer?
A: No, you cannot restore your system to a restore point created on a different computer.
Q: How do I know if my system restore is working?
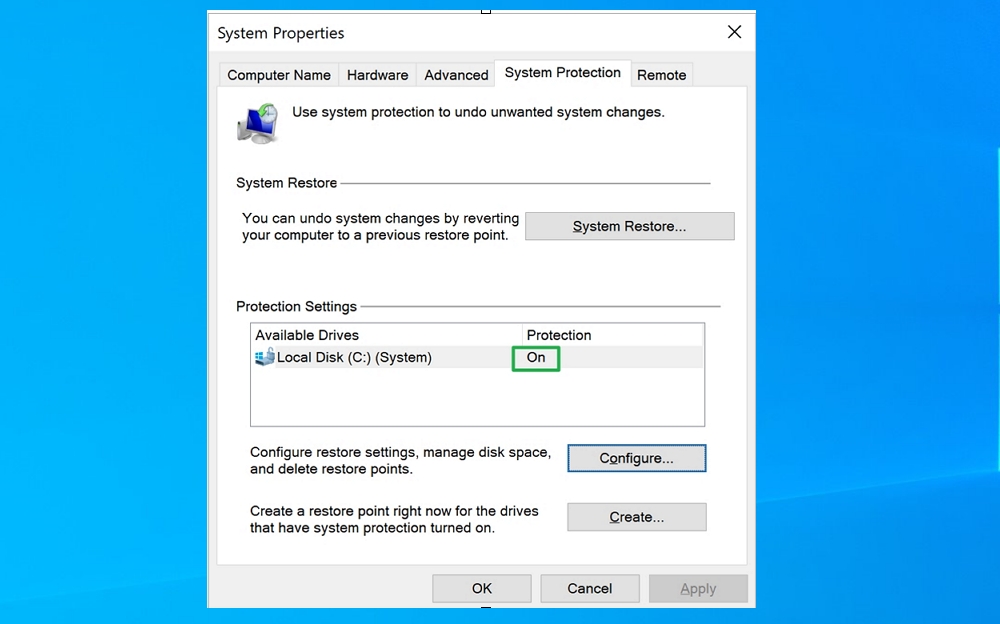
A: You can check the status of system restore by opening the "System Protection" window in the Control Panel. If the "Protection" status is "On," system restore is working.
Q: Can I delete system restore points?
A: Yes, you can delete system restore points. To do so, open the "System Protection" window, select the drive you want to manage, and click on the "Delete" button.
Q: What if I accidentally delete all my restore points?
A: If you accidentally delete all your restore points, you can create new ones. However, you will not be able to restore your system to a point before the deletion.
Conclusion
System restore points are a valuable tool for protecting your laptop and ensuring its stability. By creating and managing them effectively, you can mitigate the risks of software issues, accidental changes, and malware infections. Remember that while system restore points are a powerful tool, they should not be considered a replacement for regular data backups. Always back up your important data to ensure its safety.
:format(webp)/cdn.vox-cdn.com/uploads/chorus_asset/file/19993846/restore_point_5__1_.png)


Closure
Thus, we hope this article has provided valuable insights into Safeguarding Your Laptop: A Guide to System Restore Points in Windows 10. We appreciate your attention to our article. See you in our next article!