Safeguarding Your Digital World: Understanding System Restore Points in Windows 10
Related Articles: Safeguarding Your Digital World: Understanding System Restore Points in Windows 10
Introduction
With enthusiasm, let’s navigate through the intriguing topic related to Safeguarding Your Digital World: Understanding System Restore Points in Windows 10. Let’s weave interesting information and offer fresh perspectives to the readers.
Table of Content
- 1 Related Articles: Safeguarding Your Digital World: Understanding System Restore Points in Windows 10
- 2 Introduction
- 3 Safeguarding Your Digital World: Understanding System Restore Points in Windows 10
- 3.1 The Essence of a System Restore Point
- 3.2 When to Create a System Restore Point
- 3.3 Creating a System Restore Point in Windows 10
- 3.4 Utilizing System Restore Points
- 3.5 The Importance of System Restore Points
- 3.6 Frequently Asked Questions (FAQs)
- 3.7 Tips for Effective System Restore Point Management
- 3.8 Conclusion
- 4 Closure
Safeguarding Your Digital World: Understanding System Restore Points in Windows 10
In the dynamic landscape of digital technology, where software updates, driver installations, and unforeseen events can potentially disrupt the smooth operation of your computer, a system restore point serves as a crucial safeguard. It acts as a snapshot of your system’s configuration at a specific point in time, allowing you to revert to a previous, stable state in the event of problems. This article delves into the intricacies of creating and utilizing system restore points in Windows 10, emphasizing their importance in maintaining system stability and providing a safety net for your digital endeavors.
The Essence of a System Restore Point
A system restore point captures a comprehensive image of your computer’s critical settings and files, including:
- System Files: These files are essential for Windows to function correctly, encompassing core operating system components, drivers, and registry entries.
- Program Files: This encompasses the installation files and configurations of all programs installed on your system.
- User Files: While not all user files are included, system restore points typically capture important user data like documents, pictures, and settings.
When you create a system restore point, Windows essentially creates a backup of the aforementioned elements, storing it on your hard drive. This backup can be accessed later to revert your system to the state it was in at the time the restore point was created.
When to Create a System Restore Point
It is prudent to create a system restore point before undertaking any significant system changes, such as:
- Installing a New Program: Installing software can sometimes lead to conflicts with existing programs or system files. Creating a restore point before installation provides a safety net if the new program causes issues.
- Updating Drivers: Driver updates are crucial for ensuring smooth hardware operation, but they can also introduce instability. Creating a restore point before updating drivers allows for easy rollback in case of problems.
- Installing a Major Windows Update: Windows updates are essential for security and performance improvements, but they can sometimes introduce bugs or compatibility issues. Creating a restore point before installing a major update provides a fallback option if problems arise.
- Making Significant System Changes: Any major configuration changes, such as altering system settings, modifying the registry, or reinstalling Windows, should be preceded by a system restore point creation.
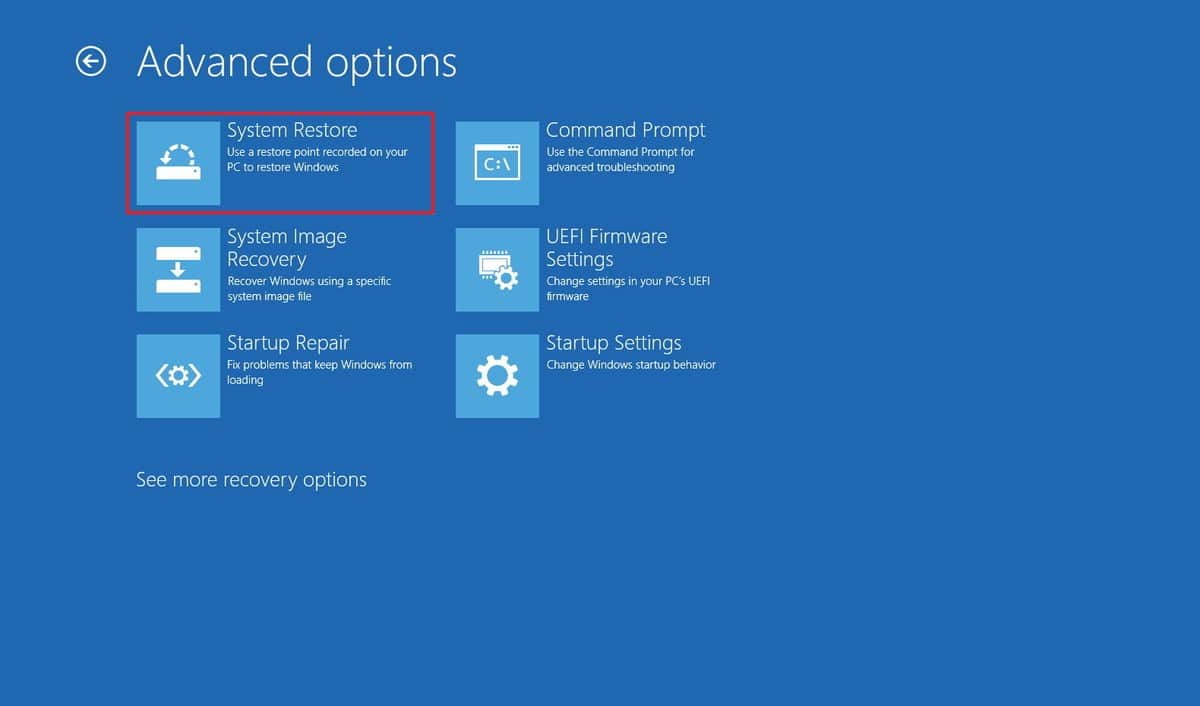
Creating a System Restore Point in Windows 10
Creating a system restore point in Windows 10 is a straightforward process:
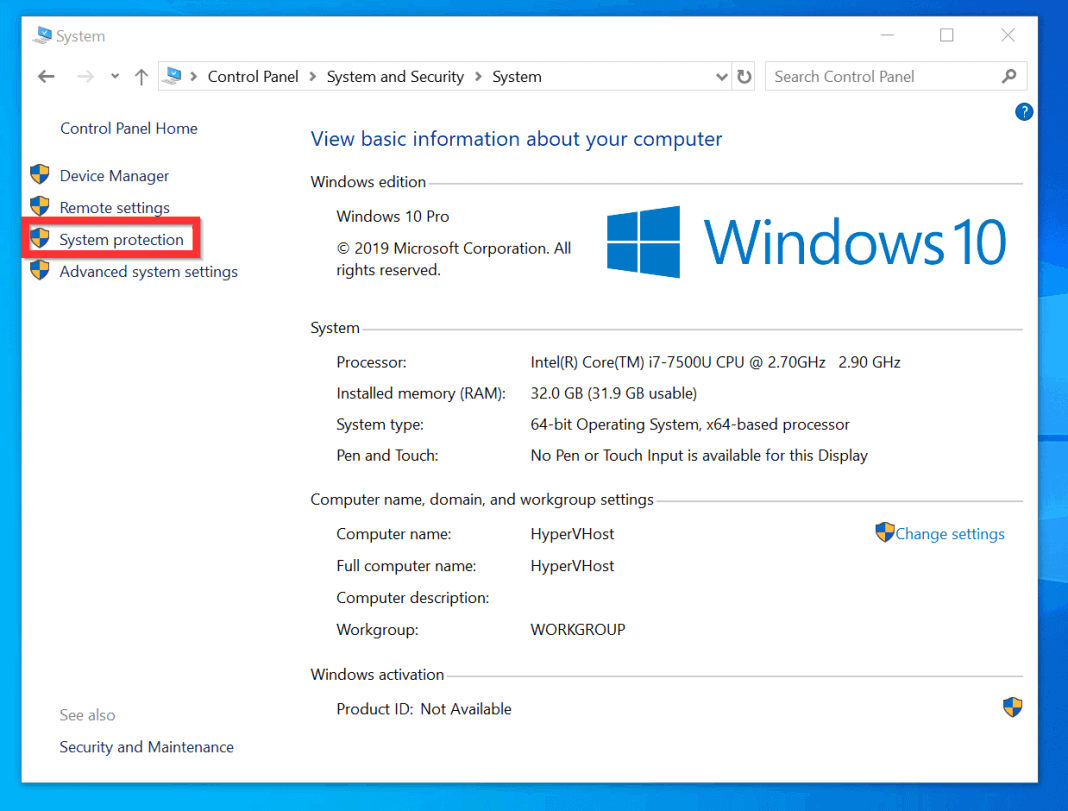
- Open the Control Panel: Navigate to the Control Panel by searching for it in the Windows search bar.
- Select System and Security: Within the Control Panel, locate and click on "System and Security."
- Choose System: Click on "System" to access system settings.
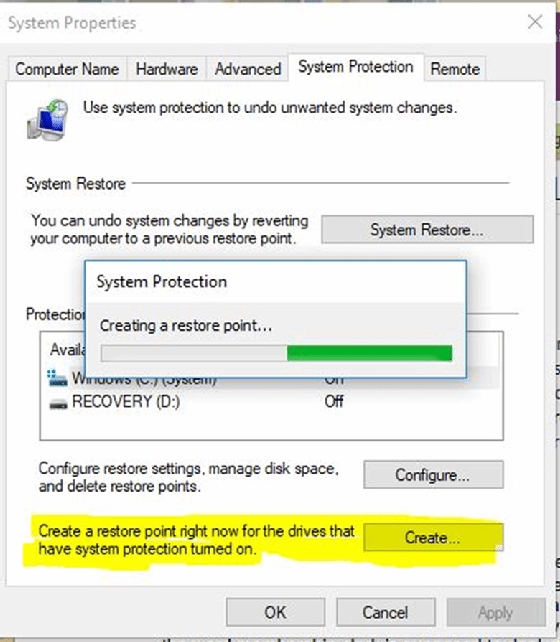
- Access System Protection: In the System window, click on "System Protection" located in the left-hand pane.
- Create a Restore Point: Click on the "Create" button within the System Protection window to initiate the process of creating a new restore point.
- Provide a Description: In the "Create a restore point" window, enter a descriptive name for the restore point. This will help you remember the context in which it was created.
- Confirm Creation: Click on the "Create" button to confirm the creation of the restore point. Windows will proceed to create the snapshot, which may take a few minutes depending on the size of your system.
Utilizing System Restore Points
Once a system restore point has been created, it can be used to revert your system to a previous state in case of problems. To restore your system using a restore point:
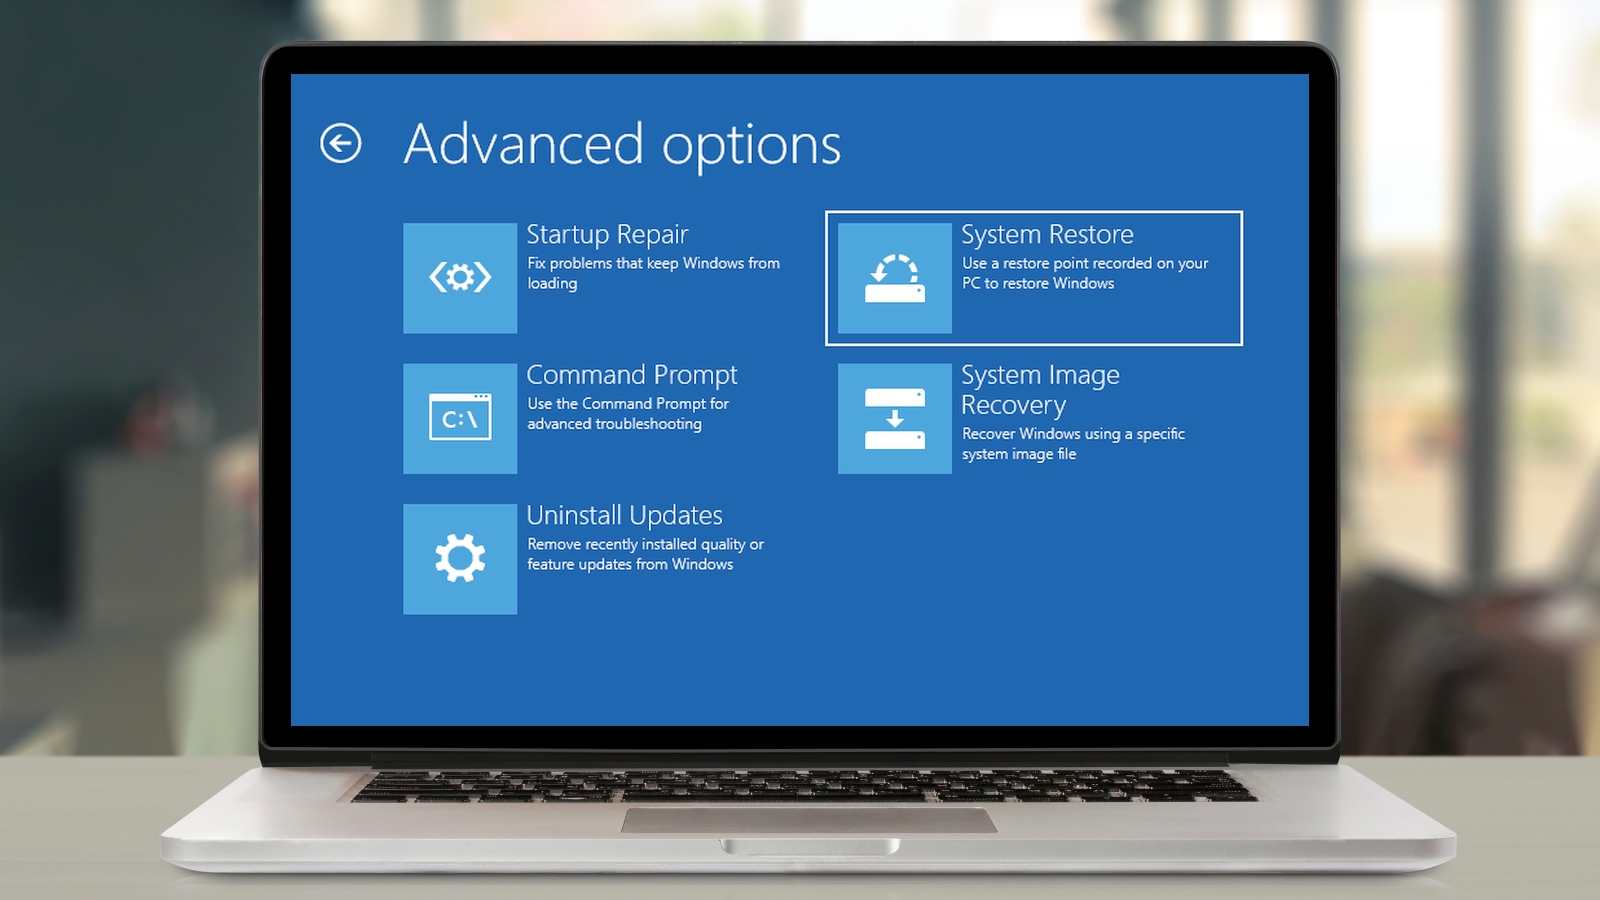
- Access System Protection: Open the Control Panel and navigate to "System and Security" > "System" > "System Protection."
- Select System Restore: Click on the "System Restore" button within the System Protection window.
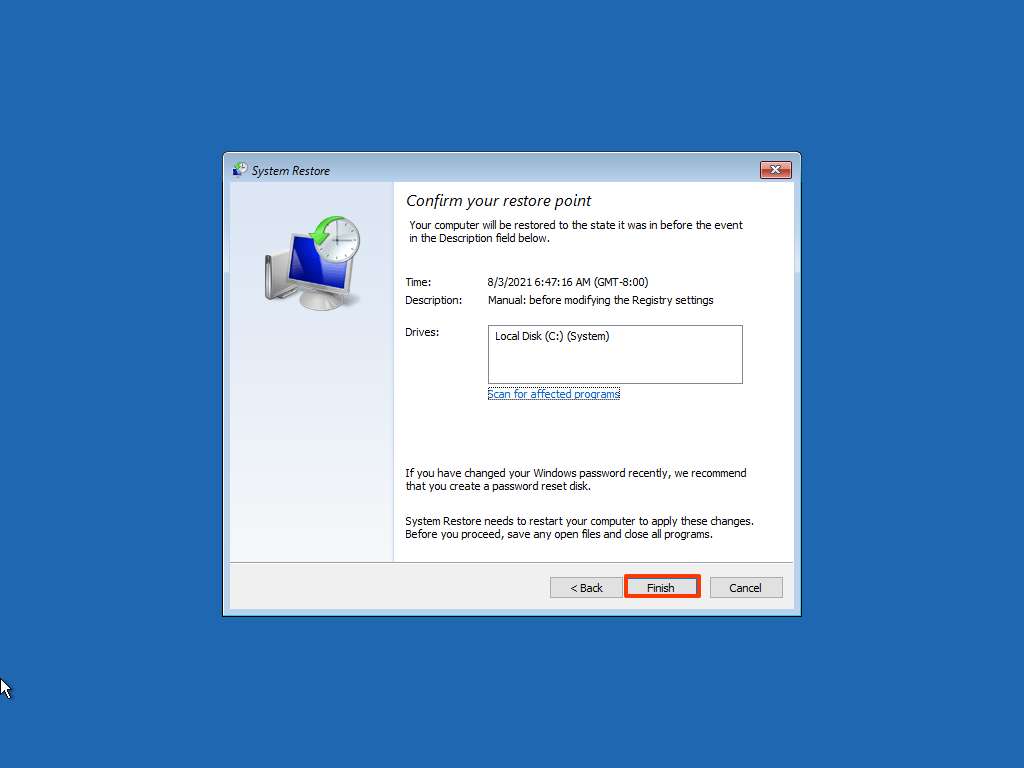
- Choose a Restore Point: Select the desired restore point from the list of available restore points. The date and description of each restore point are displayed for easy identification.
- Confirm Restoration: Review the selected restore point and click on "Next" to proceed with the restoration process. Windows will then begin the restoration process, which may take some time depending on the size of the restore point.
The Importance of System Restore Points
System restore points are an indispensable tool for safeguarding your digital world. They provide a safety net for:
- Recovering from Software Conflicts: If a newly installed program causes issues, you can revert to a restore point created before the installation, effectively removing the problematic program and its associated changes.
- Undoing Driver Problems: If a driver update leads to system instability, restoring to a previous point can resolve the issue without having to manually uninstall or reinstall the driver.
- Reversing Windows Update Issues: If a Windows update introduces bugs or compatibility problems, restoring to a previous point can effectively revert your system to a stable state.
- Rectifying System Configuration Changes: Any accidental or intentional system configuration changes can be undone by restoring to a previous point, ensuring that your system operates as intended.
Frequently Asked Questions (FAQs)
1. How often should I create system restore points?
The frequency of creating system restore points depends on your individual usage patterns and risk tolerance. It is generally recommended to create a restore point before any significant system changes, as outlined previously. Additionally, you can schedule automatic creation of restore points on a regular basis, such as weekly or monthly.
2. How much disk space do system restore points consume?
The amount of disk space consumed by system restore points depends on the size of your system and the frequency of restore point creation. However, Windows typically allocates a reasonable amount of disk space for restore points, and you can customize the maximum disk space allocated to them.
3. Can I delete system restore points?
Yes, you can delete system restore points to free up disk space. However, it is advisable to keep at least one or two recent restore points for safety purposes. To delete a restore point, access the System Protection window and click on the "Delete" button.
4. What happens to my files during a system restore?
System restore primarily affects system files, program files, and some user settings. Your personal files, such as documents, pictures, and music, are typically not affected by a system restore. However, it is always a good practice to back up your important files regularly, as system restore is not a substitute for a full backup.
5. Can I create a system restore point on a different drive?
No, system restore points are stored on the same drive as the Windows operating system. You cannot create a restore point on a different drive.
6. Can I restore my system to a restore point created on a different computer?
No, system restore points are specific to the computer on which they were created. You cannot restore your system to a restore point created on a different computer.
7. Is system restore the same as a backup?
No, system restore is not a full backup. While it captures critical system files and program files, it does not back up all of your personal files. A full backup typically involves backing up your entire hard drive or specific folders to an external storage device, such as a hard drive or cloud storage.
Tips for Effective System Restore Point Management
- Regularly Create Restore Points: Establish a routine for creating restore points before any significant system changes, such as installing software, updating drivers, or installing Windows updates.
- Use Descriptive Names: When creating a restore point, provide a descriptive name that reflects the context in which it was created. This will make it easier to identify the relevant restore point when needed.
- Monitor Disk Space Usage: Regularly check the amount of disk space consumed by system restore points. You can adjust the maximum disk space allocated to restore points to manage storage usage.
- Keep Recent Restore Points: Retain at least one or two recent restore points for safety purposes. Older restore points can be deleted to free up disk space.
- Consider a Full Backup: While system restore points provide a safety net, they are not a substitute for a full backup. Regularly back up your important files to an external storage device or cloud storage to ensure data protection.
Conclusion
System restore points are a powerful tool for safeguarding your computer’s stability and protecting your digital endeavors. By creating restore points before significant system changes, you can effectively mitigate the risks associated with software conflicts, driver problems, Windows updates, and system configuration changes. Regularly creating and managing system restore points, combined with a comprehensive backup strategy, provides a robust defense against data loss and system instability, ensuring a smooth and reliable computing experience.


Closure
Thus, we hope this article has provided valuable insights into Safeguarding Your Digital World: Understanding System Restore Points in Windows 10. We hope you find this article informative and beneficial. See you in our next article!