Safeguarding Against Accidental Deletion: Understanding and Enabling Confirmation Dialogs in Windows 10
Related Articles: Safeguarding Against Accidental Deletion: Understanding and Enabling Confirmation Dialogs in Windows 10
Introduction
In this auspicious occasion, we are delighted to delve into the intriguing topic related to Safeguarding Against Accidental Deletion: Understanding and Enabling Confirmation Dialogs in Windows 10. Let’s weave interesting information and offer fresh perspectives to the readers.
Table of Content
Safeguarding Against Accidental Deletion: Understanding and Enabling Confirmation Dialogs in Windows 10

In the digital realm, data is paramount. Its loss, whether accidental or intentional, can be a significant setback, ranging from inconvenience to severe financial or personal consequences. To mitigate the risk of unintended data deletion, Windows 10 offers a crucial safeguard: confirmation dialogs. These simple yet powerful prompts serve as a final checkpoint before any permanent removal of files or folders.
This article delves into the importance and mechanics of enabling these confirmation dialogs in Windows 10, providing a comprehensive understanding of their role in protecting data integrity.
The Significance of Confirmation Dialogs:
Confirmation dialogs, often referred to as "delete confirmation windows," act as a vital barrier against accidental deletion. They present a simple question: "Are you sure you want to delete this?" This seemingly innocuous question can be the difference between a minor inconvenience and a major data loss.
Here’s why enabling confirmation dialogs is crucial:
- Preventing Accidental Deletion: A moment of distraction, a misclick, or a hasty decision can lead to the irreversible deletion of valuable data. Confirmation dialogs provide a pause for reflection, ensuring that the user is truly aware of the action they are about to undertake.
- Minimizing Data Loss: In a fast-paced digital environment, it’s easy to overlook the consequences of deleting files. Confirmation dialogs serve as a reminder, allowing users to reconsider their actions and potentially prevent significant data loss.
- Safeguarding Against Malicious Actions: While not a foolproof solution, confirmation dialogs can deter malicious software or unauthorized users from deleting sensitive data. They introduce an extra layer of security, making it more difficult for unauthorized entities to perform destructive actions.
Understanding the Mechanics of Confirmation Dialogs:
Windows 10 offers two distinct methods for enabling confirmation dialogs:
- System-Wide Confirmation: This setting applies a confirmation prompt to all file and folder deletions across the entire operating system. This provides the most comprehensive protection, ensuring that no data is deleted without explicit user confirmation.
- Individual Folder Confirmation: This method allows users to enable confirmation dialogs for specific folders, providing a more granular control over data protection.
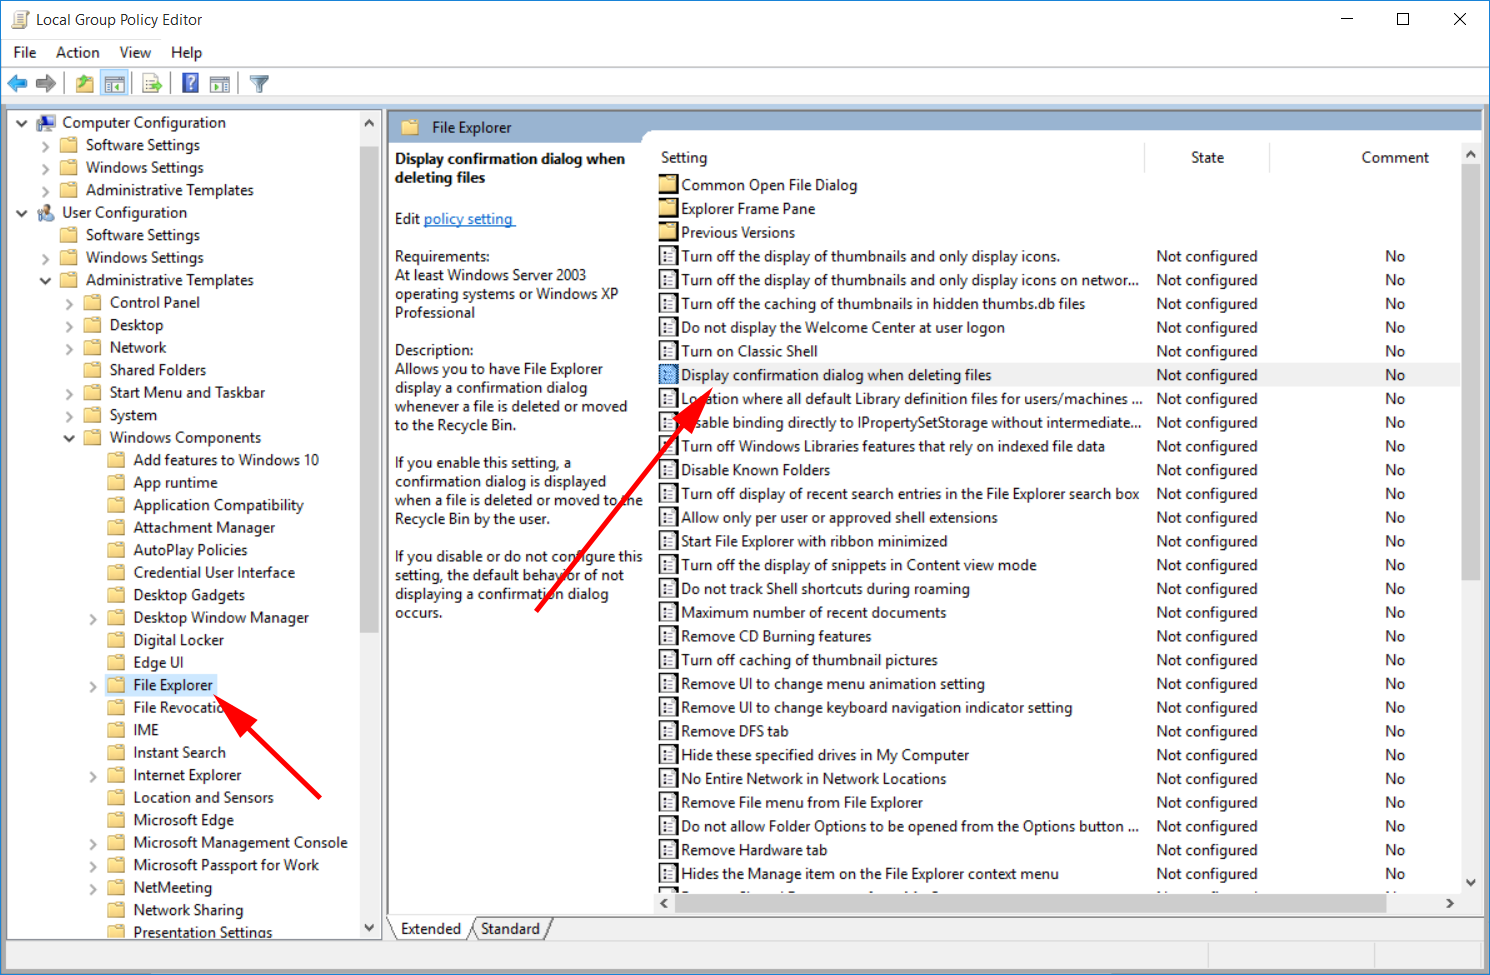
Enabling System-Wide Confirmation:
To enable system-wide confirmation dialogs, follow these steps:
- Open File Explorer: Navigate to the "This PC" or "File Explorer" window.
- Access "View" Tab: Click on the "View" tab located in the top menu bar.
- Locate "Options" Button: In the "View" tab, click on the "Options" button located in the far right corner.
- Open "Folder Options" Window: A new window labeled "Folder Options" will appear.
- Navigate to "View" Tab: Select the "View" tab within the "Folder Options" window.
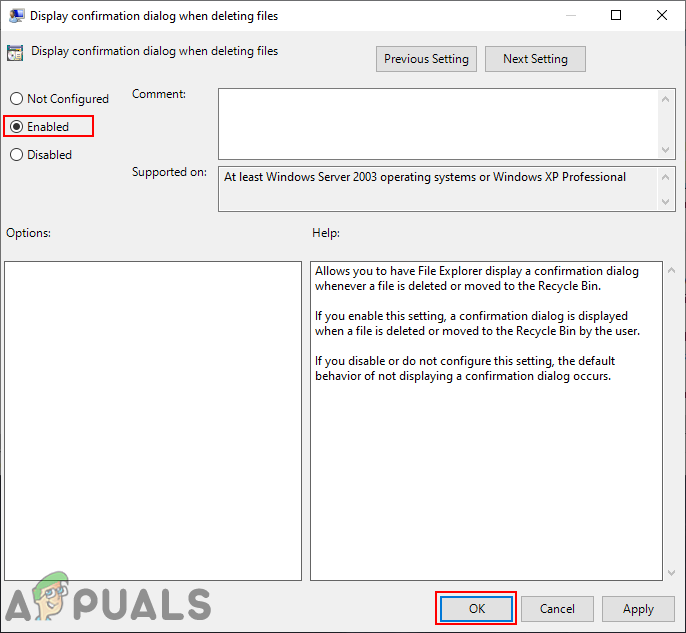
- Locate "Confirm Deletion of Files" Option: Scroll down the list of options until you find "Confirm deletion of files."
- Enable the Option: Check the box next to "Confirm deletion of files" to activate the system-wide confirmation dialogs.
- Apply and Confirm: Click on the "Apply" button to save the changes and then "OK" to close the "Folder Options" window.
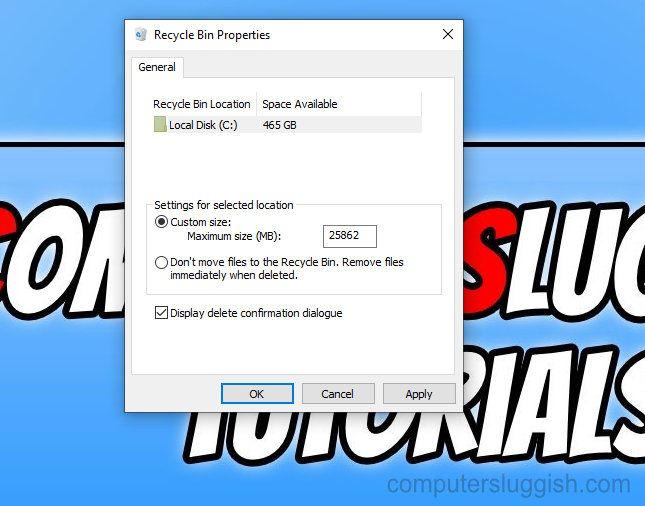
Enabling Confirmation for Specific Folders:
To enable confirmation dialogs for specific folders, follow these steps:
- Open the Desired Folder: Navigate to the folder for which you want to enable confirmation dialogs.
- Right-Click on the Folder: Right-click on the folder name.
- Select "Properties": From the context menu, choose "Properties."
- Navigate to the "Customize" Tab: In the "Properties" window, select the "Customize" tab.
- Choose "General Items": From the "Customize" tab, select "General Items" in the "Optimize this folder for" dropdown menu.
- Enable "Confirm Deletion" Option: Check the box next to "Confirm deletion of files" to activate confirmation dialogs for the selected folder.
- Apply and Confirm: Click on the "Apply" button to save the changes and then "OK" to close the "Properties" window.
Frequently Asked Questions:
1. What happens if I accidentally delete a file with confirmation dialogs enabled?
Enabling confirmation dialogs does not prevent accidental deletion. It simply adds a prompt that requires user confirmation before the deletion takes place. If you accidentally confirm a deletion, the file will be permanently removed.
2. Can I disable confirmation dialogs if I want to delete files quickly?
Yes, you can disable confirmation dialogs by following the same steps outlined above and unchecking the "Confirm deletion of files" box. However, it’s important to be cautious when disabling this feature, as it removes the safety net against accidental deletion.
3. Are confirmation dialogs foolproof against data loss?
Confirmation dialogs provide a significant level of protection against accidental deletion, but they are not foolproof. Malicious software or unauthorized users may still be able to delete data, even with confirmation dialogs enabled.
4. Can I customize the confirmation dialog message?
Windows 10 does not offer the ability to customize the confirmation dialog message. The default message "Are you sure you want to delete this?" remains consistent across the operating system.
5. Do confirmation dialogs apply to all types of files?
Confirmation dialogs apply to all types of files and folders, including documents, images, videos, and executable programs.
Tips for Safeguarding Data:
- Regularly Back Up Data: Even with confirmation dialogs enabled, it’s essential to back up your data regularly. This ensures that even if data is accidentally deleted, you have a copy to restore it from.
- Use Data Recovery Software: In case of accidental deletion, data recovery software can be used to attempt to recover deleted files. However, it’s important to note that data recovery is not always successful.
- Be Mindful of Downloads: Avoid downloading files from untrusted sources, as they may contain malicious software that can delete data.
- Keep Software Updated: Ensure that your operating system and antivirus software are up to date to mitigate the risk of security vulnerabilities.
Conclusion:
Enabling confirmation dialogs in Windows 10 is a simple yet powerful step towards safeguarding data integrity. By adding a layer of protection against accidental deletion, these prompts can significantly reduce the risk of data loss, ensuring that users have a moment of reflection before permanently removing valuable files.
While confirmation dialogs provide a valuable safety net, it’s important to remember that they are not a substitute for regular data backups and cautious file management practices. By combining confirmation dialogs with these additional measures, users can create a robust data protection strategy, mitigating the risk of data loss and ensuring the preservation of valuable information.


Closure
Thus, we hope this article has provided valuable insights into Safeguarding Against Accidental Deletion: Understanding and Enabling Confirmation Dialogs in Windows 10. We thank you for taking the time to read this article. See you in our next article!