Returning to Familiarity: A Comprehensive Guide to Downgrading from Windows 11 to Windows 10
Related Articles: Returning to Familiarity: A Comprehensive Guide to Downgrading from Windows 11 to Windows 10
Introduction
In this auspicious occasion, we are delighted to delve into the intriguing topic related to Returning to Familiarity: A Comprehensive Guide to Downgrading from Windows 11 to Windows 10. Let’s weave interesting information and offer fresh perspectives to the readers.
Table of Content
Returning to Familiarity: A Comprehensive Guide to Downgrading from Windows 11 to Windows 10
The transition to Windows 11 was met with mixed reactions. While some embraced the new features and design, others found themselves yearning for the familiarity and stability of Windows 10. For those individuals, the option to revert to the previous operating system presents a compelling solution. This article provides a comprehensive guide to the process of downgrading from Windows 11 to Windows 10, covering its motivations, steps involved, and potential considerations.
Understanding the Reasons for Downgrade
The decision to downgrade from Windows 11 to Windows 10 is often driven by a confluence of factors. While Windows 11 boasts new features and a modern aesthetic, it might not be the ideal fit for every user. Some common reasons for choosing to revert include:
- Hardware Compatibility Issues: Windows 11 comes with stringent system requirements, and older computers may not meet these specifications. This can lead to performance issues, instability, or even the inability to install the operating system altogether. Downgrading to Windows 10 ensures compatibility with a wider range of hardware.
- Performance Concerns: Some users experience performance degradation on their devices after upgrading to Windows 11. This might manifest as slower boot times, sluggish application response, or general system lag. A downgrade to Windows 10 might alleviate these performance concerns and restore the desired responsiveness.
- Software Compatibility Issues: Certain software applications, particularly older programs, might not be compatible with Windows 11. This can pose a significant obstacle for users who rely on specific software for their work or personal activities. Downgrading to Windows 10 ensures compatibility with a broader range of applications.
- Preference for Familiar Interface: The shift to a new user interface in Windows 11 can be jarring for some users accustomed to the Windows 10 layout. A return to the familiar Windows 10 interface can provide a more comfortable and intuitive user experience.
- Feature Set: While Windows 11 introduces new features, some users might find that they do not utilize these additions and prefer the functionality offered by Windows 10. The familiarity and stability of the existing features might outweigh the allure of the new additions.
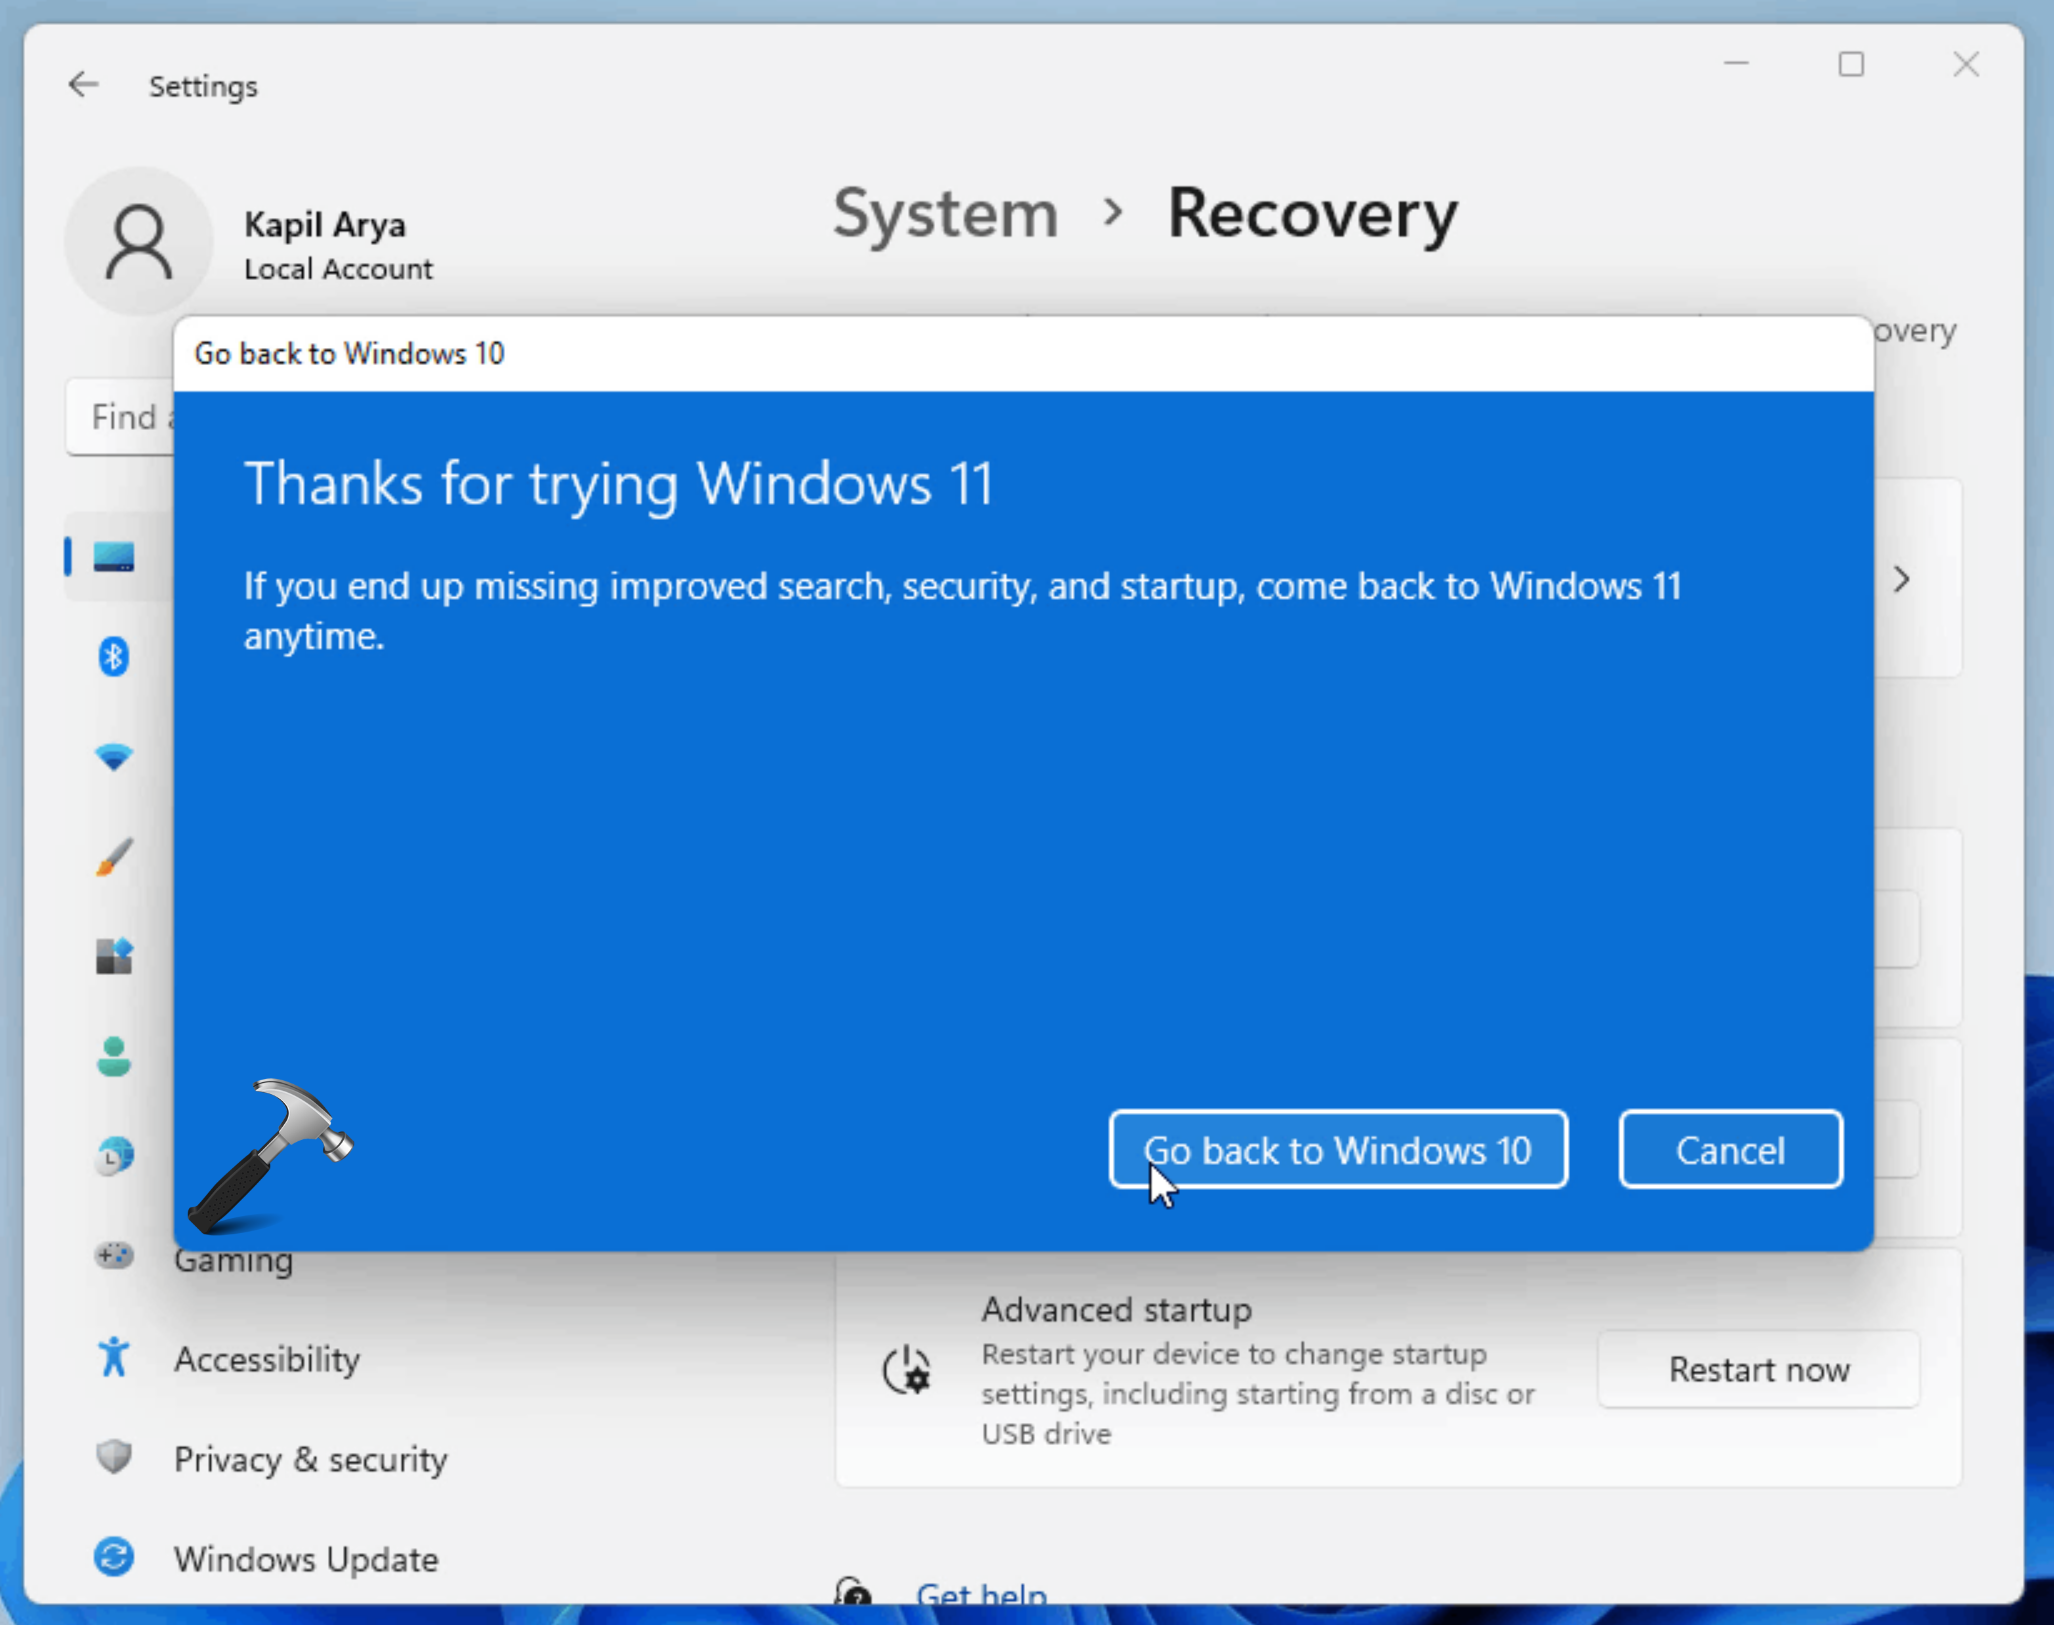
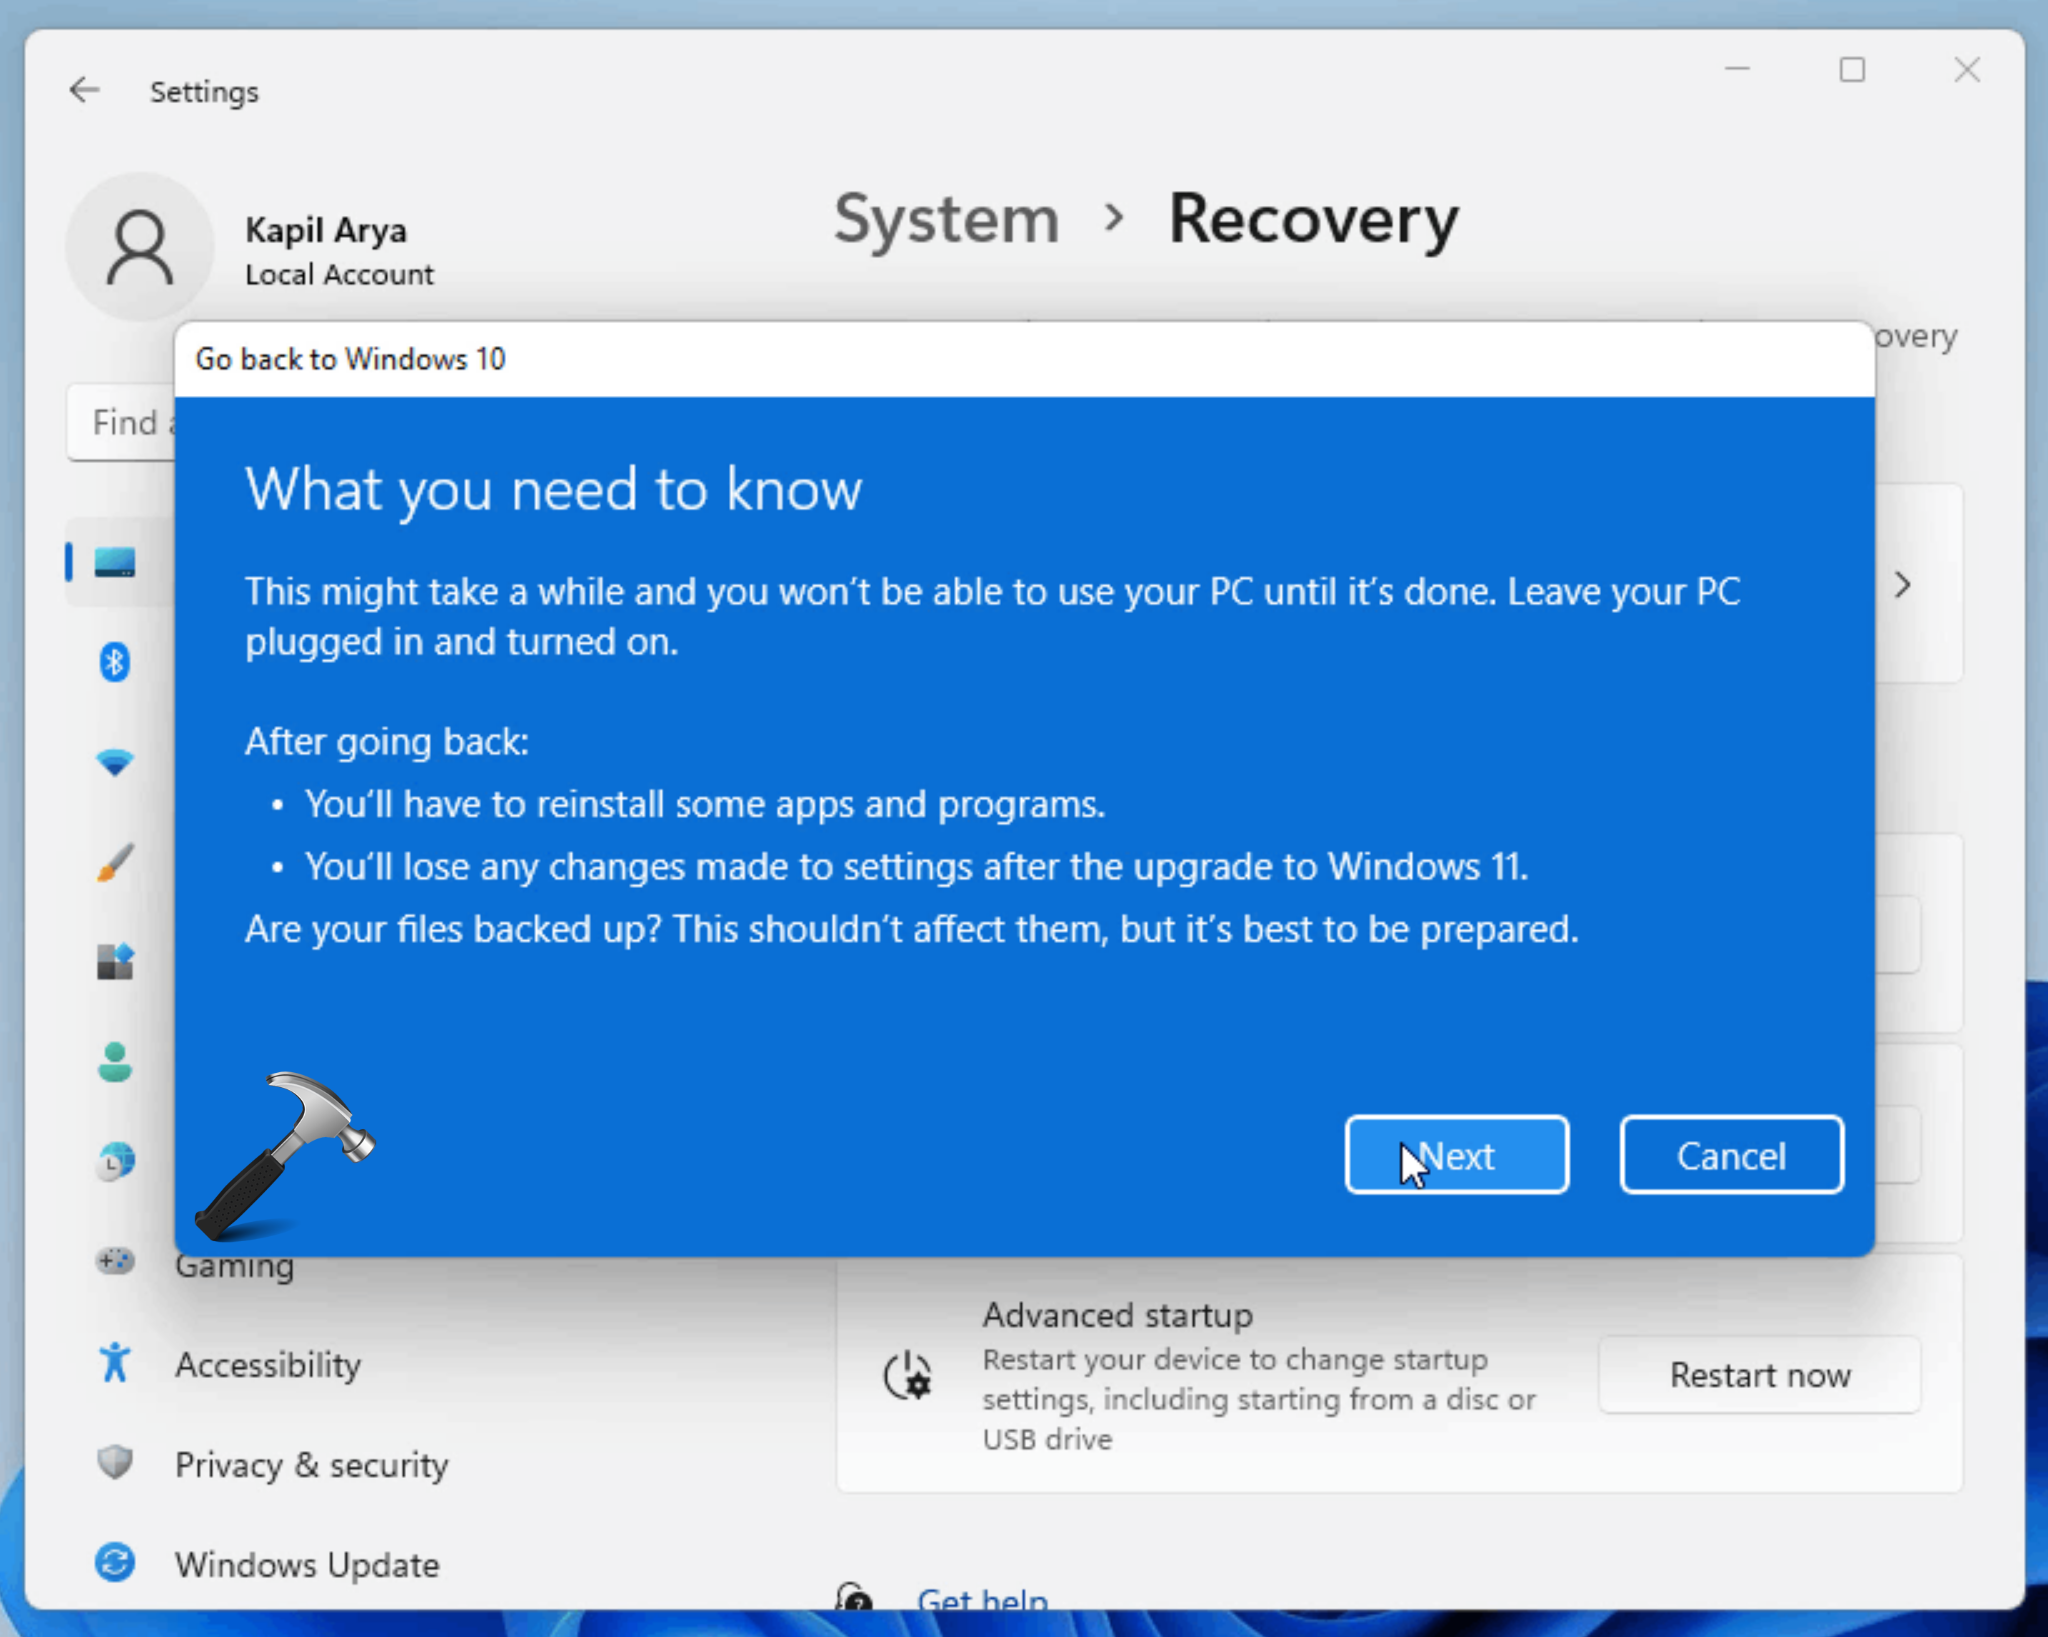
The Downgrade Process: A Step-by-Step Guide
Downgrading from Windows 11 to Windows 10 is a relatively straightforward process, but it’s crucial to follow the steps meticulously to ensure a smooth transition. Here’s a detailed guide:
- Backup Your Data: Before embarking on any system changes, it’s paramount to create a complete backup of your important files and data. This safeguards against any unforeseen issues during the downgrade process. Use external hard drives, cloud storage services, or data backup software to create a comprehensive backup.
- Check for Windows 10 Installation Media: You will need a bootable USB drive or DVD containing the Windows 10 installation files. If you do not have this media, you can download the Windows 10 ISO file from Microsoft’s official website and create a bootable USB drive using tools like Rufus or the Windows USB/DVD Download Tool.
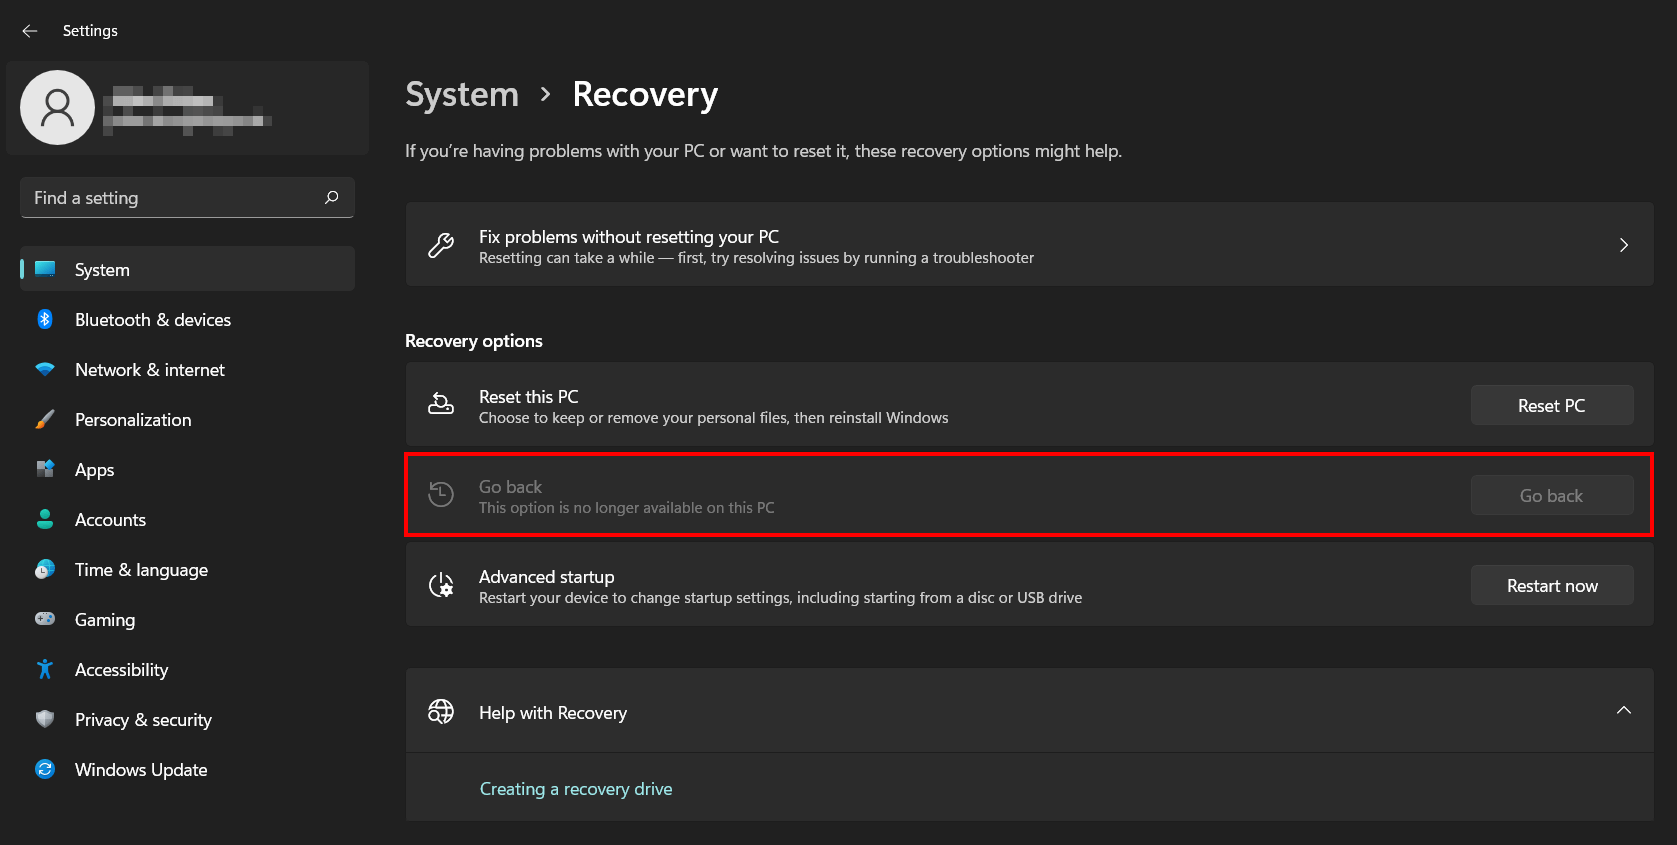
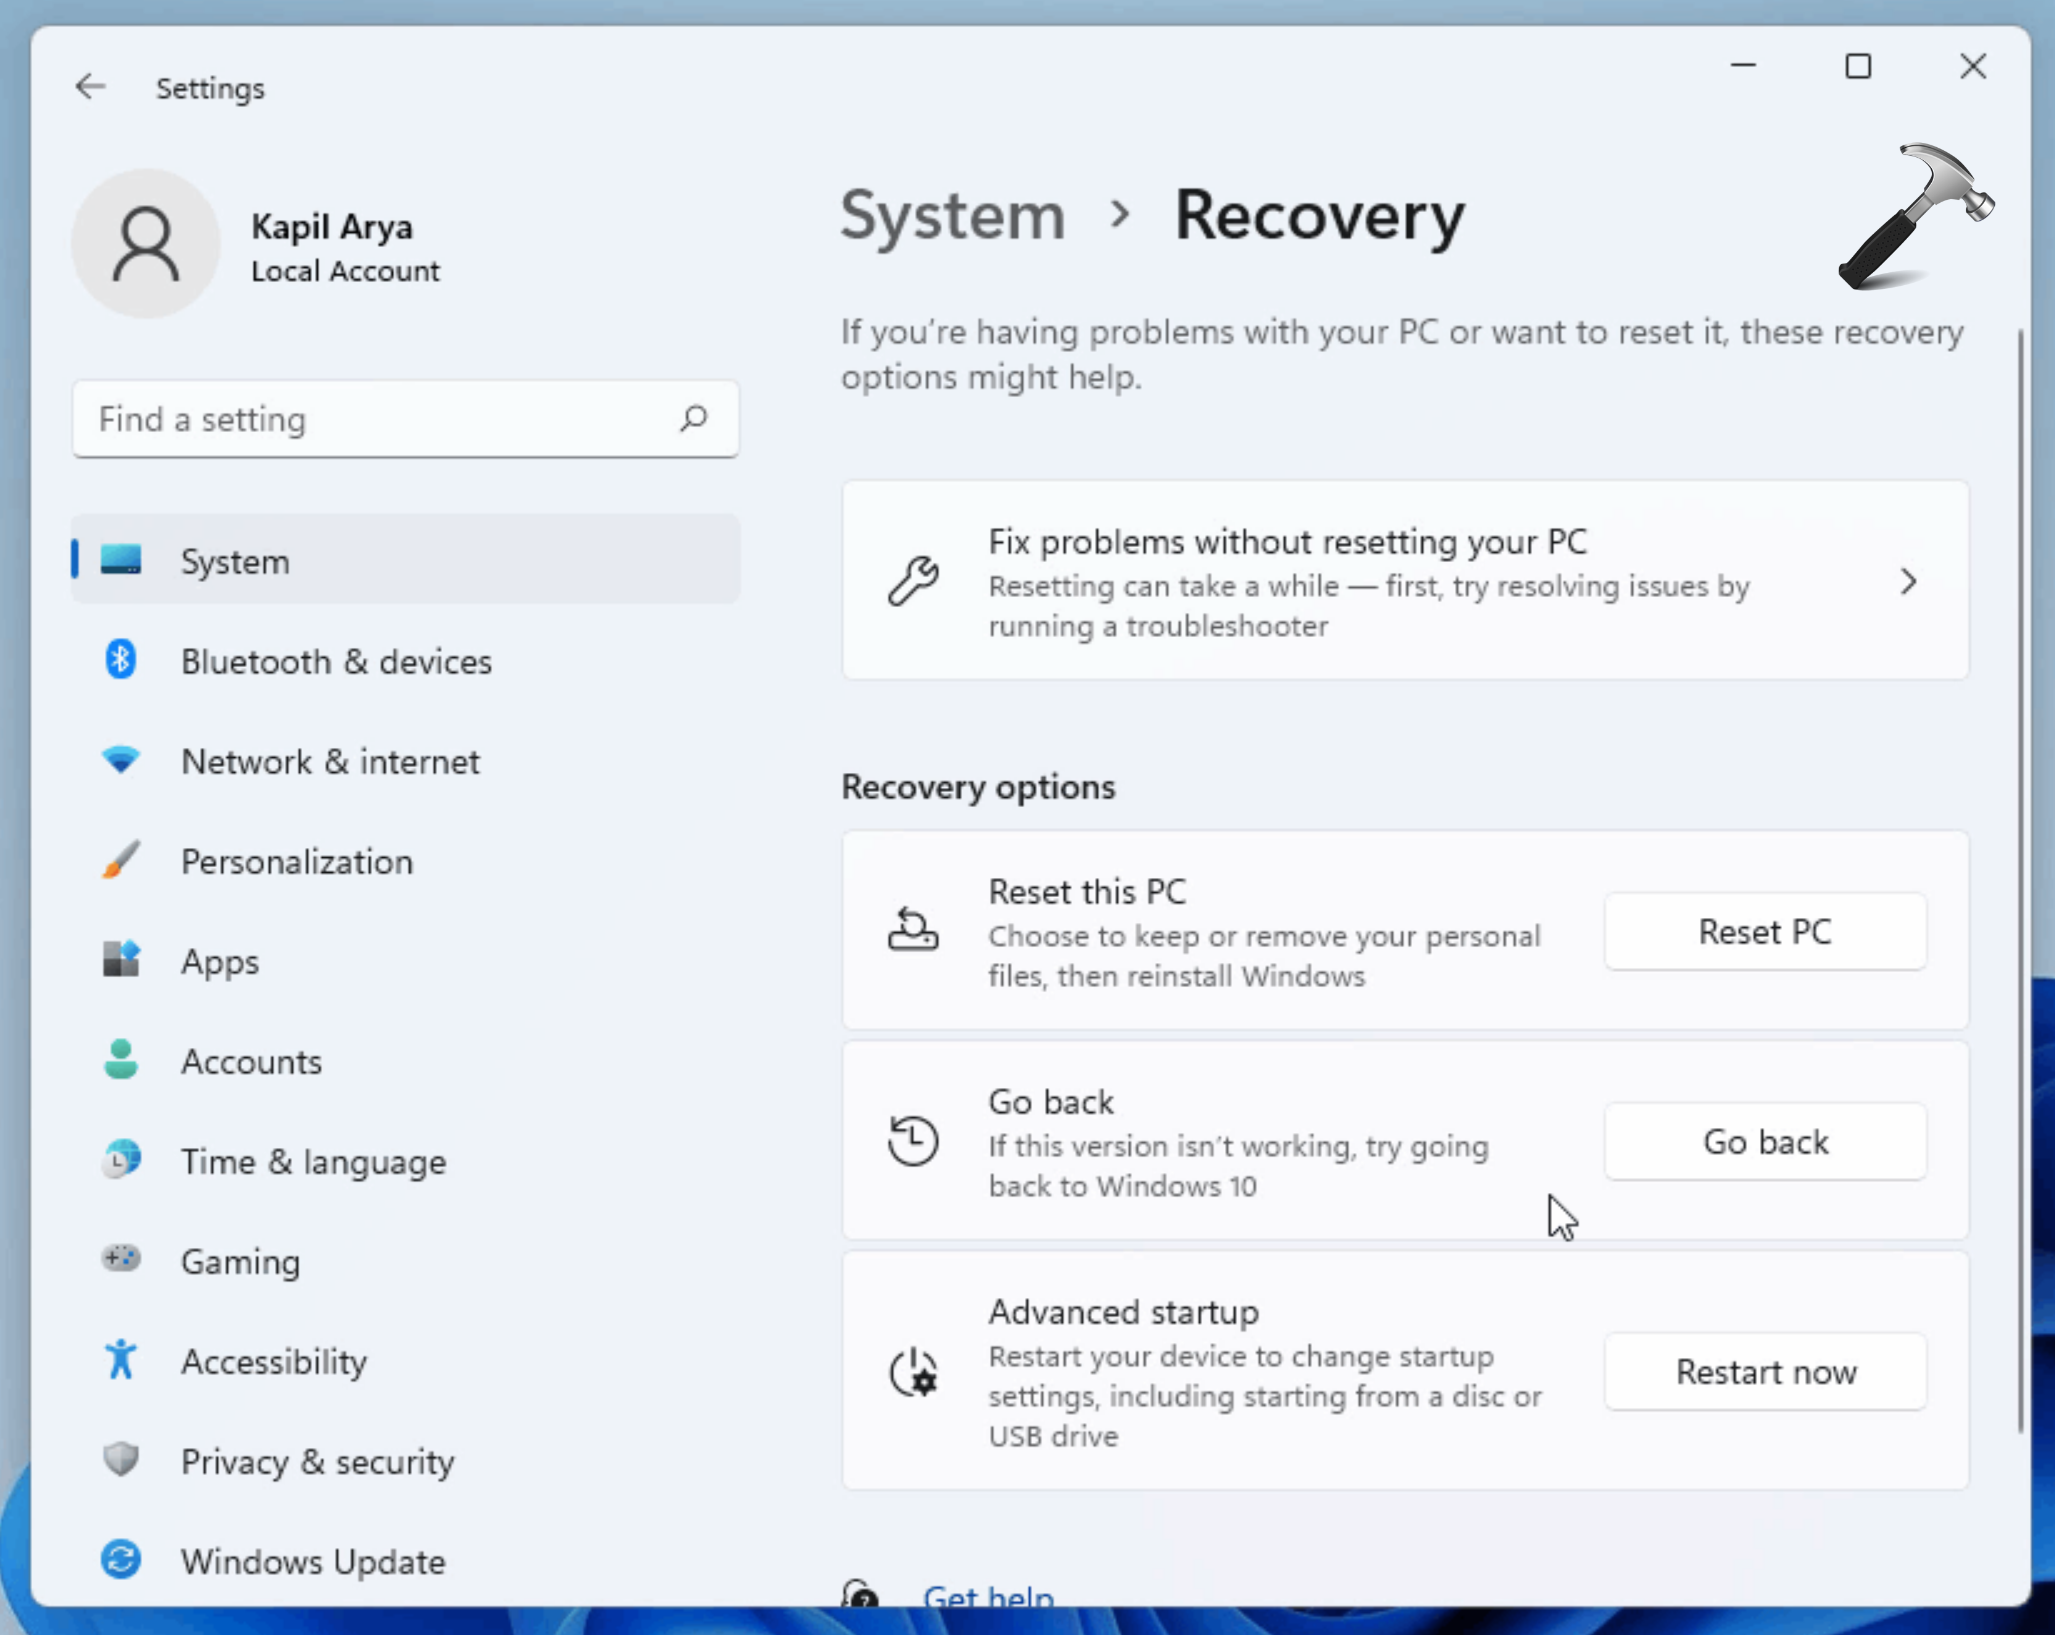
- Access the Windows 11 Recovery Environment: Restart your computer and press the appropriate key (usually F2, F8, or Del) to access the BIOS or UEFI settings. Locate the boot order and set the USB drive or DVD as the primary boot device. Save the changes and exit the BIOS/UEFI settings.
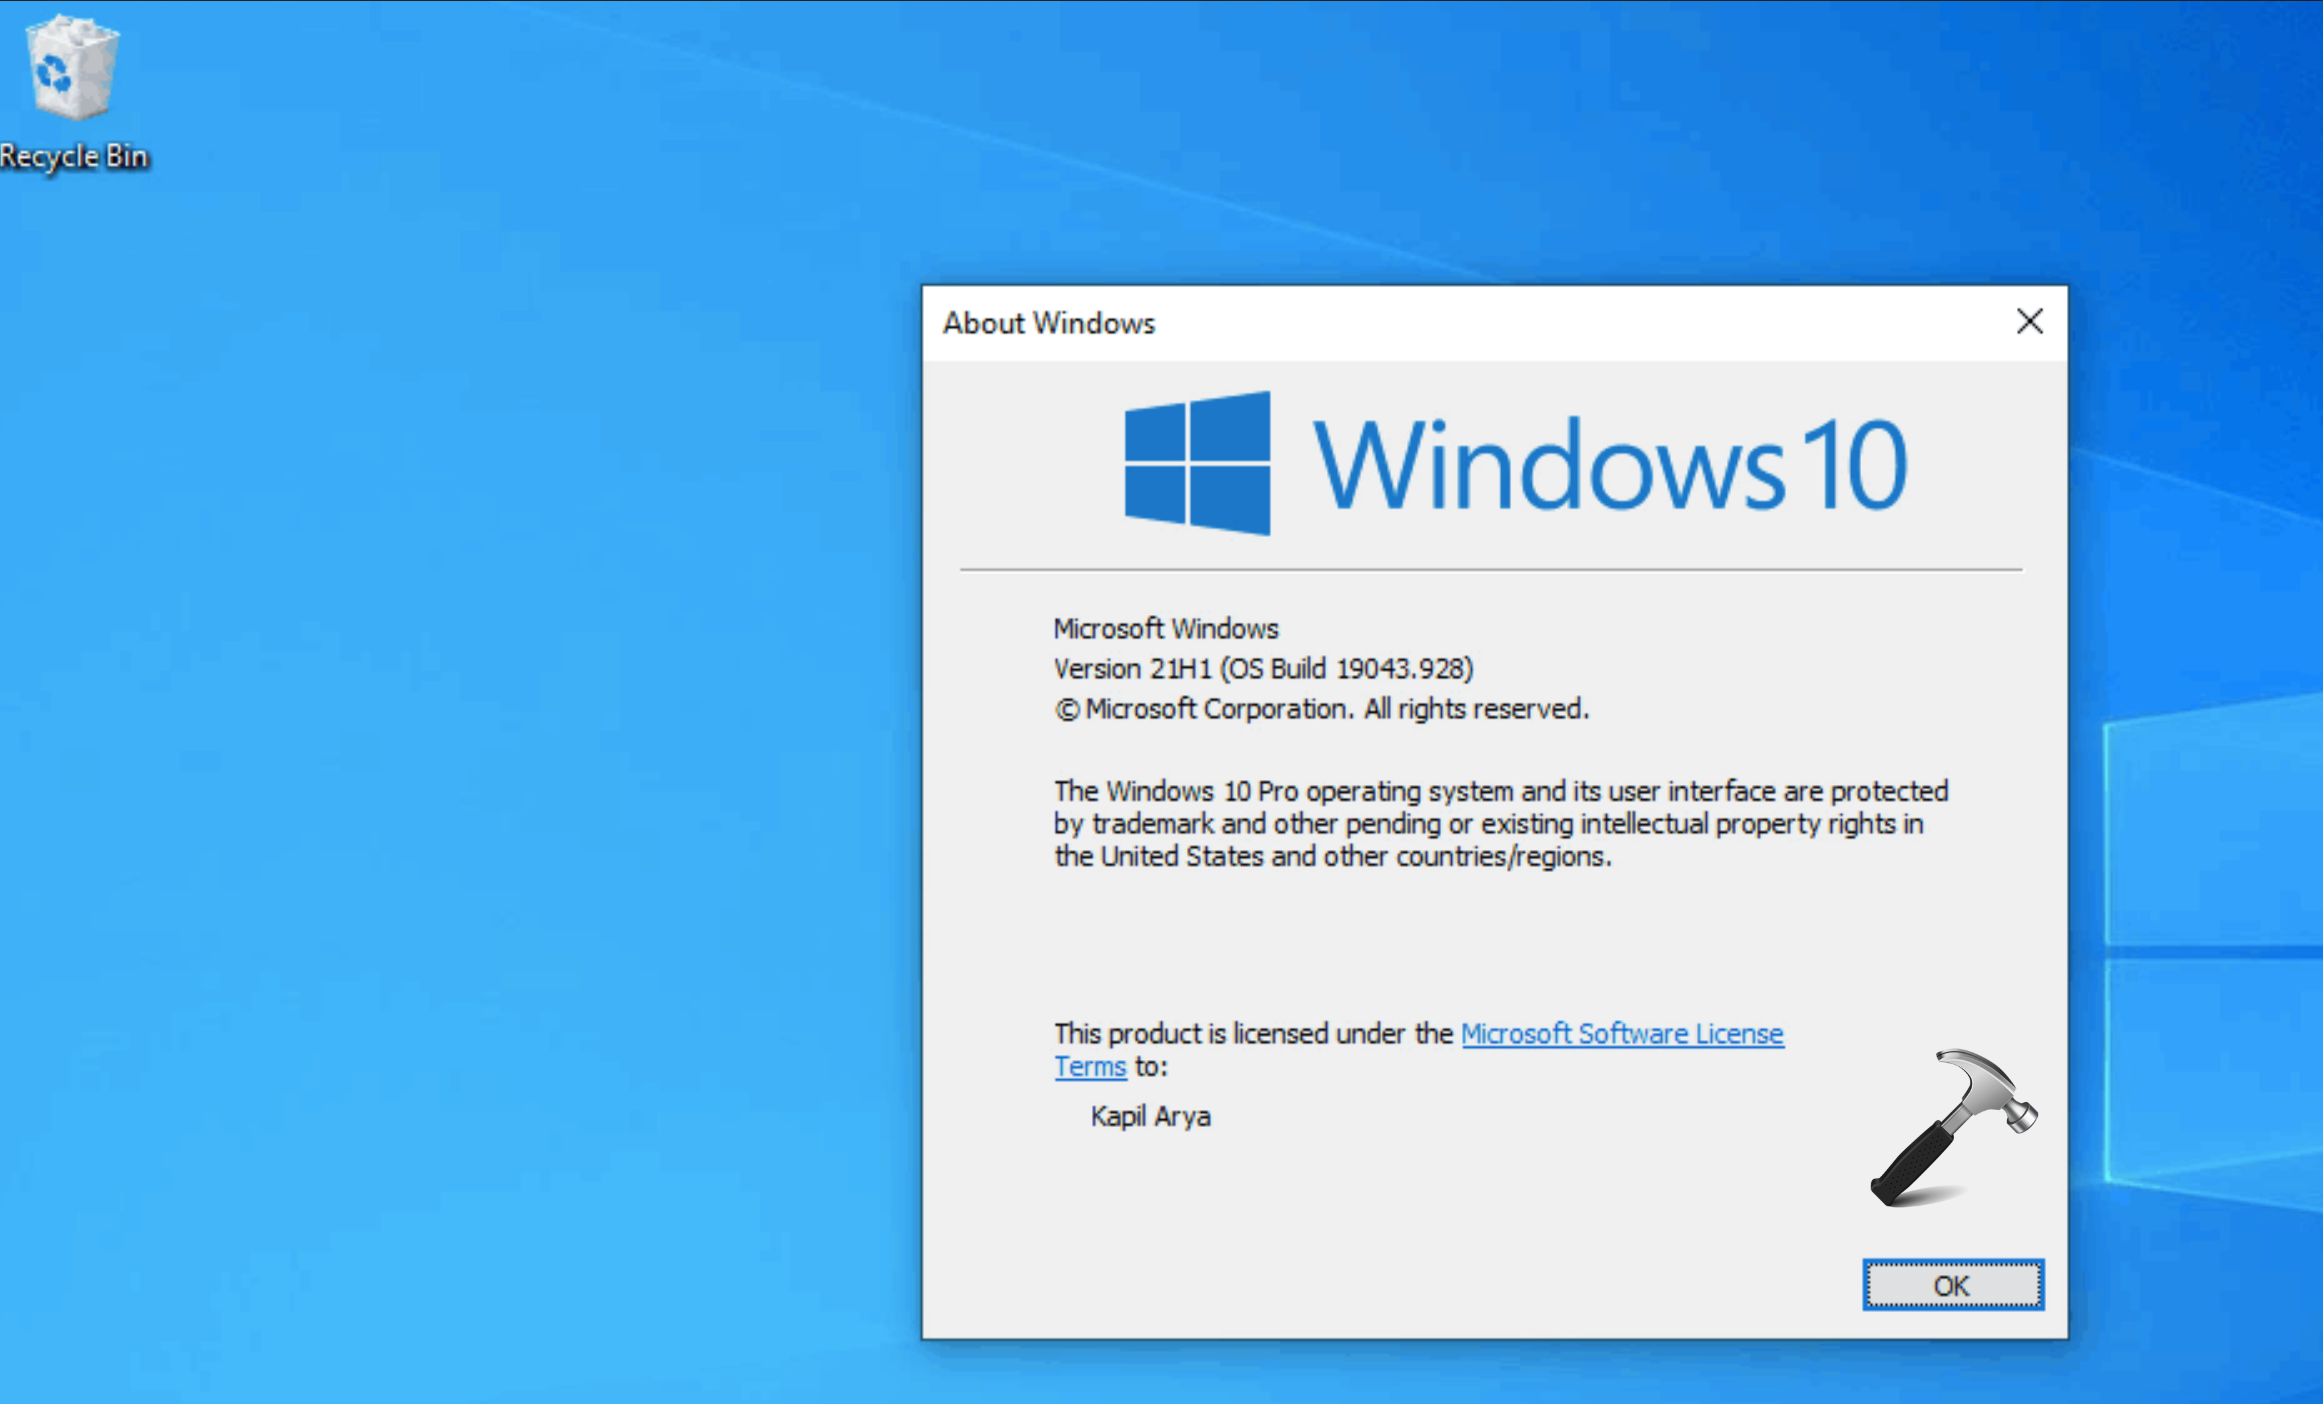
- Start the Windows 10 Installation: Your computer will boot from the installation media. Follow the on-screen instructions to begin the Windows 10 installation process. You will be presented with options to either upgrade or perform a clean install. Choose "Custom: Install Windows only (advanced)" to perform a clean install, which will erase all data on your hard drive.
- Select the Drive for Installation: You will be presented with a list of available drives. Choose the drive where Windows 11 is currently installed and proceed with the installation. This will overwrite the Windows 11 installation with Windows 10.
- Follow the On-Screen Instructions: The installation process will take some time to complete. Follow the on-screen instructions, including providing your product key, setting up your user account, and choosing your desired settings.
- Install Necessary Drivers: Once Windows 10 is installed, you might need to install drivers for your hardware devices. These can be downloaded from the manufacturer’s website or obtained through Windows Update.
Important Considerations:
While downgrading from Windows 11 to Windows 10 is generally a straightforward process, there are a few important considerations to keep in mind:
- Data Loss: Performing a clean installation of Windows 10 will erase all data on the drive where Windows 11 is currently installed. It is essential to have a complete backup of your data before proceeding.
- Software Compatibility: Ensure that all your essential software applications are compatible with Windows 10 before downgrading. Some applications might not function properly or may require updates to work with Windows 10.
- Driver Availability: While most drivers will work seamlessly with Windows 10, some devices might require updated drivers. It’s advisable to check the manufacturer’s website for the latest drivers after the downgrade.
- Product Key: If you have a valid Windows 10 product key, you can use it to activate the operating system after the downgrade. If you do not have a product key, you might need to purchase one from Microsoft.
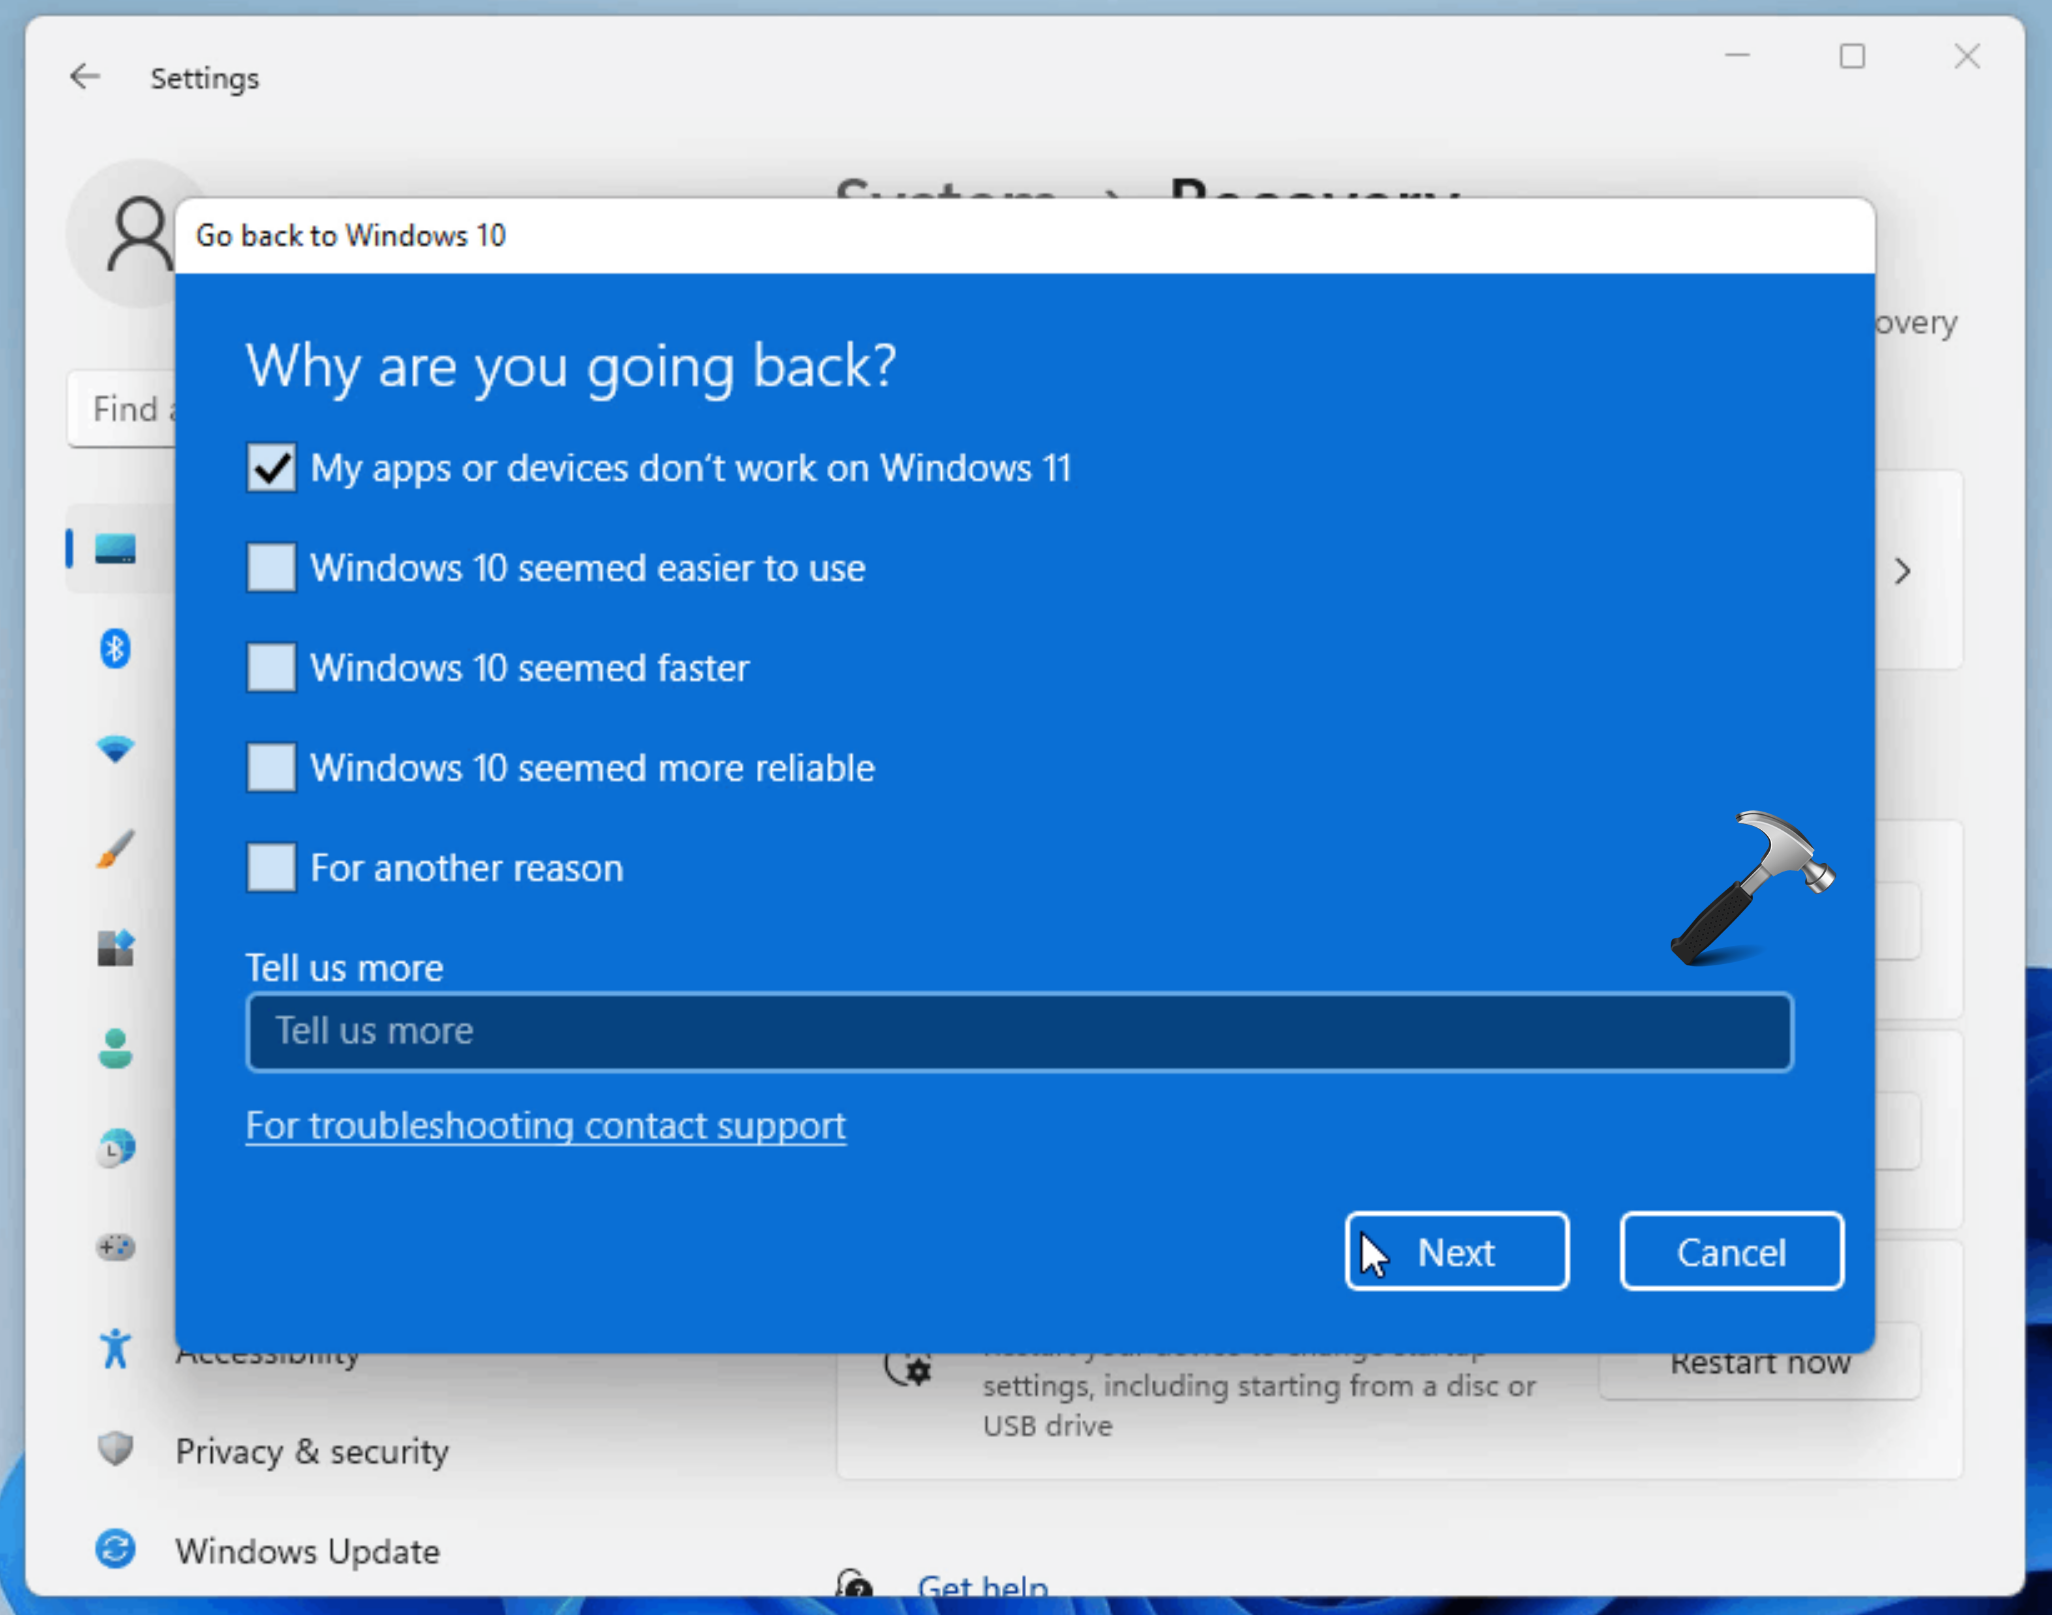
- Windows 11 Features: Downgrading to Windows 10 means losing access to the new features introduced in Windows 11. Consider if these features are essential for your needs before making the decision to downgrade.
FAQs about Downgrading from Windows 11 to Windows 10
Q: Will I lose my data if I downgrade to Windows 10?
A: Yes, a clean installation of Windows 10 will erase all data on the drive where Windows 11 is installed. It’s crucial to have a complete backup of your data before proceeding.
Q: Do I need a Windows 10 product key to downgrade?
A: If you have a valid Windows 10 product key, you can use it to activate the operating system after the downgrade. If you do not have a product key, you might need to purchase one from Microsoft.
Q: Can I upgrade back to Windows 11 after downgrading?
A: Yes, you can upgrade back to Windows 11 after downgrading. However, you might need to reinstall your applications and drivers after the upgrade.
Q: What if I encounter issues during the downgrade process?
A: If you encounter any problems, you can refer to Microsoft’s official documentation or seek assistance from their support team. You can also consult online forums or communities for troubleshooting guidance.
Tips for a Smooth Downgrade
- Create a complete backup of your data before starting the downgrade process.
- Ensure you have a bootable USB drive or DVD containing the Windows 10 installation files.
- Check for updated drivers for your hardware devices before starting the downgrade.
- Familiarize yourself with the steps involved in the downgrade process before proceeding.
- Be patient during the installation process, as it might take some time to complete.
Conclusion
Downgrading from Windows 11 to Windows 10 can be a viable solution for users who encounter compatibility issues, performance problems, or prefer the familiarity and stability of the previous operating system. The process is relatively straightforward, but it’s essential to follow the steps carefully and have a complete backup of your data. By carefully considering the reasons for downgrade, understanding the process, and following the tips outlined in this guide, users can seamlessly transition back to Windows 10 and regain the desired functionality and user experience.


Closure
Thus, we hope this article has provided valuable insights into Returning to Familiarity: A Comprehensive Guide to Downgrading from Windows 11 to Windows 10. We thank you for taking the time to read this article. See you in our next article!