Navigating Secure Boot in Windows 11: A Comprehensive Guide
Related Articles: Navigating Secure Boot in Windows 11: A Comprehensive Guide
Introduction
With great pleasure, we will explore the intriguing topic related to Navigating Secure Boot in Windows 11: A Comprehensive Guide. Let’s weave interesting information and offer fresh perspectives to the readers.
Table of Content
Navigating Secure Boot in Windows 11: A Comprehensive Guide

Secure Boot, a crucial security feature integrated into modern computer systems, plays a pivotal role in safeguarding your device from malicious software and unauthorized access. This technology ensures that only trusted operating systems and software components are allowed to run on your machine, bolstering its overall security posture. While Secure Boot is typically configured within the BIOS or UEFI settings of your computer, there are situations where accessing these settings might be restricted or inconvenient. This article delves into the intricacies of enabling Secure Boot in Windows 11 without directly accessing the BIOS, highlighting its importance and providing practical guidance for implementation.
Understanding Secure Boot: A Foundation for Security
At its core, Secure Boot acts as a gatekeeper, verifying the digital signatures of operating systems and boot loaders before allowing them to execute. This verification process ensures that the software being loaded is legitimate and hasn’t been tampered with. By preventing unauthorized software from loading during the boot process, Secure Boot significantly reduces the risk of malware infections and other security threats.
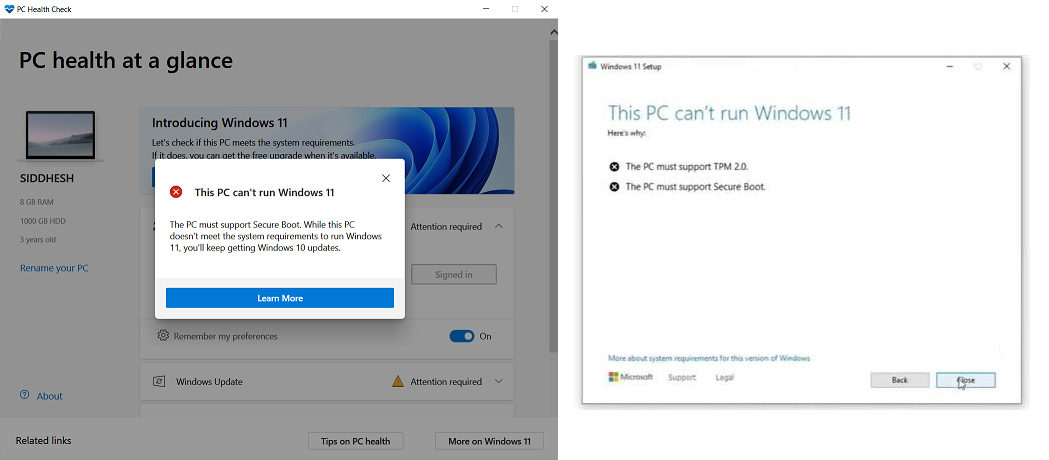
The Need for Secure Boot in Windows 11
Windows 11, Microsoft’s latest operating system, emphasizes security and stability. One of the key requirements for installing and running Windows 11 is the presence of Secure Boot. This requirement stems from the inherent security benefits Secure Boot offers, protecting both the user and the operating system from potential vulnerabilities.
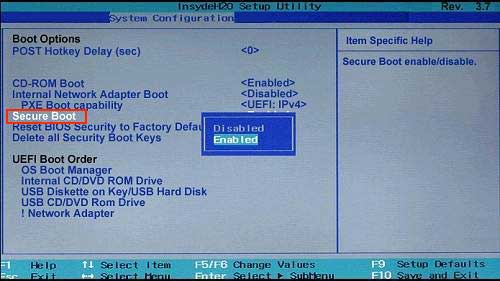
Enabling Secure Boot in Windows 11: Exploring Alternatives
While accessing the BIOS is the conventional method for enabling Secure Boot, there are alternative approaches that can be employed in situations where direct BIOS access is not feasible.
1. Utilizing the "bcdedit" Command:
The "bcdedit" command is a powerful tool built into Windows that allows you to modify boot configuration settings. This command can be used to enable Secure Boot without directly accessing the BIOS.
Steps to Enable Secure Boot Using "bcdedit":
- Open an Elevated Command Prompt: Press the "Windows key + X" and select "Command Prompt (Admin)".
- Run the Command: Execute the following command in the elevated command prompt:
bcdedit /set current secureboot enabled- Restart Your Computer: After running the command, restart your computer for the changes to take effect.
2. Employing a Third-Party Tool:
Various third-party tools are available that can assist in enabling Secure Boot without requiring BIOS access. These tools often provide a user-friendly interface, simplifying the process.
Steps to Enable Secure Boot Using a Third-Party Tool:
- Download a Reputable Tool: Choose a reliable third-party tool designed for managing boot settings.
- Install and Run the Tool: Follow the installation instructions provided by the tool’s developer.
- Enable Secure Boot: The tool will typically offer a clear option to enable Secure Boot.
Important Considerations:
- Compatibility: Ensure that the third-party tool you choose is compatible with your specific hardware and operating system.
- Security: Download tools only from trusted sources to avoid malware risks.
Benefits of Enabling Secure Boot
- Enhanced Security: Secure Boot strengthens your computer’s security by preventing unauthorized software from loading during the boot process.
- Reduced Risk of Malware: By verifying software signatures, Secure Boot significantly reduces the likelihood of malware infections.
- Improved Stability: Secure Boot contributes to a more stable computing environment by ensuring that only trusted software components are loaded.
- Compliance with Modern Standards: Enabling Secure Boot ensures compliance with modern security standards and recommendations.
FAQs: Addressing Common Queries
Q1. Is it safe to enable Secure Boot using the "bcdedit" command?
A1. Yes, using the "bcdedit" command to enable Secure Boot is a safe and legitimate method. This command is a built-in Windows tool designed for managing boot configuration settings.
Q2. Can I disable Secure Boot after enabling it?
A2. Yes, you can disable Secure Boot using the "bcdedit" command or by accessing the BIOS settings. However, keep in mind that disabling Secure Boot may compromise your system’s security.
Q3. What if I encounter errors while enabling Secure Boot?
A3. If you encounter errors, consult your computer’s documentation or contact your manufacturer for assistance. You may need to adjust specific settings in the BIOS or UEFI to resolve the issue.
Q4. Do I need to enable Secure Boot for all operating systems?
A4. Secure Boot is typically required for modern operating systems like Windows 11. However, older operating systems might not support Secure Boot.
Q5. Can I install Windows 11 without enabling Secure Boot?
A5. While it is possible to install Windows 11 without enabling Secure Boot, doing so is not recommended. Windows 11 requires Secure Boot for optimal security and functionality.
Tips for Enabling Secure Boot in Windows 11
- Back up your data: Before making any changes to your boot settings, back up your important data to avoid potential data loss.
- Consult your computer’s documentation: Refer to your computer’s manual or manufacturer’s website for specific instructions on enabling Secure Boot for your model.
- Seek professional assistance: If you are unsure about enabling Secure Boot or encounter difficulties, consider seeking assistance from a qualified computer technician.
Conclusion: Embracing Secure Boot for a Safer Computing Experience
Enabling Secure Boot in Windows 11 is a crucial step towards enhancing your computer’s security and stability. While accessing the BIOS is the traditional approach, alternative methods like using the "bcdedit" command or third-party tools offer viable options for enabling Secure Boot without direct BIOS access. By implementing Secure Boot, you can significantly reduce the risk of malware infections and unauthorized access, ensuring a more secure and reliable computing experience. Remember to prioritize security and seek professional assistance when needed to ensure a smooth and successful implementation of Secure Boot on your Windows 11 system.

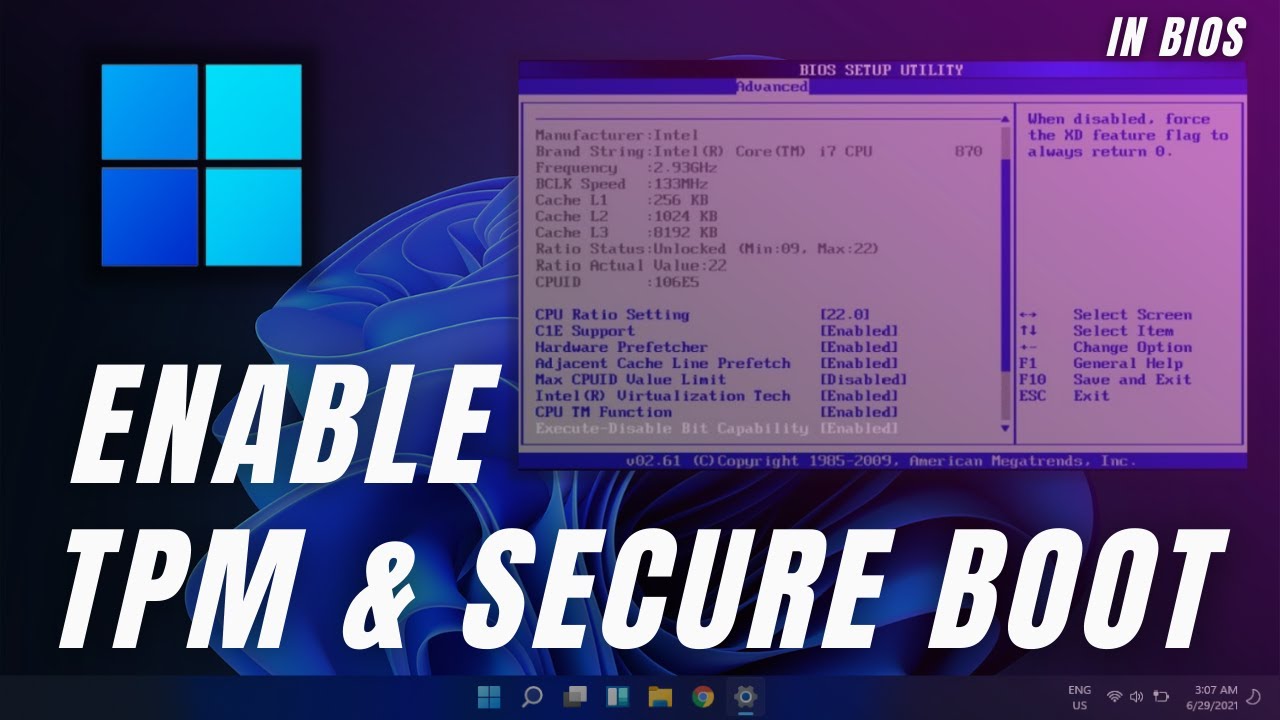
![How to Enable Secure Boot on Windows 11 Easily [2022] - YouTube](https://i.ytimg.com/vi/41sHVDV-WZc/maxresdefault.jpg)

Closure
Thus, we hope this article has provided valuable insights into Navigating Secure Boot in Windows 11: A Comprehensive Guide. We thank you for taking the time to read this article. See you in our next article!