Migrating Virtual Machines: Transforming VMDK Images to QCOW2 for Windows 10
Related Articles: Migrating Virtual Machines: Transforming VMDK Images to QCOW2 for Windows 10
Introduction
In this auspicious occasion, we are delighted to delve into the intriguing topic related to Migrating Virtual Machines: Transforming VMDK Images to QCOW2 for Windows 10. Let’s weave interesting information and offer fresh perspectives to the readers.
Table of Content
Migrating Virtual Machines: Transforming VMDK Images to QCOW2 for Windows 10
In the realm of virtualization, efficient and seamless migration of virtual machines (VMs) is paramount. This often involves converting virtual disk images between different formats, catering to various hypervisors and storage solutions. One common scenario involves transitioning from VMware’s VMDK format to KVM’s QCOW2 format, particularly when migrating Windows 10 VMs to a Linux-based environment or leveraging KVM’s advantages. This process presents a compelling opportunity to enhance flexibility, optimize performance, and leverage the unique features of different virtualization platforms.
Understanding the Formats: VMDK and QCOW2
Before delving into the conversion process, it is crucial to grasp the characteristics of VMDK and QCOW2, the two disk image formats at the heart of this migration.
VMDK (Virtual Machine Disk): Developed by VMware, VMDK is a widely adopted format, known for its compatibility across diverse VMware products and its ability to handle large disk sizes effectively. VMDK’s strength lies in its robust features, including the capability to create sparse images (storing only used data blocks), support for thin provisioning (allocating disk space on demand), and the ability to split disk images into multiple files.
QCOW2 (QEMU Copy-on-Write version 2): Originating from the QEMU virtualization project, QCOW2 has gained significant traction due to its efficiency and flexibility. It excels in its ability to create copy-on-write images, enabling efficient disk space usage by modifying only the changed data blocks. QCOW2 also offers features like compression, encryption, and the capability to store multiple disk images within a single file, contributing to its appeal for various virtualization scenarios.
The Advantages of Converting VMDK to QCOW2 for Windows 10
Converting VMDK to QCOW2 for Windows 10 VMs offers a range of benefits:
- Enhanced Flexibility: QCOW2’s compatibility with KVM and other virtualization platforms like Xen and VirtualBox provides greater flexibility in choosing your virtualization environment.
- Optimized Performance: QCOW2’s copy-on-write mechanism can lead to improved performance, especially during frequent read operations, as only the modified data blocks need to be accessed.
- Reduced Storage Consumption: QCOW2’s compression capabilities can significantly reduce storage space requirements, especially for larger VMs.
- Improved Security: QCOW2’s encryption features enhance data security, safeguarding sensitive information within the virtual disk.
Methods for Converting VMDK to QCOW2
Several methods facilitate the conversion of VMDK to QCOW2, catering to different needs and levels of expertise:
1. Using qemu-img:
The qemu-img command-line utility, a fundamental tool within the QEMU ecosystem, provides a direct and efficient method for conversion. This approach offers granular control and is particularly suitable for users comfortable with the command line.
Steps:
-
Install qemu-img: Ensure that the
qemu-imgutility is installed on your system. - Identify the VMDK File: Locate the VMDK file containing your Windows 10 VM.
- Convert the VMDK to QCOW2: Execute the following command in your terminal:
qemu-img convert -f vmdk -O qcow2 <vmdk_file_path> <qcow2_file_path>Replace <vmdk_file_path> with the path to your VMDK file and <qcow2_file_path> with the desired location and name for your QCOW2 file.
2. Utilizing Virtualization Software:
Several virtualization software solutions, including VirtualBox and KVM, offer built-in functionality for converting VMDK to QCOW2. These graphical interfaces simplify the process, making it accessible to users without extensive command-line experience.
Steps:
- Open the Virtualization Software: Launch your preferred virtualization software.
- Import the VMDK: Use the software’s import functionality to import the VMDK file containing your Windows 10 VM.
- Export to QCOW2: Choose the option to export the imported VM as a QCOW2 file.
3. Leveraging Online Conversion Tools:
Online conversion tools offer a convenient solution for converting VMDK to QCOW2 without the need for local software installations. These tools typically handle the conversion process in the cloud, eliminating the requirement for local resources.
Steps:
- Locate an Online Conversion Tool: Search for a reputable online conversion tool that supports VMDK to QCOW2 conversion.
- Upload the VMDK File: Upload the VMDK file containing your Windows 10 VM to the tool’s interface.
- Initiate Conversion: Start the conversion process and wait for the tool to complete the task.
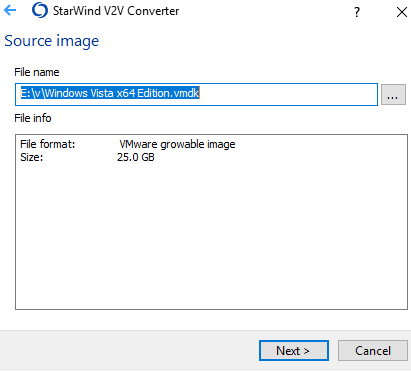
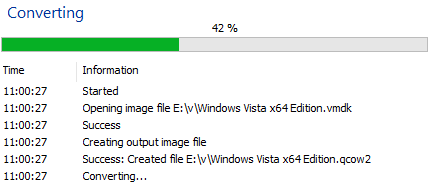
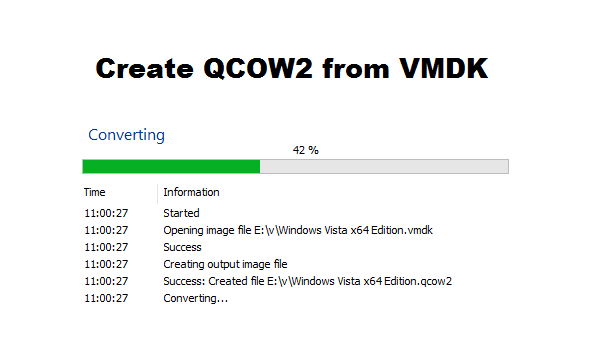
4. Employing a Specialized Converter:
Dedicated conversion tools, such as VMDK to QCOW2 Converter, are designed specifically for this task. These tools offer advanced features and options, catering to more complex conversion scenarios.
Steps:
- Download and Install the Converter: Obtain and install the chosen conversion tool on your system.
- Select the VMDK File: Specify the VMDK file containing your Windows 10 VM.
- Configure Settings: Configure any desired settings, such as compression level or encryption options.
- Initiate Conversion: Start the conversion process and wait for the tool to complete the task.
Considerations for Successful Conversion
While the conversion process itself is relatively straightforward, several factors should be considered for a successful migration:
- Disk Space: Ensure sufficient disk space is available for the QCOW2 image, especially if the original VMDK is large or compression is not enabled.
- VM Compatibility: Verify that your chosen virtualization software supports QCOW2 format and that the converted VM can boot and function properly.
- Driver Compatibility: If your Windows 10 VM requires specific drivers, ensure their compatibility with the new virtualization platform.
- Data Integrity: After conversion, validate the integrity of your data by booting the VM and checking for any issues.
FAQs Regarding VMDK to QCOW2 Conversion
1. Can I convert a VMDK to QCOW2 without losing data?
Yes, a well-executed conversion process should preserve all data within the virtual disk. However, it is always advisable to back up your VMDK image before starting the conversion.
2. Does converting VMDK to QCOW2 affect the VM’s performance?
The conversion itself does not directly affect performance. However, QCOW2’s copy-on-write capabilities can potentially lead to improved performance, particularly during read operations.
3. What if my VM doesn’t boot after conversion?
If your VM fails to boot after conversion, several potential causes could be at play. Check for driver compatibility issues, ensure that the VM’s BIOS settings are appropriate for the new virtualization platform, and verify that the virtual disk is connected correctly.
4. Is it possible to convert a VMDK to QCOW2 without a virtual machine?
Yes, you can convert a VMDK to QCOW2 using the qemu-img command-line utility without the need for a running virtual machine.
5. Can I convert a VMDK to QCOW2 without losing the existing disk space?
By default, the conversion process will create a new QCOW2 image with the same size as the original VMDK. However, you can use the -b option in qemu-img to create a sparse QCOW2 image, saving disk space by only storing the used data blocks.
Tips for a Smooth Conversion
- Backup: Always create a backup of your VMDK image before initiating the conversion process.
- Check Compatibility: Ensure that your virtualization software and the target hardware support QCOW2 format.
- Test After Conversion: Boot the converted VM and test its functionality to ensure data integrity and driver compatibility.
- Optimize Settings: Consider using compression or encryption options for QCOW2 images to optimize storage space and enhance security.
Conclusion
Converting VMDK to QCOW2 for Windows 10 VMs presents a valuable opportunity to enhance flexibility, optimize performance, and leverage the strengths of different virtualization platforms. By carefully considering the conversion methods, ensuring compatibility, and following best practices, users can seamlessly migrate their VMs, unlocking new possibilities and maximizing the benefits of virtualization.


Closure
Thus, we hope this article has provided valuable insights into Migrating Virtual Machines: Transforming VMDK Images to QCOW2 for Windows 10. We thank you for taking the time to read this article. See you in our next article!