Mastering Your Storage: A Comprehensive Guide to Disk Management in Windows 11
Related Articles: Mastering Your Storage: A Comprehensive Guide to Disk Management in Windows 11
Introduction
In this auspicious occasion, we are delighted to delve into the intriguing topic related to Mastering Your Storage: A Comprehensive Guide to Disk Management in Windows 11. Let’s weave interesting information and offer fresh perspectives to the readers.
Table of Content
Mastering Your Storage: A Comprehensive Guide to Disk Management in Windows 11
Windows 11, with its sleek interface and advanced features, offers a powerful tool for managing your computer’s storage: Disk Management. This built-in utility provides a comprehensive platform for understanding, organizing, and optimizing your hard drives and other storage devices. Whether you’re a seasoned computer user or a newcomer to the world of data management, mastering Disk Management can significantly improve your computer’s performance, enhance security, and ensure the longevity of your valuable data.
Understanding Disk Management: A Foundation for Effective Storage Control
Disk Management acts as the central hub for all your storage-related activities. It offers a visual representation of your connected drives, including internal hard drives, external USB drives, and network drives. This graphical interface allows you to:
- Identify and Label Drives: Clearly distinguish between different storage devices, making navigation and file organization effortless.
- Partition Drives: Divide a single physical drive into multiple logical partitions, enabling you to allocate specific storage space for different purposes (e.g., operating system, user data, backups).
- Format Drives: Prepare a drive for use by creating a file system, such as NTFS or FAT32, which allows the operating system to understand and access data stored on the drive.
- Create, Delete, and Resize Partitions: Manage your storage space efficiently by adjusting the size of partitions based on your needs, creating new partitions for specific applications or data, or removing unused partitions.
- Assign Drive Letters: Assign unique letter designations to drives, simplifying their identification and navigation within Windows.
- Check Disk Health: Run diagnostics to identify and potentially repair errors on your hard drives, ensuring their integrity and data safety.
- Convert File Systems: Change the file system of a drive (e.g., from FAT32 to NTFS) to optimize performance or compatibility with specific applications.
Benefits of Effective Disk Management
Harnessing the power of Disk Management yields numerous benefits, enhancing your computing experience and safeguarding your data:
- Optimized Performance: By organizing your storage space efficiently, you can reduce fragmentation and improve the speed at which your computer accesses files, leading to smoother application launches and faster overall performance.
- Enhanced Security: Creating separate partitions for your operating system and user data helps isolate sensitive information, mitigating the risk of data loss in case of system failure or malware infection.
- Increased Storage Efficiency: Disk Management allows you to allocate storage space strategically, ensuring that you have enough space for your critical files and applications while minimizing wasted space on your drives.
- Data Protection: Regularly checking your hard drives for errors and performing backups can prevent data loss and ensure the longevity of your important files.
- Simplified Data Management: By organizing your drives into logical partitions and assigning meaningful drive letters, you can easily navigate and access your data, improving efficiency and reducing confusion.
Accessing Disk Management: Your Gateway to Storage Control
Accessing Disk Management in Windows 11 is straightforward:
- Search for "Disk Management": Type "Disk Management" in the Windows search bar and select the "Create and format hard disk partitions" option.
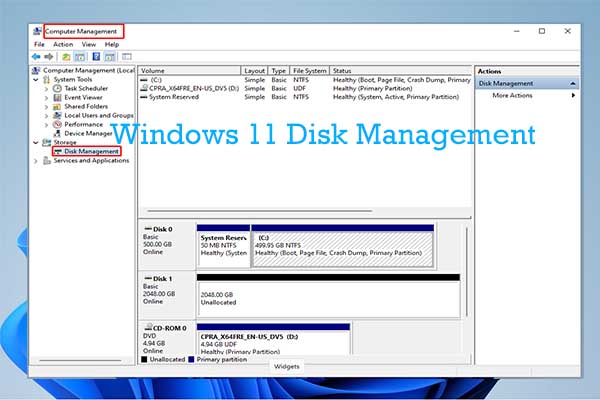
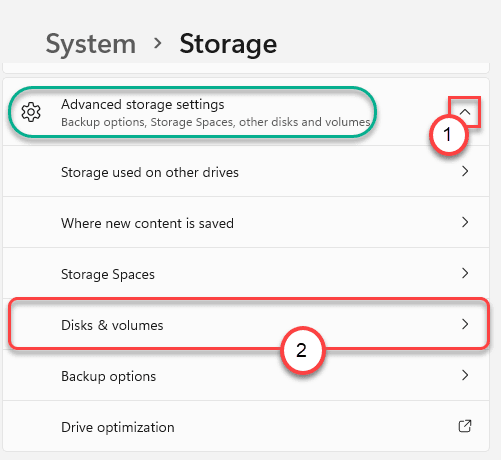
- Right-Click "This PC": Right-click on the "This PC" icon in File Explorer and choose "Manage." From the "Computer Management" window, navigate to "Storage" and select "Disk Management."
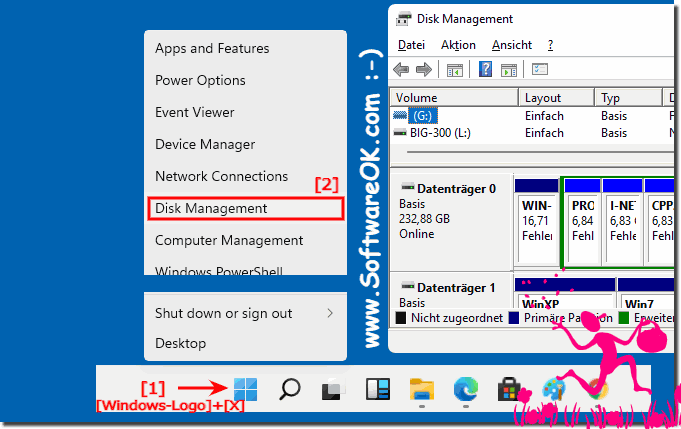
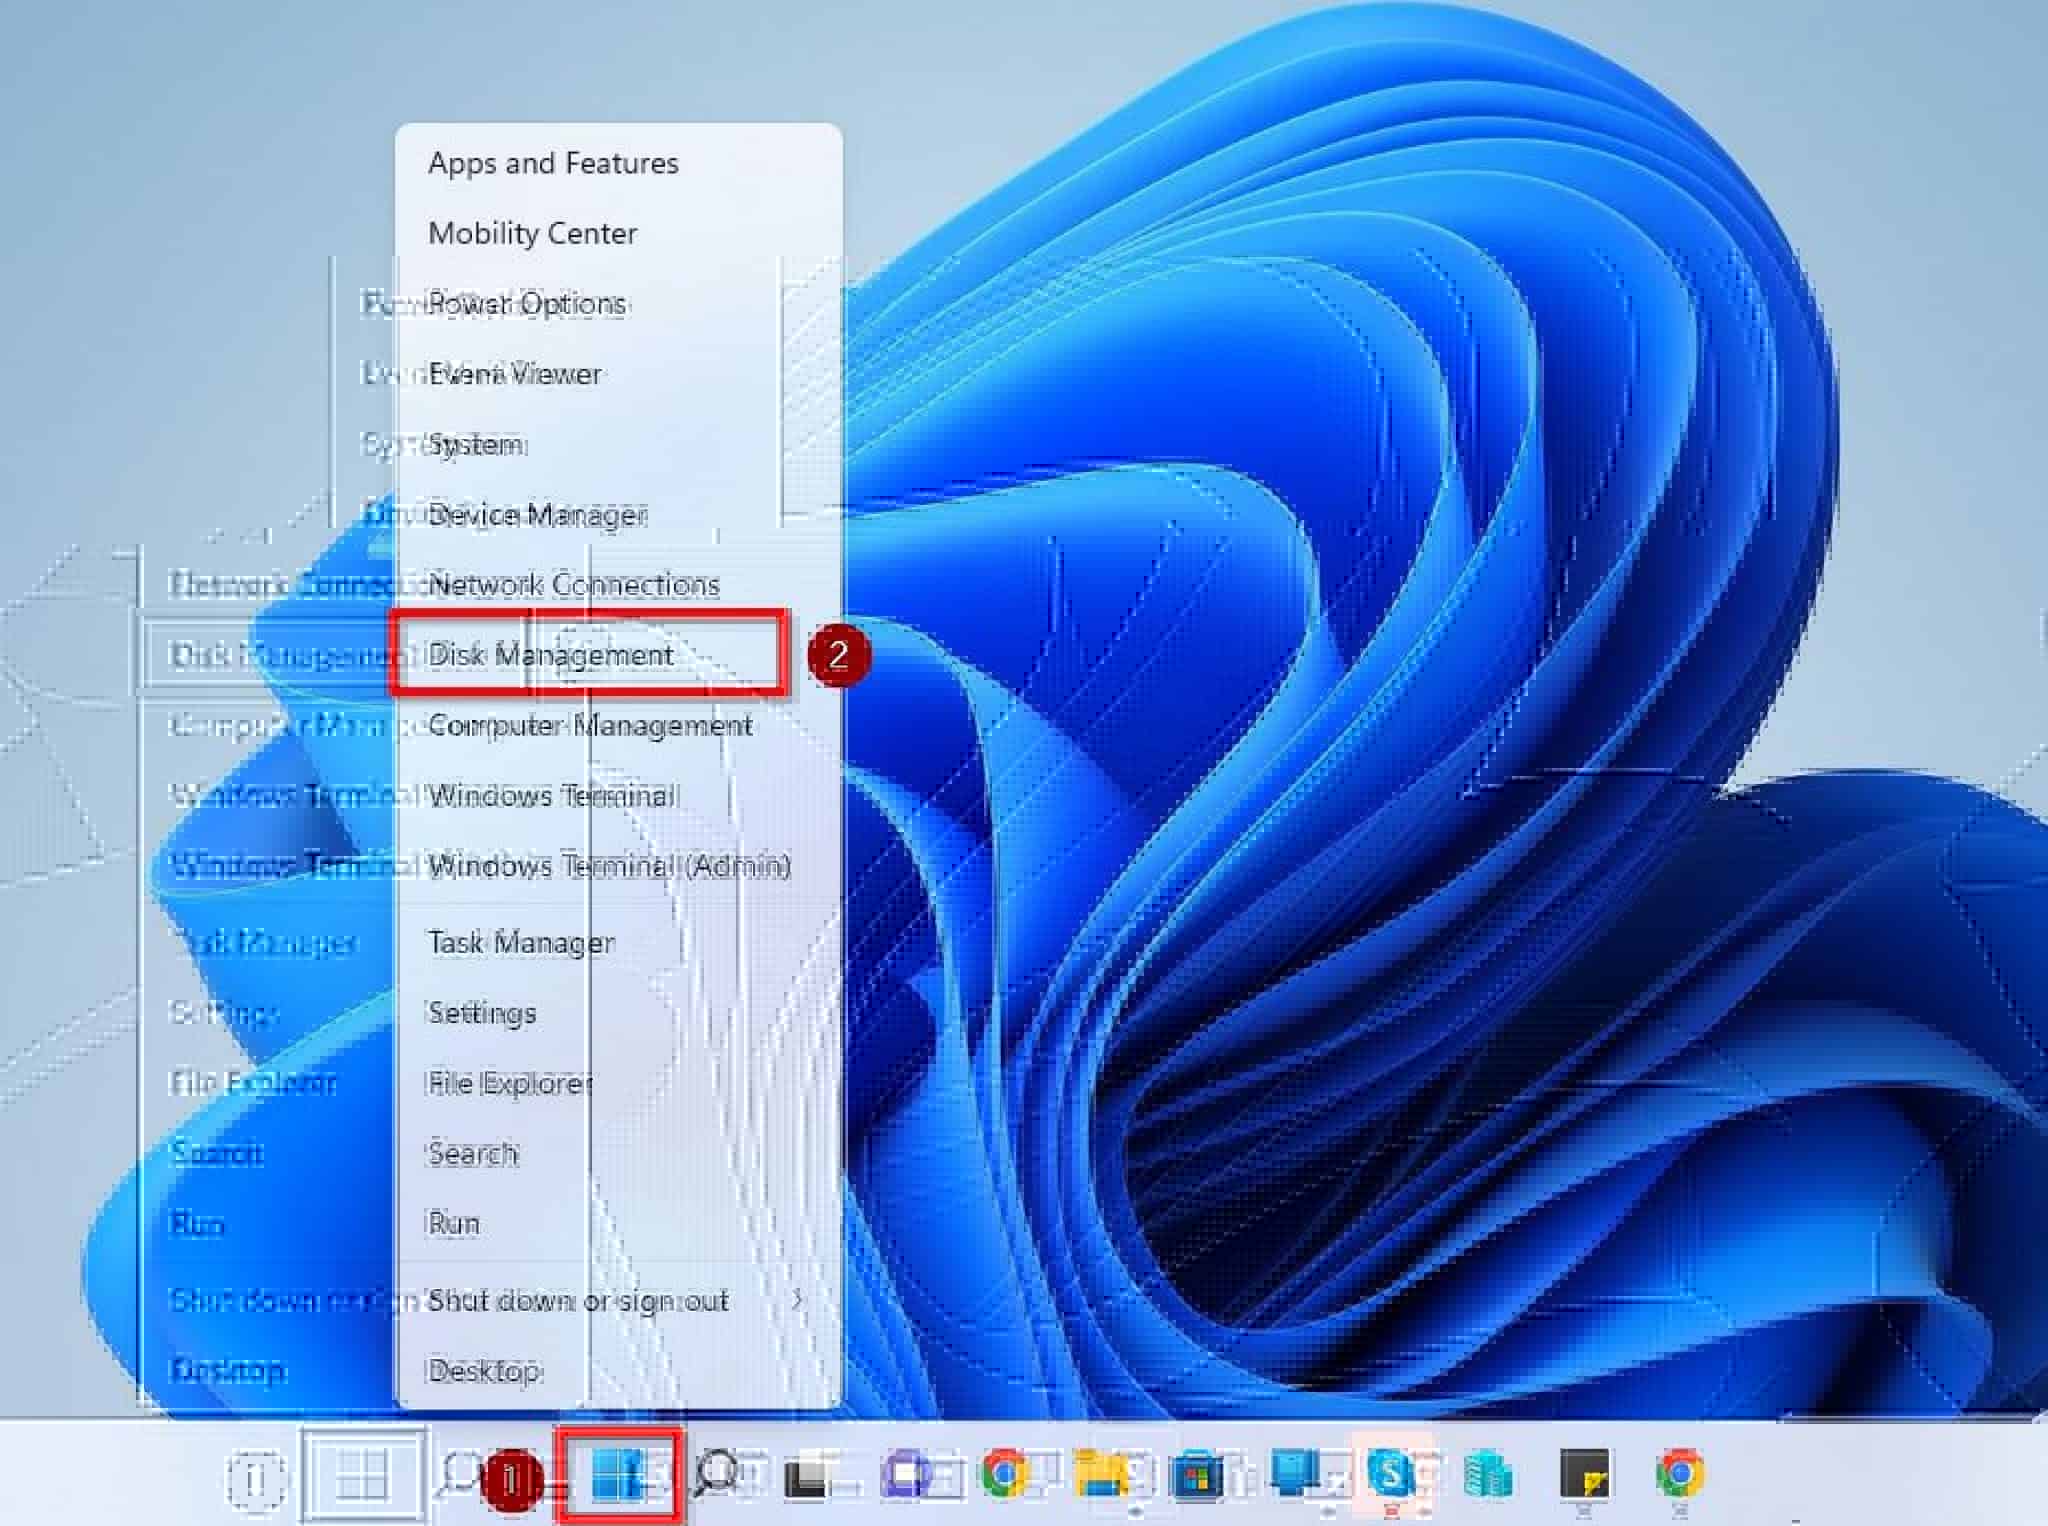
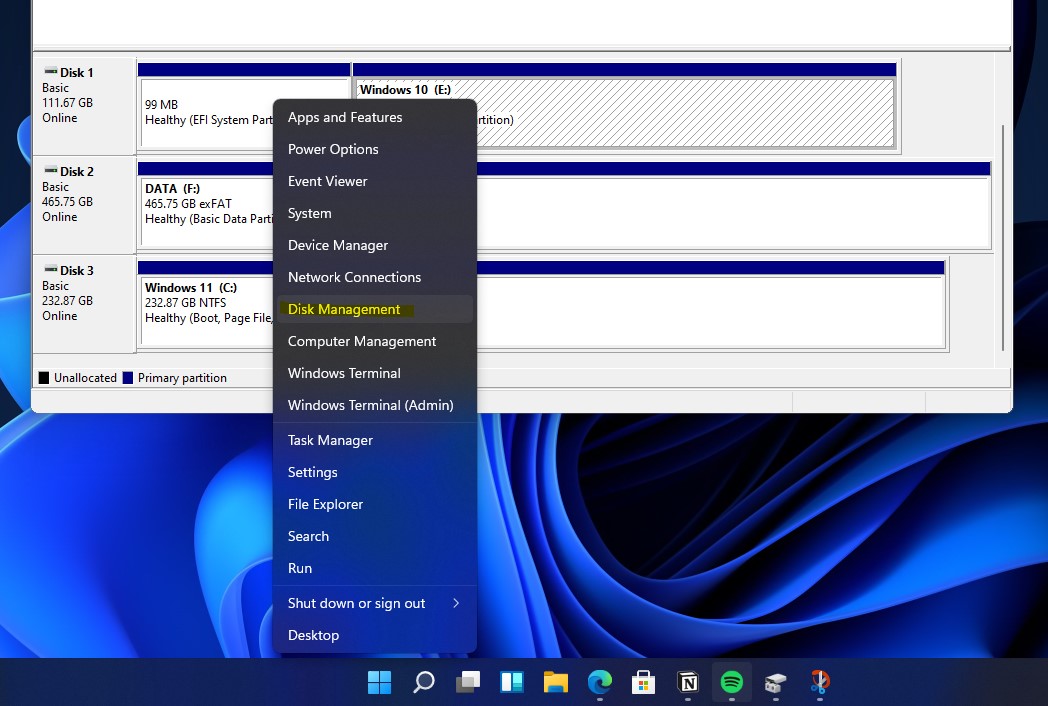
- Use the "Windows Key + X" Shortcut: Press the Windows key and the "X" key simultaneously. Select "Disk Management" from the menu that appears.
Navigating Disk Management: A Visual Guide to Your Storage
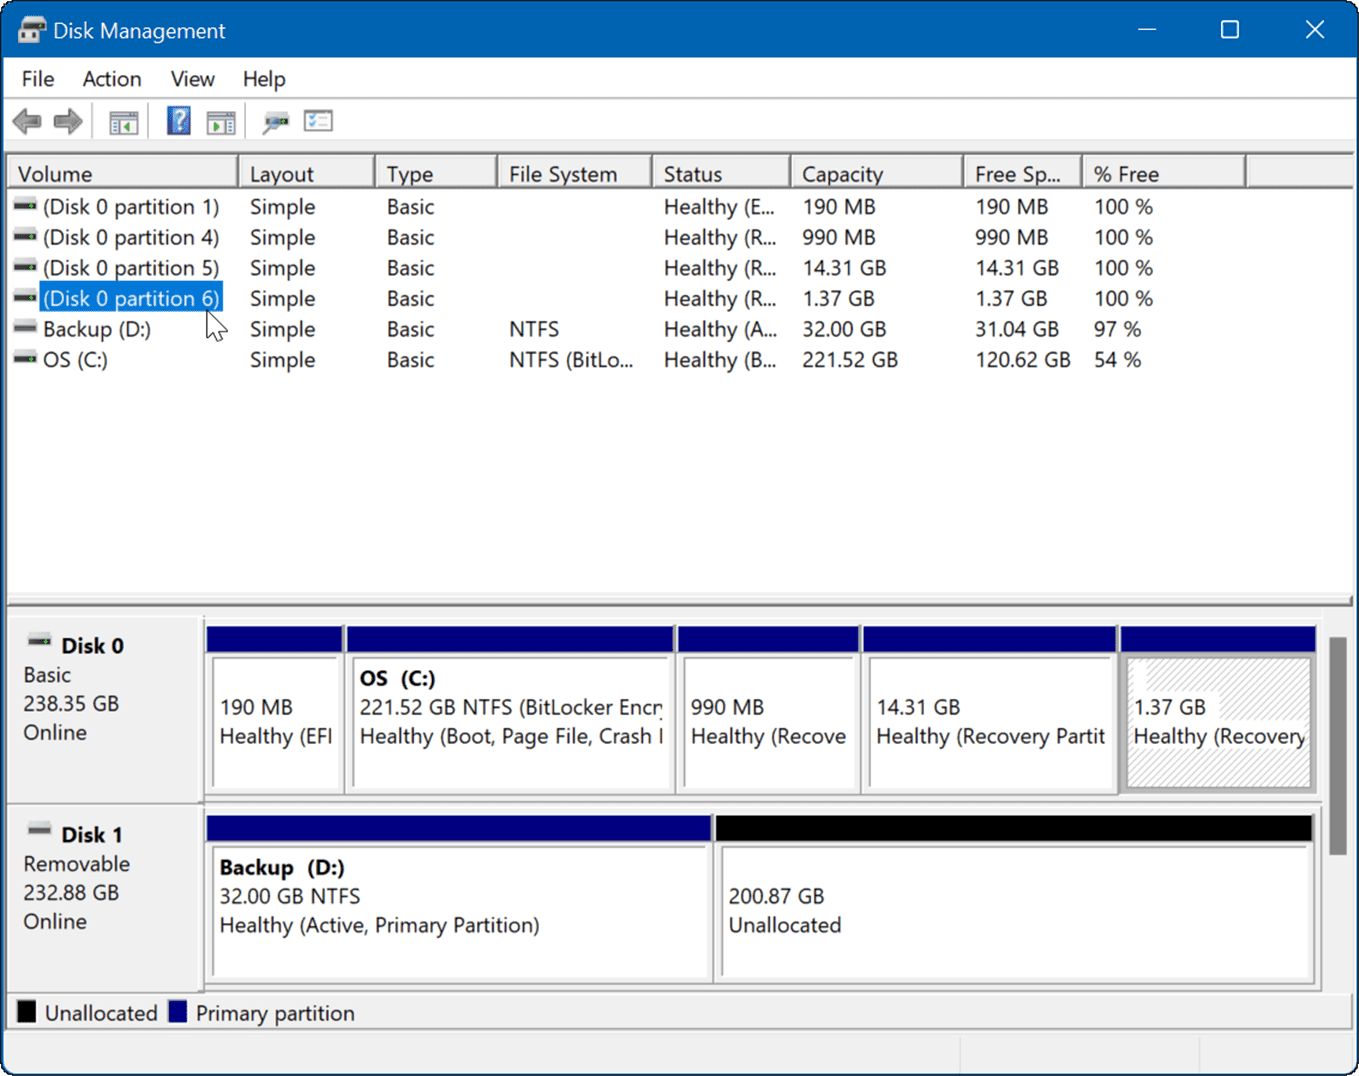
Once you’ve accessed Disk Management, you’ll be presented with a visual representation of your storage drives. The interface is intuitive and easy to understand:
- Drive List: Displays all connected drives, including their size, free space, file system, and partition information.
- Partition Map: Shows a graphical representation of each drive, highlighting the different partitions and their allocated space.
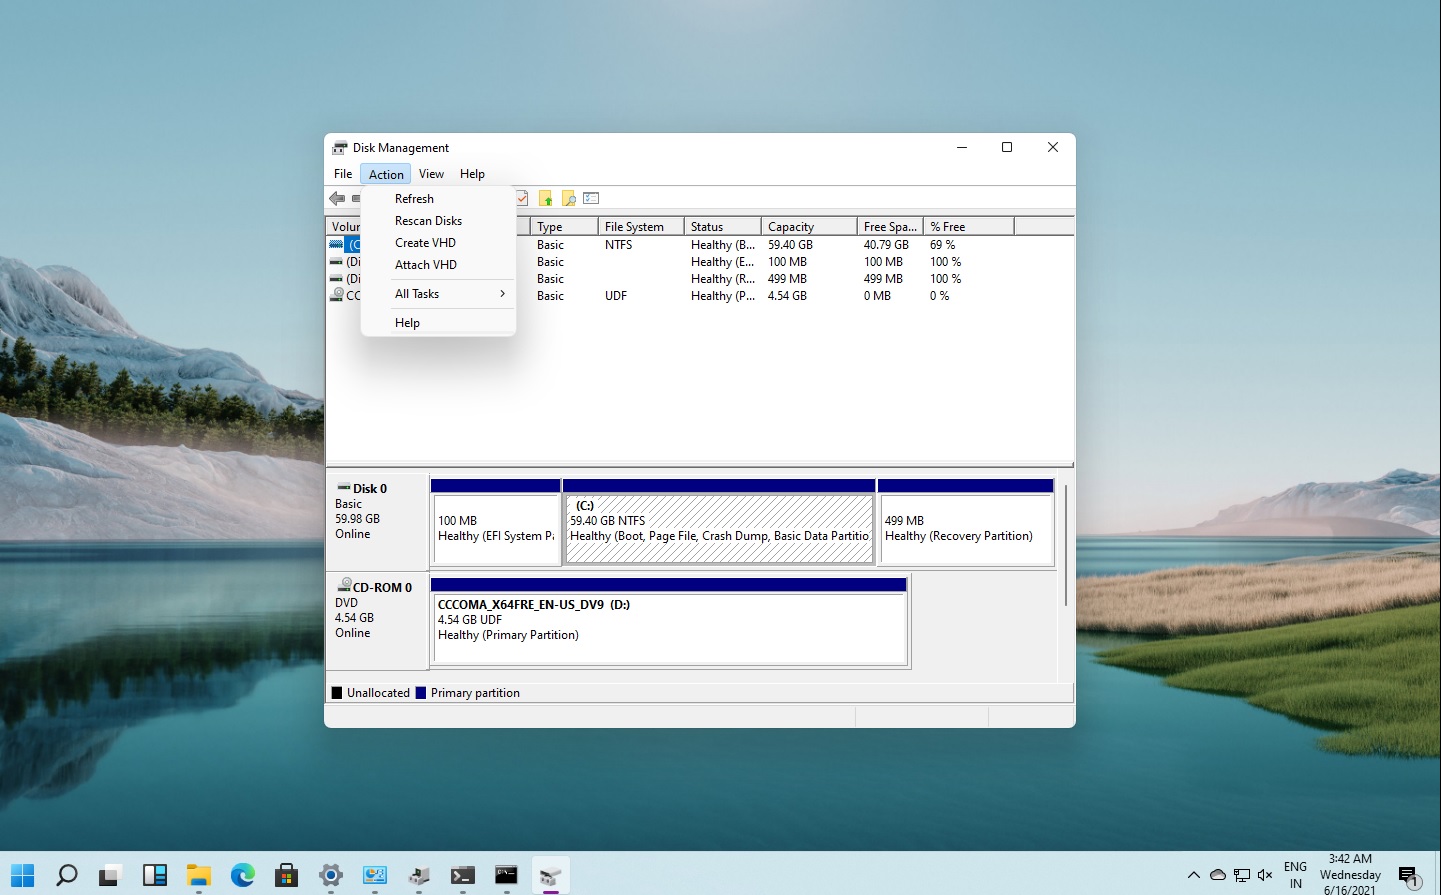
- Action Menu: Provides a range of options for managing your drives, including creating, deleting, formatting, and resizing partitions.
Mastering Disk Management: A Step-by-Step Guide
To effectively manage your storage, follow these steps:
- Identify Your Drives: Carefully examine the list of drives in Disk Management, noting the size, free space, and file system of each drive.
- Partition Your Drives (If Necessary): If you need to create separate partitions for different purposes, right-click on the unallocated space on a drive and select "New Simple Volume." Follow the on-screen instructions to create a new partition.
- Format Your Drives: Before using a new drive or partition, it’s essential to format it. Right-click on the drive or partition and select "Format." Choose the desired file system (NTFS for most applications) and assign a volume label for easy identification.
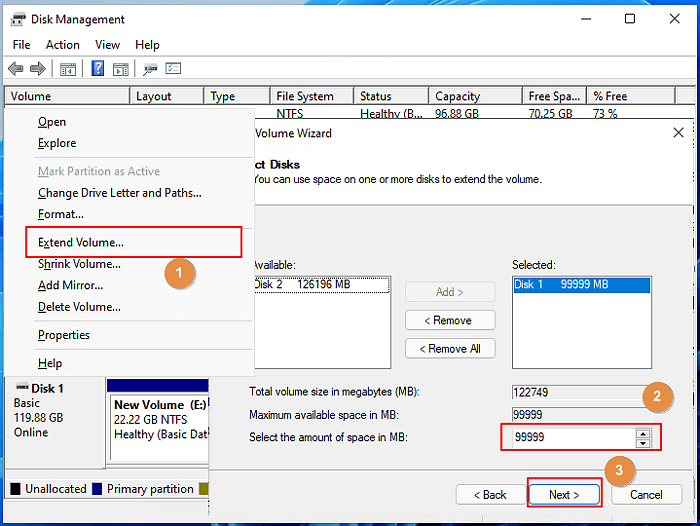
- Resize Your Partitions: If you need to adjust the size of a partition, right-click on the partition and select "Extend Volume" or "Shrink Volume." Follow the prompts to resize the partition.
- Assign Drive Letters: If a drive or partition doesn’t have a drive letter assigned, right-click on it and select "Change Drive Letter and Paths." Assign a unique letter for easy navigation.
- Check Disk Health: To ensure the integrity of your drives, regularly run a check disk. Right-click on the drive and select "Properties." Go to the "Tools" tab and click "Check."
- Convert File Systems: If you need to change the file system of a drive, right-click on the drive and select "Format." Select the desired file system and proceed with the formatting process.
Frequently Asked Questions (FAQs) about Disk Management
Q: What is the difference between a hard drive and a partition?
A: A hard drive is a physical storage device, while a partition is a logical division of a hard drive. A single hard drive can be divided into multiple partitions, each with its own file system and storage capacity.
Q: What file system should I use for my partitions?
A: For most purposes, NTFS is the recommended file system for Windows 11. It offers better performance, security, and features compared to FAT32.
Q: Can I delete a partition without losing data?
A: Deleting a partition can lead to data loss if it contains important files. Before deleting a partition, ensure that you have backed up all essential data.
Q: How do I recover deleted partitions?
A: Recovering deleted partitions is possible using data recovery software, but it’s not always guaranteed. If you have deleted a partition accidentally, it’s best to consult a data recovery professional.
Q: Can I use Disk Management to manage external drives?
A: Yes, Disk Management can be used to manage external drives, including USB drives, SD cards, and external hard drives.
Tips for Effective Disk Management
- Regularly back up your data: To protect yourself from data loss, create regular backups of your important files. This can be done using external drives, cloud storage services, or backup software.
- Monitor your disk space: Keep an eye on your disk space usage to ensure you have enough room for your files and applications. Consider deleting unnecessary files or upgrading to a larger drive if needed.
- Defragment your hard drives: While Windows 11 automatically defragments drives, you can manually run a defragmentation process to improve performance.
- Scan for errors regularly: Regularly check your hard drives for errors using the "Check Disk" feature in Disk Management. This can help prevent data loss and ensure the longevity of your drives.
- Use a disk cleanup tool: Use a disk cleanup tool to remove temporary files, system files, and other unnecessary files to free up space on your drives.
Conclusion
Disk Management in Windows 11 is a powerful tool that empowers you to take control of your storage space. By understanding its features and utilizing its capabilities, you can optimize your computer’s performance, enhance data security, and ensure the longevity of your valuable files. Whether you’re a novice or an experienced user, mastering Disk Management is a crucial step towards maximizing your computing experience and safeguarding your data.

Closure
Thus, we hope this article has provided valuable insights into Mastering Your Storage: A Comprehensive Guide to Disk Management in Windows 11. We thank you for taking the time to read this article. See you in our next article!