Mastering Workspace Organization: A Comprehensive Guide to Windows 11’s Enhanced Window Management
Related Articles: Mastering Workspace Organization: A Comprehensive Guide to Windows 11’s Enhanced Window Management
Introduction
With great pleasure, we will explore the intriguing topic related to Mastering Workspace Organization: A Comprehensive Guide to Windows 11’s Enhanced Window Management. Let’s weave interesting information and offer fresh perspectives to the readers.
Table of Content
- 1 Related Articles: Mastering Workspace Organization: A Comprehensive Guide to Windows 11’s Enhanced Window Management
- 2 Introduction
- 3 Mastering Workspace Organization: A Comprehensive Guide to Windows 11’s Enhanced Window Management
- 3.1 Understanding the Power of Snap Layouts
- 3.2 Unlocking the Benefits of Snap Layouts
- 3.3 Implementing Snap Layouts: A Step-by-Step Guide
- 3.4 Going Beyond Predefined Layouts: Creating Custom Zones
- 3.5 FAQs: Addressing Common Concerns
- 3.6 Tips for Maximizing Snap Layouts
- 3.7 Conclusion: Embracing a New Era of Workspace Organization
- 4 Closure
Mastering Workspace Organization: A Comprehensive Guide to Windows 11’s Enhanced Window Management
Windows 11 introduces a revolutionary approach to window management, empowering users to organize their digital workspace with unparalleled precision and efficiency. This innovative feature, known as "Snap Layouts," offers a suite of intuitive tools for arranging applications, maximizing screen real estate, and fostering a clutter-free, productive environment.
Understanding the Power of Snap Layouts
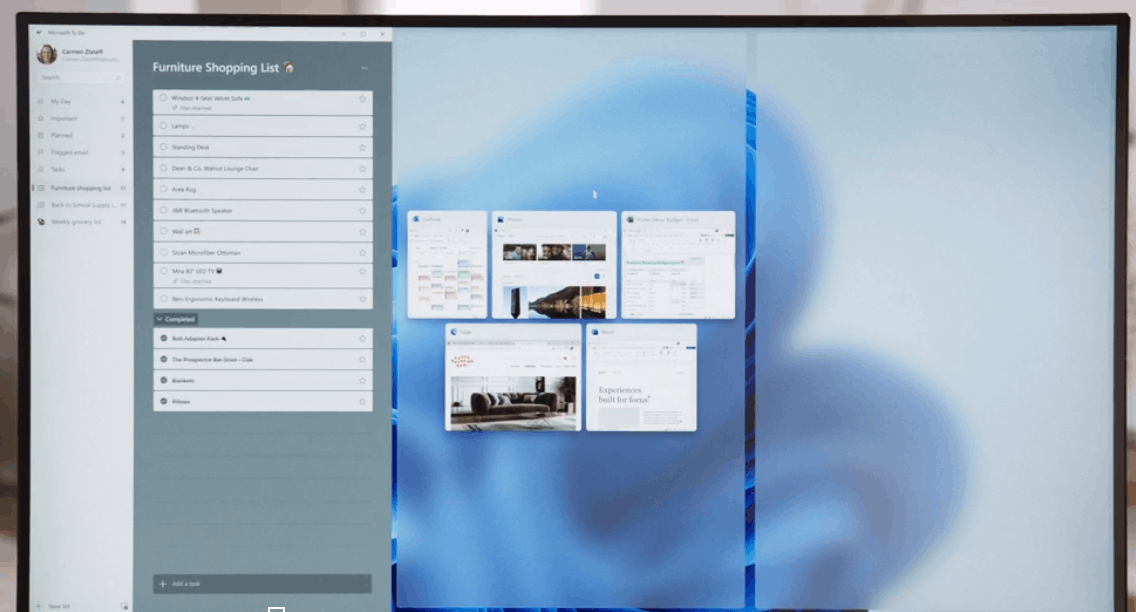
Snap Layouts, the cornerstone of Windows 11’s enhanced window management, provides users with the ability to effortlessly create and customize multi-window layouts. These layouts, often referred to as "fancy zones," enable users to instantly arrange applications into predefined areas on their screen, optimizing screen space and streamlining workflows.
The Core Elements of Snap Layouts:
- Predefined Layouts: Windows 11 offers a range of pre-configured layouts, including side-by-side, top and bottom, and quadrants, allowing users to quickly arrange applications based on their preferred workflow.
- Customizable Zones: Users have the flexibility to create their own custom layouts, tailoring the arrangement of windows to suit specific tasks and preferences.
- Dynamic Resizing: Snap Layouts automatically adjust window sizes and positions to accommodate changes in screen resolution or the addition of new windows.
- Multi-Monitor Support: Snap Layouts seamlessly extend to multi-monitor setups, allowing users to manage windows across multiple screens with ease.
Unlocking the Benefits of Snap Layouts
The benefits of Snap Layouts extend far beyond aesthetic organization, offering a transformative impact on productivity and workflow efficiency.
Enhanced Productivity:
- Reduced Distractions: By visually separating applications, Snap Layouts minimize distractions, allowing users to focus on the task at hand without the clutter of multiple overlapping windows.
- Streamlined Multitasking: The ability to quickly arrange applications into predefined layouts significantly improves multitasking capabilities, enabling users to seamlessly switch between applications and access information with minimal effort.
- Increased Efficiency: By optimizing screen real estate, Snap Layouts maximize the available workspace, allowing users to view more content and work on multiple projects simultaneously.
Improved User Experience:
- Intuitive and Easy to Use: Snap Layouts are incredibly intuitive, requiring minimal effort to learn and master. The simple drag-and-drop interface makes it effortless to create and manage window arrangements.
- Seamless Integration: Snap Layouts seamlessly integrate with other Windows 11 features, such as the taskbar and the Alt+Tab switcher, providing a cohesive and streamlined user experience.
- Personalized Workspaces: The ability to create custom layouts allows users to personalize their workspace, tailoring it to specific tasks and workflows.
Implementing Snap Layouts: A Step-by-Step Guide
Utilizing Snap Layouts is remarkably straightforward. Here’s a breakdown of the process:
- Open the Applications: Launch the applications you wish to arrange within a Snap Layout.
- Initiate Snap Layout: Hover your mouse over the title bar of an application window. You’ll notice a small "Snap" icon appear in the top right corner. Click this icon to reveal the available Snap Layout options.
- Select a Layout: Choose the desired layout from the displayed options. The selected layout will instantly arrange the active window within the chosen configuration.
- Add More Windows: Repeat the process, hovering over the title bar of another application window and selecting the "Snap" icon to add it to the existing Snap Layout.
Going Beyond Predefined Layouts: Creating Custom Zones
For those seeking greater control and customization, Snap Layouts offer the ability to create personalized zones. This empowers users to define their own unique window arrangements, tailored to specific tasks or workflows.
- Access Settings: Navigate to the Windows settings by pressing the Windows key + I.
- System Settings: Select "System" from the left-hand menu.
- Multitasking: Click on "Multitasking" within the System settings.
- Snap Layouts: Locate the "Snap Layouts" section.
- Custom Zones: Click the "Custom zones" toggle to activate the feature.
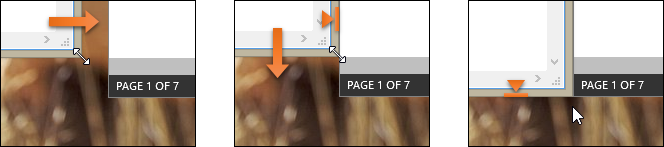
- Define Zones: Drag and drop the dividers on the screen to create custom zones according to your preferred layout.
- Save and Apply: Save the custom layout by clicking the "Save" button.
FAQs: Addressing Common Concerns
Q: Can I use Snap Layouts with multiple monitors?
A: Yes, Snap Layouts seamlessly extend to multi-monitor setups. You can arrange windows across multiple screens, creating a unified and organized workspace.
Q: Can I adjust the size of my custom zones?
A: Absolutely. You can resize custom zones by dragging the dividers on the screen to fine-tune the layout to your exact preferences.
Q: Are there any limitations to the number of windows I can arrange in a Snap Layout?
A: The number of windows you can arrange within a Snap Layout is dependent on the screen resolution and the chosen layout. However, Windows 11 allows for a high degree of flexibility, enabling you to arrange multiple windows within a single layout.
Q: Can I customize the look and feel of Snap Layouts?
A: While you cannot directly customize the appearance of Snap Layouts, you can adjust the overall theme and color scheme of Windows 11 to influence the visual presentation of your workspace.
Tips for Maximizing Snap Layouts
- Experiment with Layouts: Explore the various pre-configured layouts and custom zone options to discover the arrangement that best suits your workflow.
- Utilize Keyboard Shortcuts: Leverage keyboard shortcuts, such as Windows key + Z, to quickly access and manage Snap Layouts.
- Leverage Virtual Desktops: Combine Snap Layouts with virtual desktops to further organize your workspace, dedicating specific desktops to different projects or tasks.
- Customize Taskbar: Arrange the taskbar icons to align with your Snap Layout preferences, facilitating quick access to frequently used applications.
Conclusion: Embracing a New Era of Workspace Organization
Windows 11’s Snap Layouts revolutionize workspace organization, empowering users to create a streamlined, efficient, and visually appealing digital environment. By offering a range of pre-configured layouts and the ability to create custom zones, Snap Layouts provide unparalleled control over window arrangement, fostering a clutter-free and productive workspace.
Embracing Snap Layouts unlocks a new era of workspace organization, allowing users to streamline their workflows, minimize distractions, and enhance their overall productivity. As you delve into the world of Snap Layouts, remember to experiment with different configurations, leverage keyboard shortcuts, and personalize your workspace to create an environment that optimizes your efficiency and enhances your digital experience.


Closure
Thus, we hope this article has provided valuable insights into Mastering Workspace Organization: A Comprehensive Guide to Windows 11’s Enhanced Window Management. We appreciate your attention to our article. See you in our next article!