Managing Local Users and Groups in Windows 11: A Comprehensive Guide
Related Articles: Managing Local Users and Groups in Windows 11: A Comprehensive Guide
Introduction
In this auspicious occasion, we are delighted to delve into the intriguing topic related to Managing Local Users and Groups in Windows 11: A Comprehensive Guide. Let’s weave interesting information and offer fresh perspectives to the readers.
Table of Content
Managing Local Users and Groups in Windows 11: A Comprehensive Guide
Windows 11, like its predecessors, offers a robust system for managing user accounts and their access permissions. This system, often referred to as "local users and groups," allows administrators to control who can access the computer and what they can do. Understanding how to manage these local accounts is crucial for maintaining system security, ensuring data integrity, and optimizing user experience.
Understanding the Basics: Local Users and Groups
At its core, Windows 11 relies on the concept of user accounts. Each user account represents a distinct individual with specific privileges and permissions. These permissions define what the user can access and modify on the system. For instance, a standard user account might have limited access to system settings and files, while an administrator account enjoys full control.
Groups, on the other hand, act as containers for users. They enable efficient management of user permissions by assigning a set of privileges to the entire group rather than individually to each user. This simplifies the process of granting access to multiple users with similar needs. For example, a "Marketing" group might be granted access to specific shared folders and applications relevant to their work.
Why Manage Local Users and Groups?
Managing local users and groups holds significant importance in maintaining a secure and efficient Windows 11 environment. Here’s why:
- Security: By creating separate user accounts for each individual, administrators can control access to sensitive data and system settings. This helps prevent unauthorized access and potential misuse.
- Accountability: Each user account is associated with a specific individual, making it easier to track user activity and identify any potential security breaches.
- Resource Management: By assigning specific permissions to users and groups, administrators can limit resource usage and ensure that only authorized individuals have access to essential resources.
- Customization: Different users may have varying needs and preferences. Creating separate accounts allows for personalized settings and configurations, enhancing the user experience.
- Collaboration: Groups facilitate collaboration by allowing users to share files and applications within a specific context, simplifying work processes and streamlining communication.
Enabling and Managing Local Users and Groups
Windows 11 provides a user-friendly interface for managing local users and groups. Here’s a detailed breakdown of the steps involved:
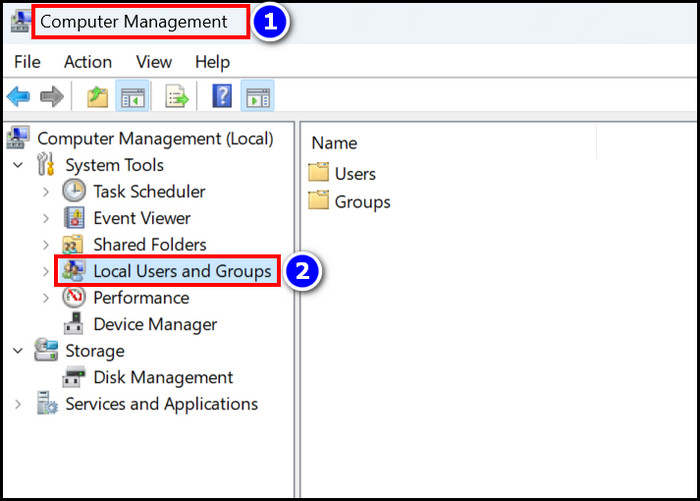
1. Accessing the "Local Users and Groups" Console:
- Open the "Run" dialog box by pressing the Windows key + R.
- Type "lusrmgr.msc" and press Enter. This will launch the "Local Users and Groups" console.
2. Managing Users:
-
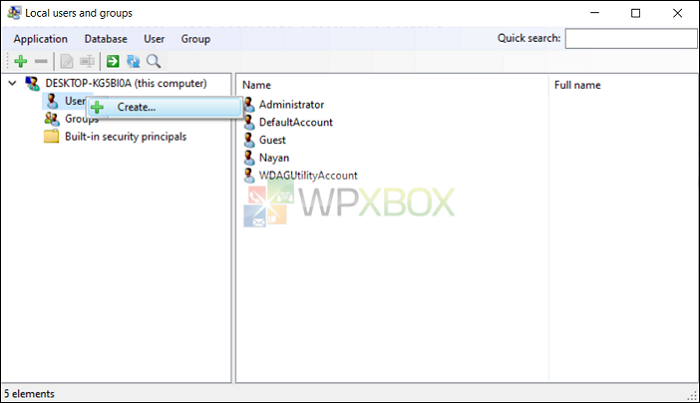
Creating a New User:
- Navigate to the "Users" folder in the left pane.
- Right-click and select "New" > "User."
- Provide a username, password, and confirm the password.
- Optionally, set a user description and choose a group membership.
-
Modifying User Properties:
- Right-click on the desired user and select "Properties."
- Access various settings such as password policy, account lockout, and group memberships.
-
Deleting a User:
- Right-click on the desired user and select "Delete."
- Confirm the deletion.
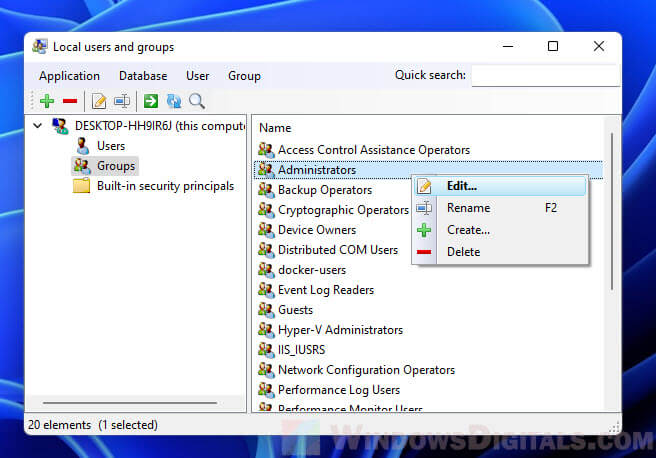
3. Managing Groups:
-
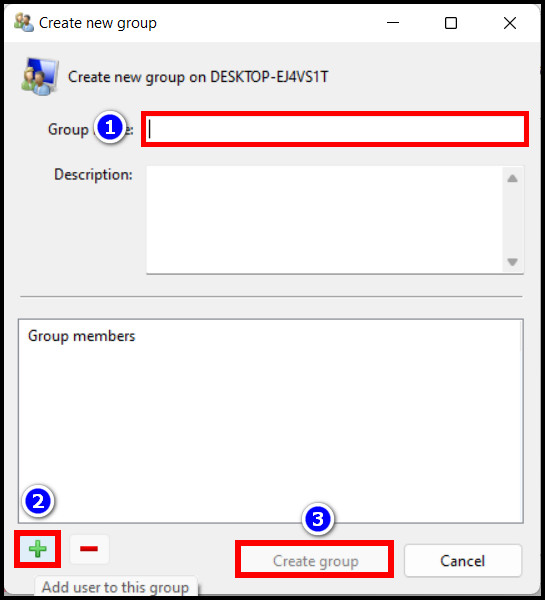
Creating a New Group:
- Navigate to the "Groups" folder in the left pane.
- Right-click and select "New" > "Group."
- Provide a group name and description.
-
Adding Users to a Group:
- Right-click on the desired group and select "Properties."
- Go to the "Members" tab.
- Click "Add" and select the users you want to add to the group.
-
Removing Users from a Group:
- Right-click on the desired group and select "Properties."
- Go to the "Members" tab.
- Select the user you want to remove and click "Remove."
-
Deleting a Group:
- Right-click on the desired group and select "Delete."
- Confirm the deletion.
4. Assigning Permissions:
-
Setting File and Folder Permissions:
- Right-click on the desired file or folder and select "Properties."
- Go to the "Security" tab.
- Click "Edit" and select the user or group you want to modify permissions for.
- Check or uncheck the desired permissions, such as "Read," "Write," or "Full control."
-
Setting Application Permissions:
- For specific applications, you can set permissions directly within the application’s settings.
- This allows you to control which users can access and utilize certain applications.
Best Practices for Managing Local Users and Groups:
- Use Strong Passwords: Encourage users to choose strong passwords that combine uppercase and lowercase letters, numbers, and symbols.
- Regularly Review User Accounts: Periodically review user accounts to ensure they are still necessary and have appropriate permissions.
- Implement Account Lockout Policies: Configure account lockout policies to prevent unauthorized access after multiple failed login attempts.
- Use Group Policies: For large organizations, leverage Group Policies to centrally manage user accounts and permissions across multiple computers.
- Maintain Proper Documentation: Keep detailed records of user accounts, group memberships, and permissions for future reference and troubleshooting.
Frequently Asked Questions
Q: What is the difference between a local user and a domain user?
A: A local user is an account created directly on the computer, while a domain user is an account created on a domain controller and can be used to log in to multiple computers on the network. Domain users are typically used in larger organizations with Active Directory.
Q: How do I enable or disable a user account?
A: To enable or disable a user account, right-click on the user in the "Local Users and Groups" console and select "Properties." In the "General" tab, check or uncheck the "Account is disabled" option.
Q: Can I change a user’s password without knowing their current password?
A: Yes, you can reset a user’s password without knowing their current password. In the "Local Users and Groups" console, right-click on the user and select "Set Password." You will be prompted to enter a new password.
Q: What are some common group names in Windows 11?
A: Some common group names include "Administrators," "Users," "Guests," "Power Users," and "Backup Operators."
Tips for Managing Local Users and Groups:
- Use descriptive user names: Choose user names that clearly identify the individual.
- Create separate accounts for different purposes: For example, create separate accounts for work, personal use, or guest access.
- Regularly update user account passwords: Encourage users to change their passwords frequently.
- Consider using a password manager: A password manager can help users create and manage strong passwords securely.
- Use Group Policy to manage user accounts and permissions: Group Policy provides a centralized way to manage user accounts and permissions across multiple computers.
Conclusion
Managing local users and groups is an essential aspect of maintaining a secure and efficient Windows 11 environment. By understanding the concepts of user accounts, groups, and permissions, administrators can effectively control access to system resources, enforce security policies, and optimize the user experience. Implementing best practices and utilizing the tools provided by Windows 11 ensures a robust and secure system for all users.


Closure
Thus, we hope this article has provided valuable insights into Managing Local Users and Groups in Windows 11: A Comprehensive Guide. We appreciate your attention to our article. See you in our next article!