Managing Disk Space After Windows 10 Updates: A Comprehensive Guide
Related Articles: Managing Disk Space After Windows 10 Updates: A Comprehensive Guide
Introduction
In this auspicious occasion, we are delighted to delve into the intriguing topic related to Managing Disk Space After Windows 10 Updates: A Comprehensive Guide. Let’s weave interesting information and offer fresh perspectives to the readers.
Table of Content
Managing Disk Space After Windows 10 Updates: A Comprehensive Guide

Windows 10, known for its regular updates, often leaves behind older versions, potentially consuming valuable disk space. While this practice ensures a smooth rollback in case of update issues, it can lead to clutter and storage constraints. This article provides a comprehensive guide on managing disk space after Windows 10 updates, outlining the importance of removing older versions and offering practical steps for efficient space management.
Understanding the Need for Disk Space Management
Windows 10 updates, designed to enhance security, stability, and performance, frequently introduce new features and bug fixes. These updates are delivered in the form of feature updates, which are substantial upgrades, and quality updates, which focus on bug fixes and security patches. While updates are essential, they often result in the retention of older versions within the system.
The "Windows.old" folder, created during the update process, stores the previous operating system files, allowing for a seamless rollback if the new update encounters issues. However, this folder can consume significant disk space, particularly for larger feature updates.
Benefits of Removing Older Versions
Deleting older versions of Windows 10 after a successful update offers several benefits:
- Reclaiming Disk Space: Removing the "Windows.old" folder can free up substantial disk space, improving system performance and enabling the installation of new programs or files.
- Optimizing System Performance: By reducing the number of files and folders on the system, disk access times can be shortened, leading to faster loading times and improved overall system responsiveness.
- Minimizing System Clutter: Removing redundant files and folders contributes to a cleaner and more organized system, facilitating easier navigation and file management.
- Enhancing Security: By removing older versions, the potential for vulnerabilities associated with outdated software is minimized, strengthening system security.
Methods for Removing Older Versions
Multiple methods can be employed to remove older versions of Windows 10, each offering different levels of control and flexibility:
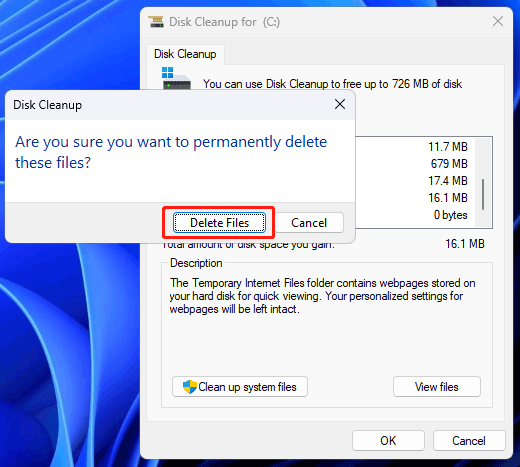
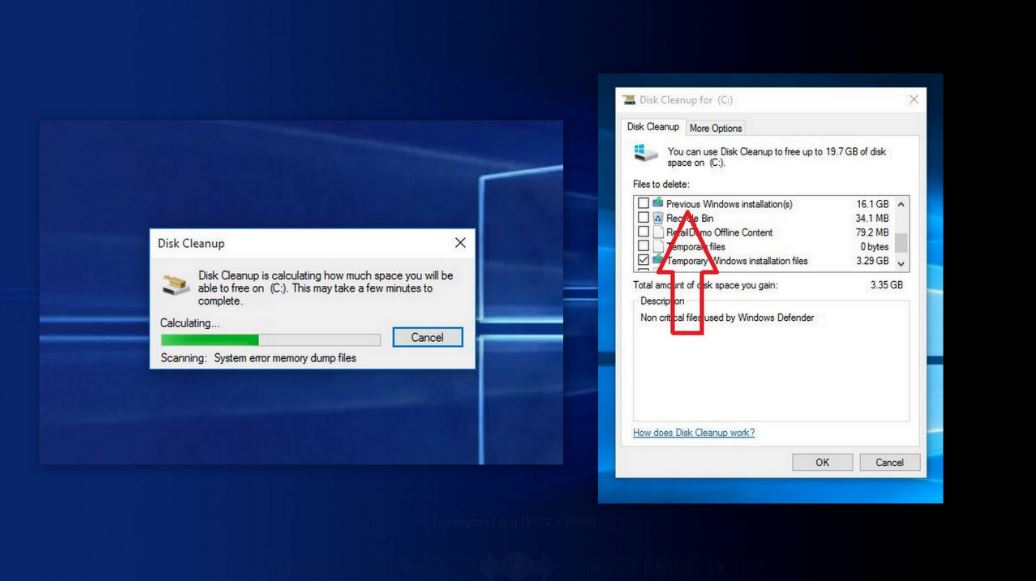
1. Using Disk Cleanup:
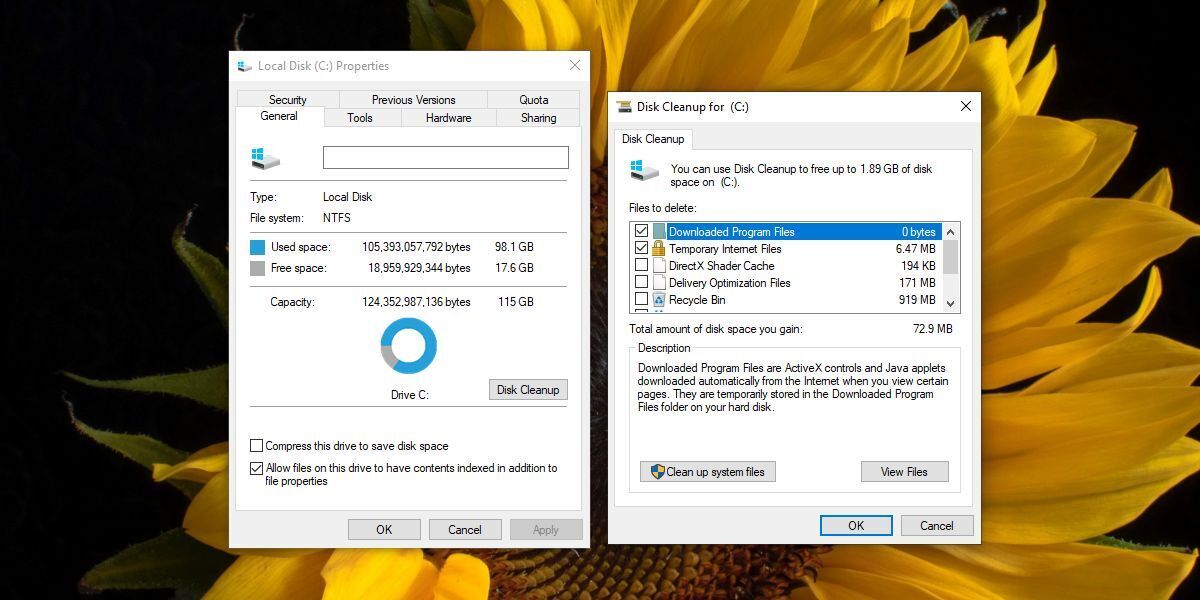
- Accessing Disk Cleanup: Navigate to the "This PC" window, right-click on the drive where Windows is installed (usually the "C" drive), and select "Properties."
- Launching Disk Cleanup: In the Properties window, click on "Disk Cleanup."
- Selecting Files to Delete: Select the "Previous Windows installations" checkbox and click "OK."
2. Manually Deleting the "Windows.old" Folder:
- Accessing the "Windows.old" Folder: Open File Explorer and navigate to the "C:Windows.old" folder.
- Deleting the Folder: Right-click on the "Windows.old" folder and select "Delete."
- Confirming Deletion: Confirm the deletion by clicking "Yes" in the confirmation prompt.
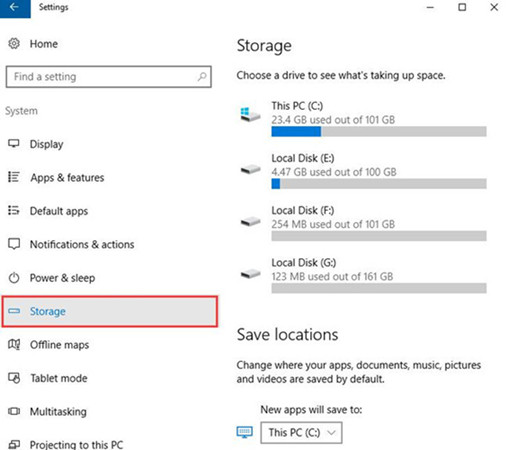
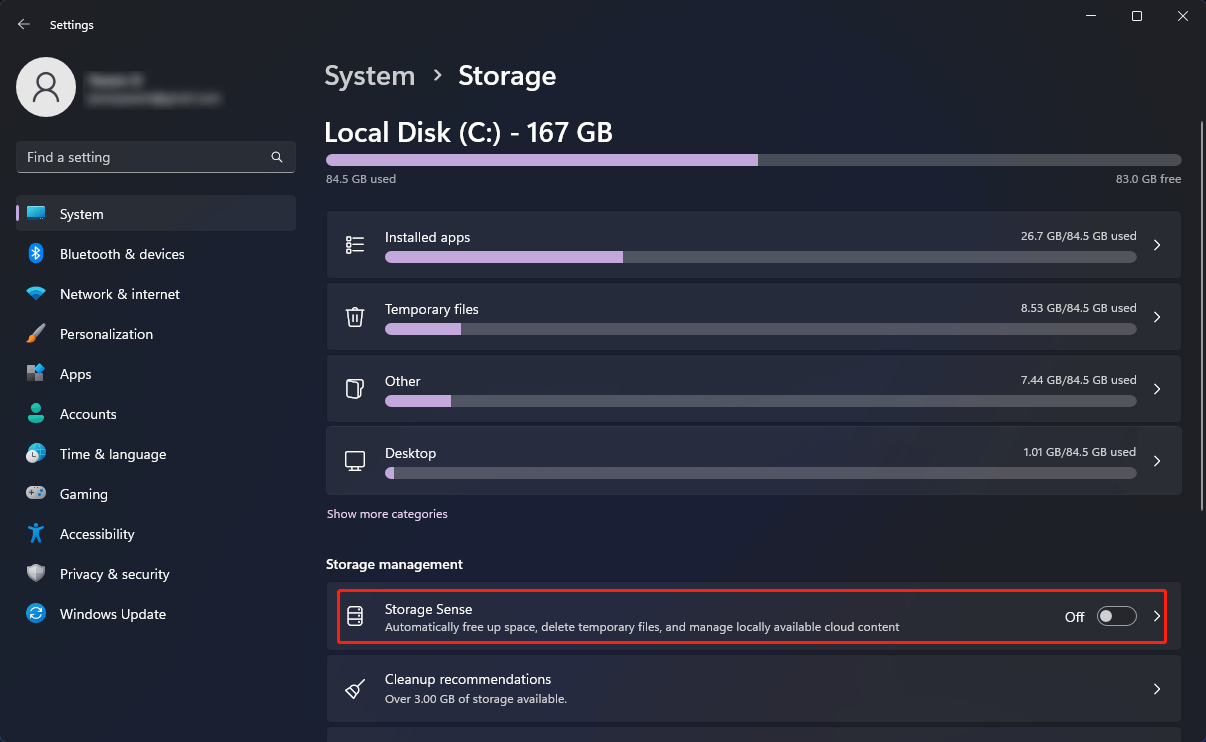
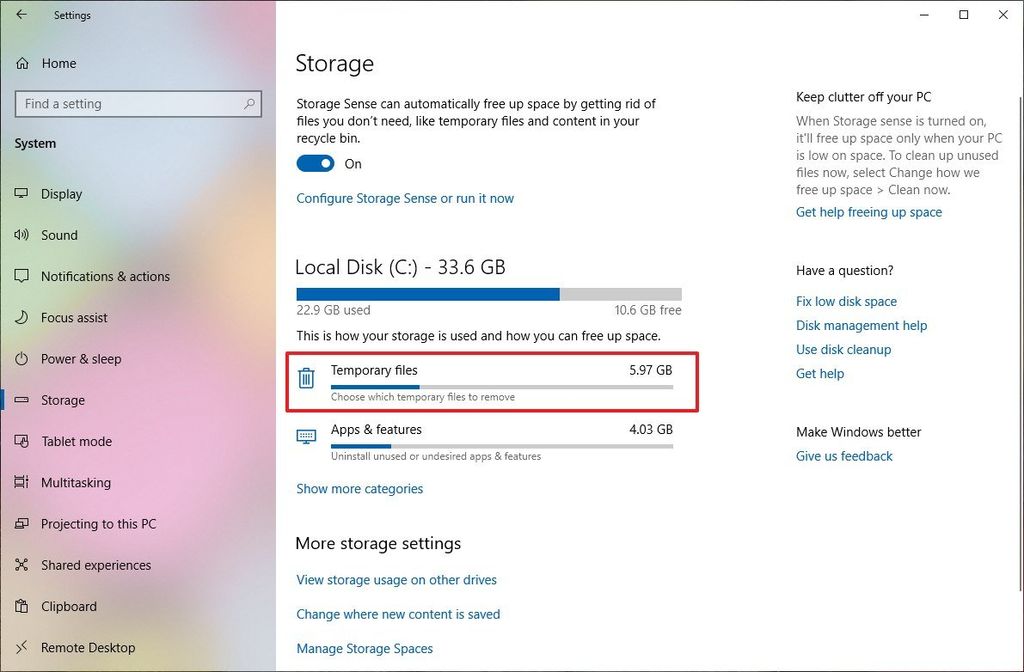
3. Using Storage Sense:
- Accessing Storage Sense: Open the "Settings" app, navigate to "System," and then "Storage."
- Enabling Storage Sense: Turn on "Storage Sense" and configure the settings according to your preferences.
- Setting up Automatic Cleanup: Enable the "Delete temporary files" option and schedule automatic cleanup for older versions of Windows.
4. Utilizing Command Prompt:
- Opening Command Prompt: Search for "cmd" in the Start menu and run it as administrator.
- Executing the Command: In the Command Prompt window, type "cleanmgr /sagerun" and press Enter.
- Selecting Files to Delete: Choose "Previous Windows installations" from the list and click "OK."
Considerations Before Deletion
Before proceeding with the removal of older versions, it is crucial to consider the following:
- Successful Update Completion: Ensure that the latest update has been successfully installed and the system is functioning properly.
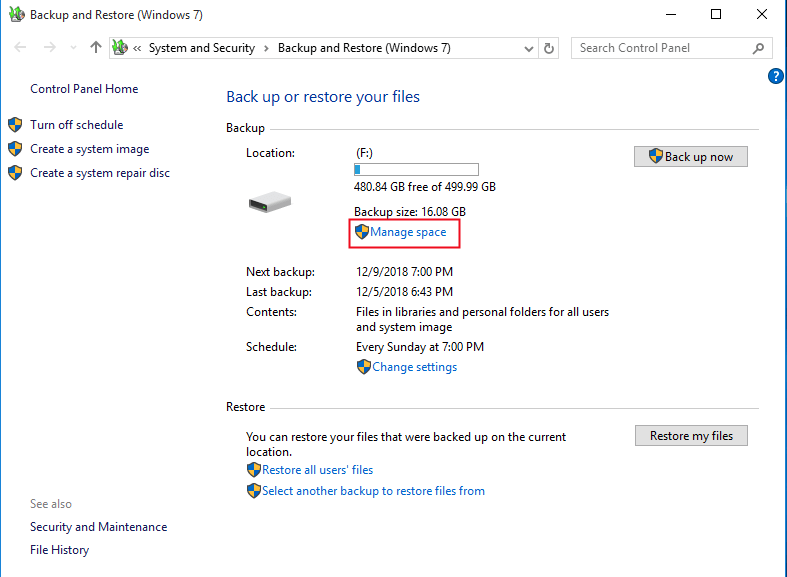
- Data Backup: It is always advisable to create a backup of important data before performing any system changes, including deleting older versions.
- Rollback Option Availability: While removing older versions can free up disk space, it also eliminates the option to roll back to a previous version if needed.
FAQs
Q: What if I accidentally deleted the "Windows.old" folder?
A: If the "Windows.old" folder is accidentally deleted, the rollback option to a previous version will be unavailable. However, a system restore point might exist, allowing you to restore the system to a previous state.
Q: Can I delete older versions without using Disk Cleanup?
A: Yes, you can manually delete the "Windows.old" folder using File Explorer. However, using Disk Cleanup is recommended as it ensures a more thorough and efficient cleanup process.
Q: How often should I clean up older versions?
A: It is recommended to clean up older versions after every successful major update to prevent unnecessary disk space consumption.
Tips for Effective Disk Space Management
- Regularly monitor disk space usage: Utilize tools like Disk Cleanup and Storage Sense to track disk space consumption and identify areas for improvement.
- Delete unnecessary files and folders: Regularly clean up temporary files, downloads, and unused programs to free up space.
- Consider cloud storage: Utilize cloud storage services like OneDrive or Google Drive to store large files and reduce local storage requirements.
- Optimize system settings: Adjust system settings like hibernation and sleep modes to reduce disk space usage.
- Install a disk space management tool: Consider using third-party tools like WinDirStat or TreeSize to visualize disk space usage and identify large files and folders.
Conclusion
Managing disk space after Windows 10 updates is essential for maintaining optimal system performance and ensuring sufficient storage capacity. By removing older versions of Windows, users can reclaim valuable disk space, optimize system responsiveness, and enhance overall system security. Regular cleaning and proactive disk space management strategies contribute to a smoother and more efficient Windows 10 experience. While the removal of older versions offers significant benefits, users should exercise caution and ensure proper backups before proceeding with the deletion process.

Closure
Thus, we hope this article has provided valuable insights into Managing Disk Space After Windows 10 Updates: A Comprehensive Guide. We hope you find this article informative and beneficial. See you in our next article!