A Comprehensive Guide to Custom Installing Windows 10
Related Articles: A Comprehensive Guide to Custom Installing Windows 10
Introduction
With enthusiasm, let’s navigate through the intriguing topic related to A Comprehensive Guide to Custom Installing Windows 10. Let’s weave interesting information and offer fresh perspectives to the readers.
Table of Content
A Comprehensive Guide to Custom Installing Windows 10
Custom installing Windows 10 provides a level of control and flexibility that surpasses a standard installation. This approach allows users to tailor the operating system to their specific needs, ensuring optimal performance and a streamlined user experience. This guide will delve into the intricacies of custom installing Windows 10, outlining each step with clarity and precision.
Understanding the Benefits of a Custom Installation
Before embarking on the installation process, it is crucial to understand the advantages offered by a custom installation.
- Clean Slate: A custom installation removes all existing data, applications, and settings, providing a fresh start. This eliminates potential conflicts and ensures a clean operating system environment.
- Selective Installation: Users can choose specific components and features to install, optimizing disk space and system resources. This approach ensures that only necessary components are present, improving system performance.
- Advanced Customization: Custom installations allow users to fine-tune various system settings, including boot options, driver selection, and partition configurations. This provides a high degree of control over the operating system’s behavior.
- Troubleshooting and Recovery: Custom installations facilitate troubleshooting and recovery processes. Having a clean installation simplifies the identification and resolution of issues, enabling efficient system restoration.
- Enhanced Security: Custom installations enable users to implement stricter security measures by selecting specific security features and configuring them according to their preferences. This enhances the overall security posture of the system.
Preparing for the Installation
A successful custom installation requires meticulous preparation. The following steps ensure a smooth and efficient process:
- Backup Essential Data: Prioritize backing up all critical data, including documents, photos, videos, and software licenses. This safeguards against potential data loss during the installation process.
- Gather Installation Media: Acquire a bootable USB drive or DVD containing the Windows 10 installation files. This media will be used to initiate the installation process.
- Check System Requirements: Ensure that the computer meets the minimum system requirements for Windows 10. This step prevents compatibility issues and ensures a smooth installation.
- Disable Antivirus Software: Temporarily disable any antivirus software installed on the computer. Antivirus programs can interfere with the installation process, potentially causing errors.
- Disconnect Peripherals: Disconnect all unnecessary peripherals, such as external hard drives, printers, and USB devices. This minimizes potential conflicts and ensures a stable installation environment.
Step-by-Step Installation Guide
Now, let’s delve into the step-by-step process of custom installing Windows 10:
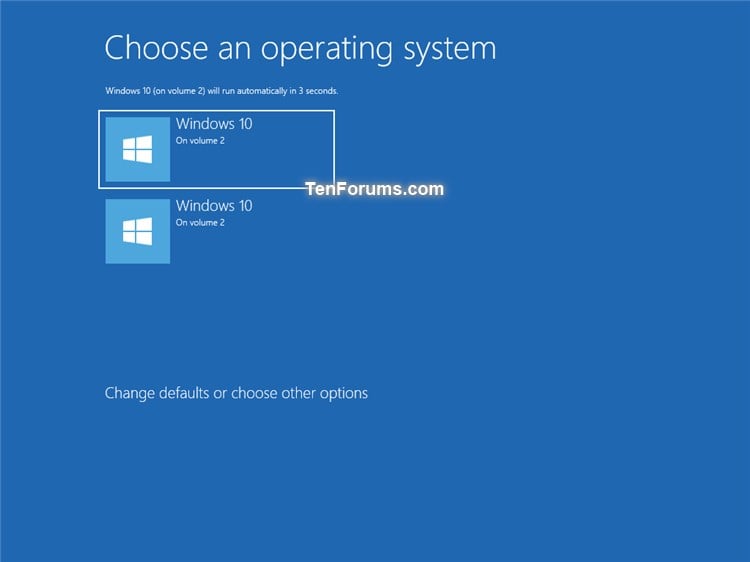
- Boot from Installation Media: Insert the bootable USB drive or DVD into the computer and restart it. Press the appropriate key during startup (usually F12 or F10) to access the boot menu and select the installation media.
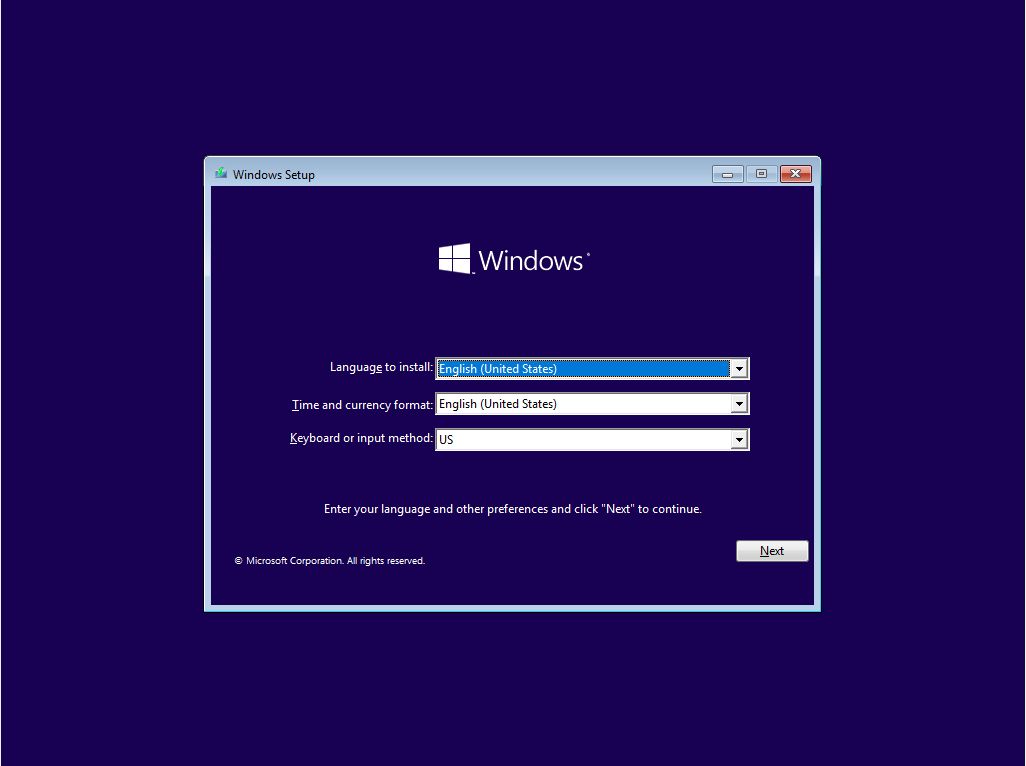
- Choose Installation Language and Keyboard Layout: Select the desired language and keyboard layout for the installation process.
- Click "Install Now": Once the installation screen appears, click the "Install Now" button to initiate the installation process.
- Accept License Terms: Carefully read and accept the Windows 10 license terms.
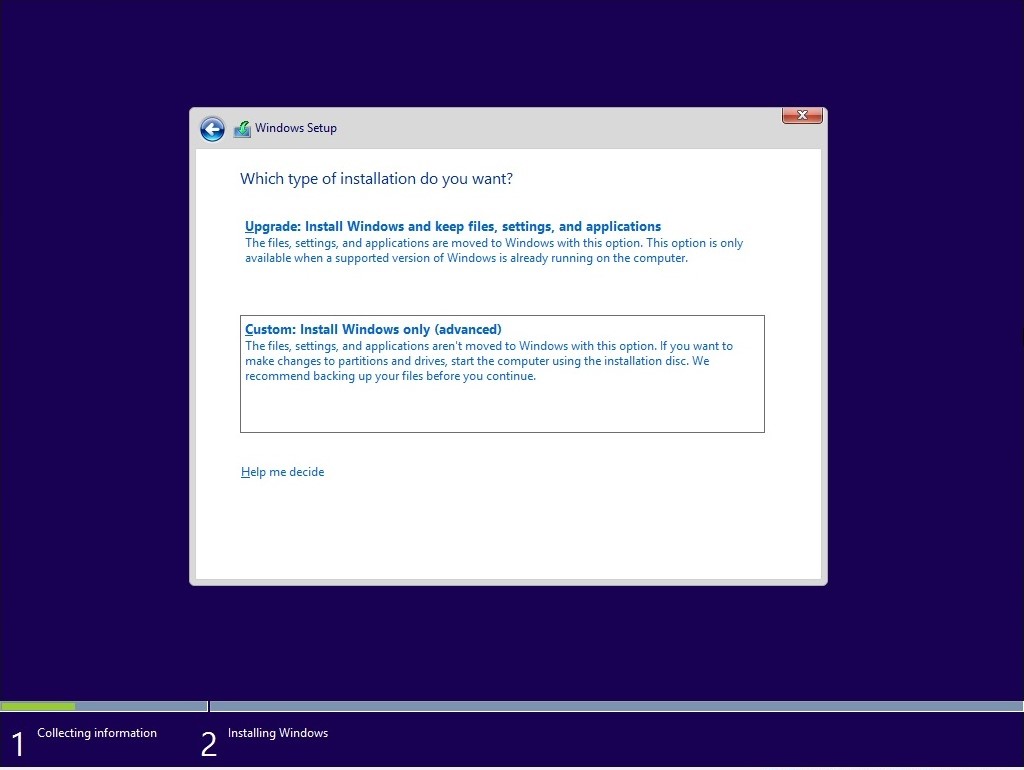
- Choose "Custom: Install Windows Only (Advanced)": Select this option to perform a custom installation. This allows users to control the partition layout and installation process.
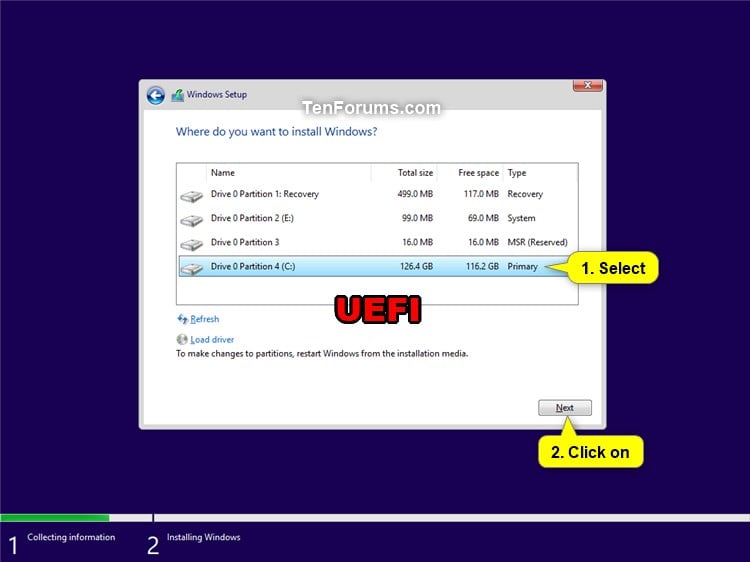
- Configure Partitions: The next screen displays the available disk space and allows users to create or modify partitions. This is a crucial step for optimizing disk space and organizing data.
- Select the Partition for Windows Installation: Choose the partition where Windows 10 will be installed. Ensure that the selected partition is formatted as NTFS.
- Start the Installation Process: Click "Next" to begin the installation process. Windows 10 will now be installed on the selected partition.
- Set Up User Account: Once the installation is complete, the system will prompt you to create a user account. Provide a username, password, and other necessary information.
- Complete Initial Setup: After creating the user account, follow the onscreen prompts to complete the initial setup process, including configuring network settings, privacy options, and other system preferences.
Post-Installation Steps
After successfully installing Windows 10, it is essential to perform several post-installation steps to ensure optimal functionality and security:
- Install Essential Drivers: Install the latest drivers for all hardware components, including graphics cards, network adapters, and other peripherals. This ensures proper functionality and eliminates potential compatibility issues.
- Update Windows: Run Windows Update to download and install the latest updates and patches. This keeps the system secure and ensures compatibility with the latest software and hardware.
- Install Antivirus Software: Install a reputable antivirus program to protect the system from malware and other threats.
- Install Necessary Software: Install essential software applications, such as web browsers, productivity tools, and media players, based on your specific needs.
- Configure System Settings: Adjust system settings, such as power options, display settings, and network settings, to optimize the user experience and enhance performance.
Troubleshooting Common Installation Issues
During the installation process, you may encounter various issues. Here are some common problems and solutions:
- Installation Error Messages: Error messages during installation often indicate a problem with the installation media, hardware incompatibility, or corrupted system files. Verify the integrity of the installation media, check for hardware compatibility, and consider using a different installation media.
- Blue Screen of Death (BSOD): The BSOD usually indicates a hardware or software conflict. Check for faulty hardware components, update drivers, and ensure the installation media is not corrupted.
- Installation Process Freezing: The installation process may freeze due to various factors, including hardware issues, insufficient disk space, or corrupted installation files. Check for hardware problems, ensure sufficient disk space, and use a different installation media.
- Unable to Boot from Installation Media: If the system cannot boot from the installation media, check the BIOS settings to ensure that the boot order is set correctly and the USB drive or DVD is recognized.
- Installation Takes an Excessively Long Time: A prolonged installation process can be caused by various factors, including hardware issues, insufficient disk space, or network connectivity problems. Check for hardware problems, ensure sufficient disk space, and optimize network connectivity.
FAQs
Q: Can I perform a custom installation on a new computer?
A: Yes, a custom installation is recommended for new computers to ensure a clean operating system environment and optimize disk space.
Q: Can I perform a custom installation on an existing computer with Windows 10 already installed?
A: Yes, but it is crucial to back up all data before proceeding. A custom installation will erase all existing data and settings.
Q: What is the difference between a custom installation and a clean installation?
A: A custom installation allows users to control the partitioning process and select specific components to install, while a clean installation erases all data and installs a fresh copy of Windows.
Q: Can I upgrade Windows 10 to a newer version using a custom installation?
A: No, a custom installation is not intended for upgrading Windows 10 to a newer version. Upgrade options are available through Windows Update or using an upgrade installation media.
Q: What are the risks associated with a custom installation?
A: A custom installation involves manipulating partitions and configuring system settings. Incorrect configuration can lead to data loss or system instability. It is crucial to proceed with caution and ensure proper backups.
Tips
- Use a Bootable USB Drive: Creating a bootable USB drive ensures portability and allows for multiple installation attempts.
- Check Hardware Compatibility: Ensure that the computer meets the minimum system requirements and all hardware components are compatible with Windows 10.
- Disable Secure Boot: If the computer has Secure Boot enabled, disable it temporarily to allow for a custom installation.
- Use a Partitioning Tool: Consider using a partitioning tool, such as Disk Management or EaseUS Partition Master, to manage partitions effectively.
- Create a System Image Backup: Create a system image backup before proceeding with the installation to facilitate system recovery in case of issues.
Conclusion
Custom installing Windows 10 offers significant advantages for users seeking control, flexibility, and a clean operating system environment. By following the steps outlined in this guide, users can successfully perform a custom installation, tailoring the operating system to their specific needs and optimizing system performance. However, it is crucial to remember that custom installations involve advanced system configurations and require a thorough understanding of the process. Always proceed with caution, ensure proper backups, and consult resources for assistance if necessary.


Closure
Thus, we hope this article has provided valuable insights into A Comprehensive Guide to Custom Installing Windows 10. We hope you find this article informative and beneficial. See you in our next article!